

How To Create Private Pages and Posts in WordPress: 3 Methods

Did you know you can have private pages in WordPress? The many faces of WordPress… can be hidden when you need to create private pages or posts, for various reasons and cases. Create a paywall to monetize your blog, sell courses and manage students with different access levels, or simply provide a password protected page for a client to access documents. WordPress can do that! Let’s see how.
What Are Private Pages in WordPress?
Firstly, what are private pages in WordPress?
These are actual pages, posts, or post types that are not publicly visible on your site. Instead, they are restricted to specific users, roles, or members, depending on the level of access you set. As to the ways to make them private, or hidden, there are many based on your exact goals.
Private pages can be paid (protected by a paywall) or free (normally unlocked with a password).
When Do You Need to Create Private Pages?
In what cases does it make sense to use private pages and private posts on your site?
Such pages are often used in the following cases:
- Membership Content (Free or Paid) – For sites offering premium content to subscribers.
- News Websites – Make selected pages private to create a paywall and monetize your content.
- Client-Specific Pages – When you need to share confidential reports or projects.
- Internal Docs – Share resources that only your staff members can see.
- Event or Course Materials – Educational platforms often provide special access to enrolled students or registered participants.
- Pre-Launch or Development Pages – Pages under construction, getting ready for the future release.
How to Create Private Pages & Posts in WordPress? Three Methods
Depending on your needs, whether it’s a password-protected area, a distant learning website, or a membership platform, you’ll be using different solutions. These solutions will help you create a private web page very easily.
As a rule, specific WordPress plugins that you will install to manage your content will offer different ways to create private pages and posts.
Method 1. Use Default WordPress Visibility Settings
WordPress provides basic inbuilt visibility settings for a private post WordPress. Let us see how you can create protected content in WordPress defined by specific user roles.
1. In the WordPress block editor (Gutenberg), while editing a page/post, go to the Page settings from the right and find ‘Status’.
2. Click on the ‘Status’ to open the pop-up with the ‘Status & Visibility’ settings. Among all the options, here are those that will help you make the post or page private:
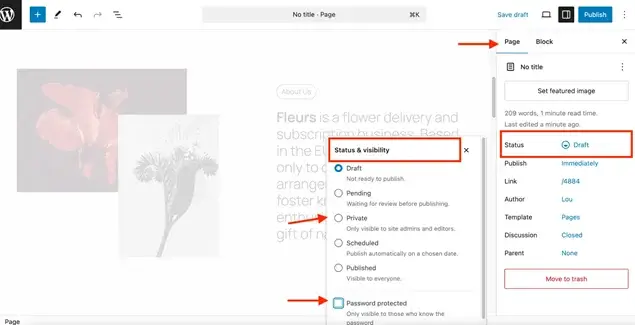
- Private – Only visible to logged-in admins and editors.
- Password-Protected – Users must enter a password to view the page.
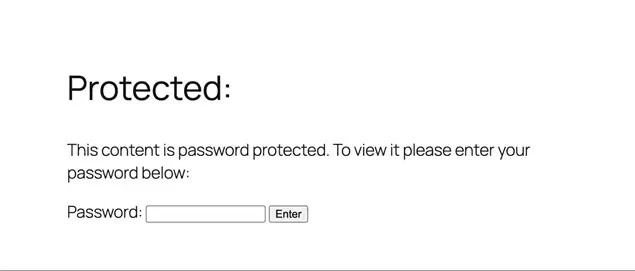
3. If you choose a ‘password-protected’ option, you are only asked to enter a secure password and save the post/page.
Thus, users will be able to use a password to log in to your WordPress private content after publishing.
This method is best for simple cases and requires you to manually send the password to anyone logging in. For example, it’s a great option for photographers who want to share private sessions or let clients download their photos.
Moreover, if you are on Elementor or Beaver, you can also restrict content using extra user role manager/subscription management plugins to easily control access to content via your favorite builders.
Why do we need Method 2? Well, if you create a private blog post in WordPress by setting the visibility to ‘Private’, only the administrators and editors will be able to view it. To allow other user roles, you will need to use a User Role Plugin and define it.
Method 2. Use Default WordPress User Roles and Role Editors
Once again, this method relies on the default WordPress user role system. But to extend its flexibility as per our requirements, extra plugins to manage access to private pages based on user roles will be required.
Simply said, this method provides an easy way to restrict content for logged-in users.
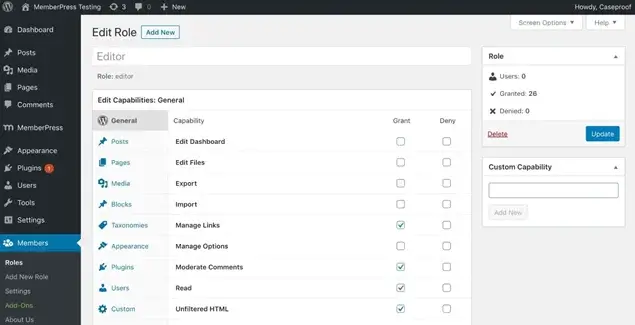
To use this method, install a membership or user role plugin – most used ones are free tools like Members and User Role Editor. They will help you:
- Restrict pages based on WordPress user roles (Subscriber, Contributor, etc.).
- Create custom user roles with specific access rights.
- Assign multiple user roles to the same user simultaneously.
This option to create private pages in WordPress is most likely needed for multi-person businesses with different roles, for example, a marketing team that needs internal documentation, a hotel with staff and admin access controls, or an online course platform where instructors and students get different levels of access.
Now, what if you want to create paywalled content or a private WordPress blog that is accessible to specific users? At this point, our third method will be a perfectly suitable and most flexible one for WordPress private page for subscribers.
Method 3. Use Membership Plugins to Build a Members-Only Area
With membership plugins for WordPress like ARMember, you can build a multi-user website, providing clients with different content restriction levels and offering free and premium membership tires.
What tools do you have to create private pages with ARMember?
ARMember specifically serves you in building member-only content with multiple levels of control.
This plugin makes it a breeze to…
- Set up role-based private pages and content restriction.
- Limit access to specific posts, pages, or categories based on varied membership levels.
- Set up content dripping for step-by-step content release.
- Build password-protected and specific member-only pages.
- Charge one-time payments or offer recurring subscriptions/trial memberships to access content.
- Customize user sign-up pages with enforced email verification.
- Customize content individually per user.
How to use ARMember to enable Content Protection
1. Install and Activate ARMember. You’ll be presented with an account setup wizard, which you can use or skip. Let’s go with a wizard, it’s easier!
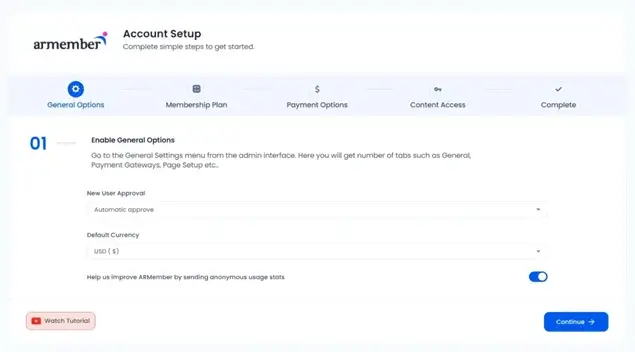
2. Choose how new members register:
- Automatically
- Manually
- By email
3. Set the currency for payments if you plan to charge for the content access or keep it as a Free Plan.
4. Choose between free, one-time or subscription access.
5. Add a plan name and cost.
6. Set up payment methods using tools like PayPal, Stripe, Authorize.net, and many more.
7. Set rules to restrict content access for paid members.
8. Configure login and registration rules.
To customize content access rules and create private pages in WordPress with ARMember, navigate to Content Access Rules. In this menu, you’ll see all your created plans and can customize content access, actually, get full control over who sees what on your site.
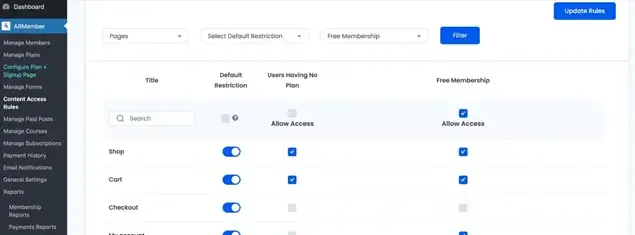
These are basic settings related to restricting content. To fully personalize and improve your membership site creation, you will have many tools to automate emails to members, enable digital downloads, customize signup pages, etc.
Choose a membership plugin when you need to build a full-scale content-centered community with different levels of content access. This is the top method to create private pages in WordPress and provide a defined access.
Conclusion: Is It Difficult to Build Private Pages in WordPress?
Need to hide a normal blog page or protect documents on your site with a password? No problem, you don’t need any special plugins for that. Use the default ‘visibility’ settings of WordPress.
Looking for more complex tools? If your business needs to restrict access based on so-called user roles, say, giving staff access to drafts but keep them hidden from contributors, you can use the user role system. Want even more flexibility? Consider popular plugins like User Role Editor or Members, which allows you to adapt the roles more precisely to your business and implement better multi-user permissions. Simply set pages to Private, assign user roles, or use a role editor to fine-tune access.
For businesses working with membership sites or internal teams, where a complex multi-user approach is required, use membership plugins to create different levels of access for your content, accessible only to authorized users.
FAQs
1. What are private pages in WordPress?
Just as the name suggests, private posts or pages in WordPress are visible to people with specific permissions only like administrators and editors. This helps backend management of the website or internal team discussions at times.
2. What is the difference between password protected and private pages in WordPress?
A password protected page in WordPress is visible to any visitor or viewer who has the correct password set by the site owner. On the other hand, private pages are accessible to only administrators and editors. Thus, restricted by user roles instead of a password.
3. Are Private WordPress pages indexed?
The sole purpose of private pages is to have restricted content access. Thus, Google does not index these pages or show them to visitors upon search. WordPress is super supportive and avoids adding private pages to XML sitemap for enhanced security.
4. What does a Private Page do?
A private page simply restricts the access to a specific post or page to selected user roles. It is completely hidden from other visitors, website menus, or even Google search results. By default, WordPress allows administrators and editors to have access to private pages. To extend access to other user roles, you will have to use a WordPress user role plugin instead.
5. Can multiple people see private pages in WordPress?
Yes, multiple people can see private pages in WordPress if they have the appropriate user role. You can set multiple user permissions with a User Role Plugin or by adding custom codes based on your requirement.
Related content:


Leave a Reply
You must be logged in to post a comment.