

How to Create an Elementor Membership Site with ARMember?


Creating an Elementor membership site is not that difficult if you have the right set of tools on hand. Right now, you can create a WordPress membership site that generates you money and looks awesome. Looking for a digestible tutorial to do that with the power of the Elementor page builder and dedicated membership plugin? Let’s dive into what you need to get started.
But before we dive into the step-by-step guide to creating a membership website with Elementor, let’s take a look at its benefits.
Why Create an Elementor Membership Site?
Elementor is a beloved and one of the most popular WordPress page builders. Why? Because its drag-and-drop feature allows exclusive design control without any coding! With a dedicated membership plugin, you get a high level of customization and provide a unique user experience.
To help you decide, here’s why building a membership site using the Elementor plugin is the right decision.
- Simplified Drag and Drop: The visual editor of Elementor lets you design custom pages for members, registration, login, pricing plans, and more. You just need to drag varied elements into place.
- Customizable Layouts: Elementor page builder allows you to fine-tune each section of your site layout. Thus, you can easily match your membership site with the brand colors and image.
- Integrate Dynamic Content: Show or hide various containers or sections of your site with Elementor. Thus, you can offer content based on various membership levels.
- Readymade Templates: Elementor’s predesigned templates help you quickly build and set up your membership business site.
Now, going ahead, what do you need to do to build an Elementor-based membership site? The following sections will help you with that.
Firstly, Start with a WordPress Theme
There are plenty of Elementor-powered themes for different types of sites. While you can use any theme and then edit it with Elementor, we highly recommend selecting a WordPress theme that’s built with Elementor compatibility and tailored to membership-based websites from the outset.
Such membership-focused themes are more likely to include pre-designed templates for login and registration pages, member dashboards, pricing tables, and content access controls. Sometimes, those will be powered by a specific plugin for membership. Choosing a theme that is created with both Elementor and your site’s purpose in mind can greatly speed up the customization process and help you better build a brand identity.
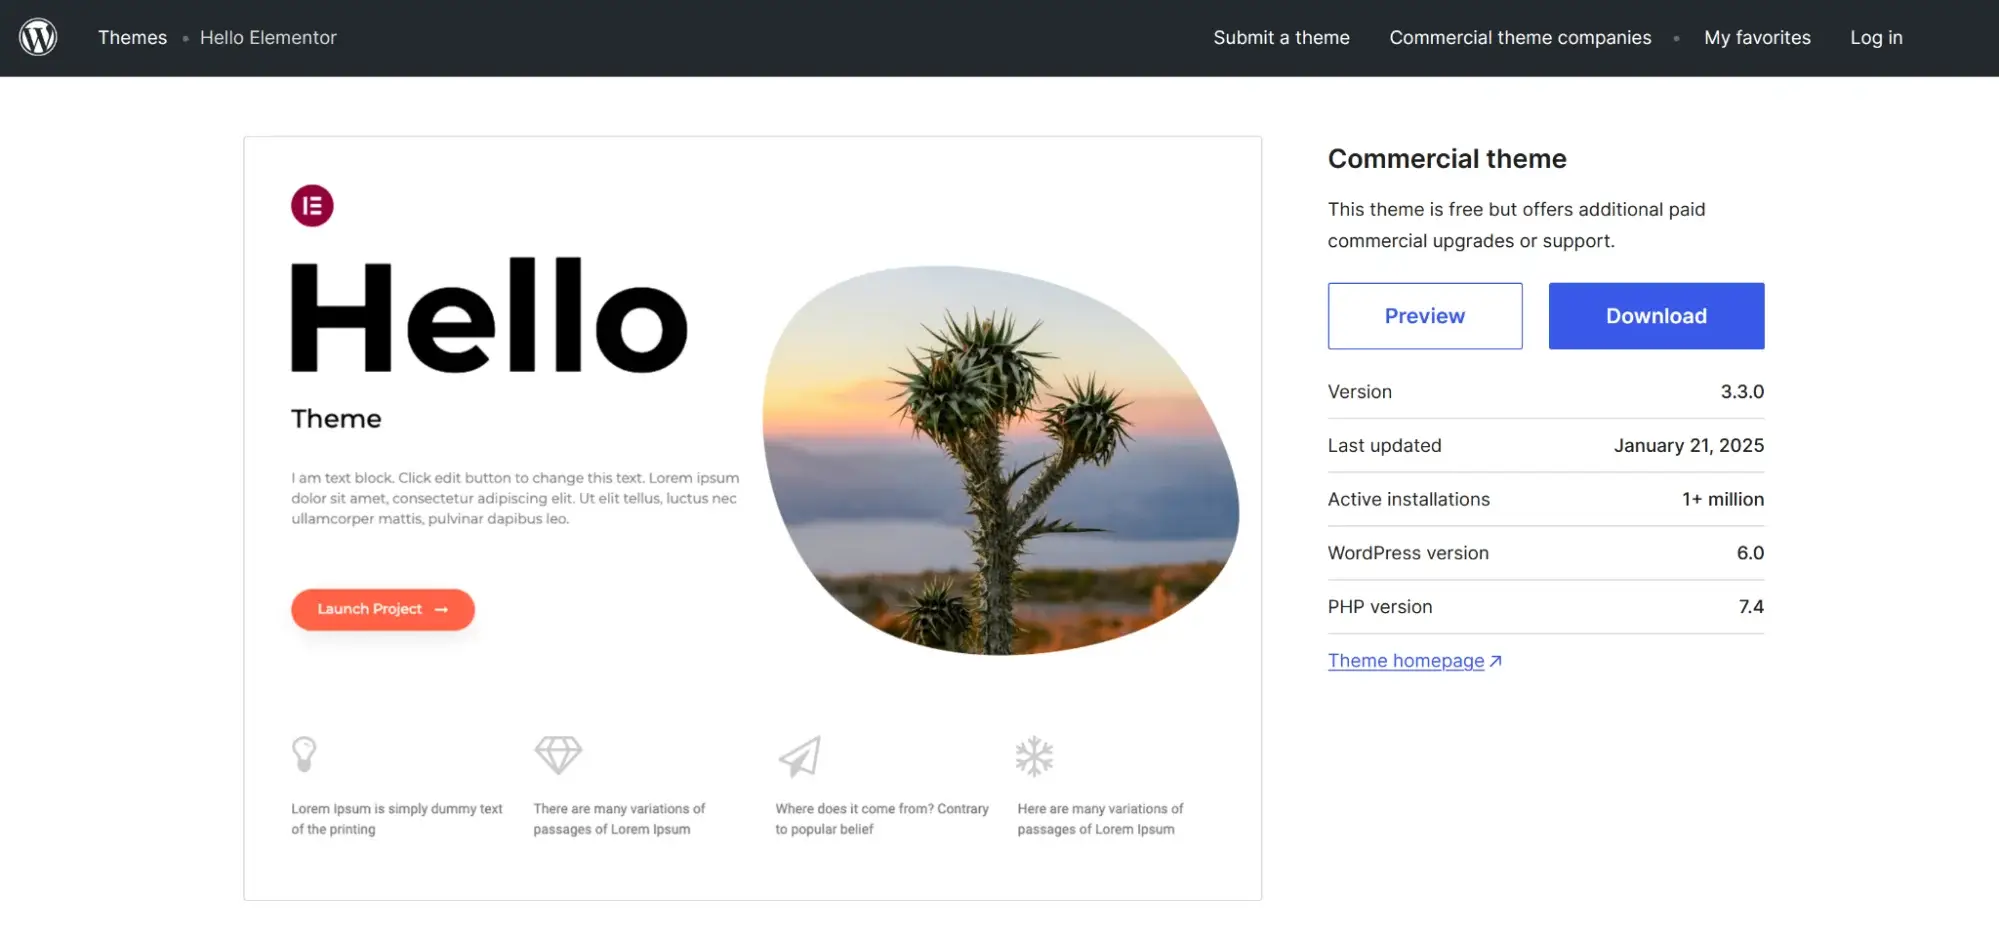
Since we are going to use the ARMember WordPress plugin for membership subscription, registration, and user area features, a plain Elementor theme is fine for us. The official Hello Elementor theme serves this purpose well and doesn’t cost a dime.
Free plugins that boost Elementor’s capabilities are also welcome to design even better pages for your Elementor membership site!
Install & Customize ARMember to Sell Paid Content & Subscriptions
Before creating important content rules, enabling payment gateways, and creating user signup pages, let’s quickly assess the tools that we need: ARMember and Elementor.
What is ARMember?
ARMember is an agile and affordable membership site creation plugin for WordPress sites. It assists you in everything from creating paid content and restricting it according to your rules to delivering it to members promptly.

Beautiful member profiles, dozens of payment gateways, and smart add-ons are packaged with premium plans.
ARMember is a helpful solution to build:
- Member areas with private access.
- Exclusive content access.
- Subscription portals for selling membership tiers and packages.
The plugin naturally creates multiple pages for member-content interactions. But how do you build an Elementor membership site with it? The purpose of Elementor in this case is to add all those pages faster and easier in the page builder interface using Elementor widgets instead of shortcodes; and also – customize those pages and your content pages with the powerful tools of Elementor. ARMember is fully optimized for these processes.
Start with the General Settings
When you first install the plugin, a setup wizard will guide you through the main steps easily.
Let’s take a look at the key features you can use and customize. You need to go through these features before you can add your membership content to the Elementor site.
- Activate your ARMember license to receive updates, support, and access to built-in add-ons. If you need more help with the license activation or add-on usage, visit our docs.
- Go through the general settings tab to pick the preferences for your site setup (pick a currency, select a user approval mode, or even restrict a website without login).
- Set up your first monetization settings: set up free or paid membership plans with names and prices. For example, plan validity, payment options, and content restrictions per plan.
- Go through the payment setup and choose at least one payment gateway (PayPal, Stripe, or Bank Transfer) to accept payments for paid plans. Overall, the plugin supports 21+ various payment gateways.
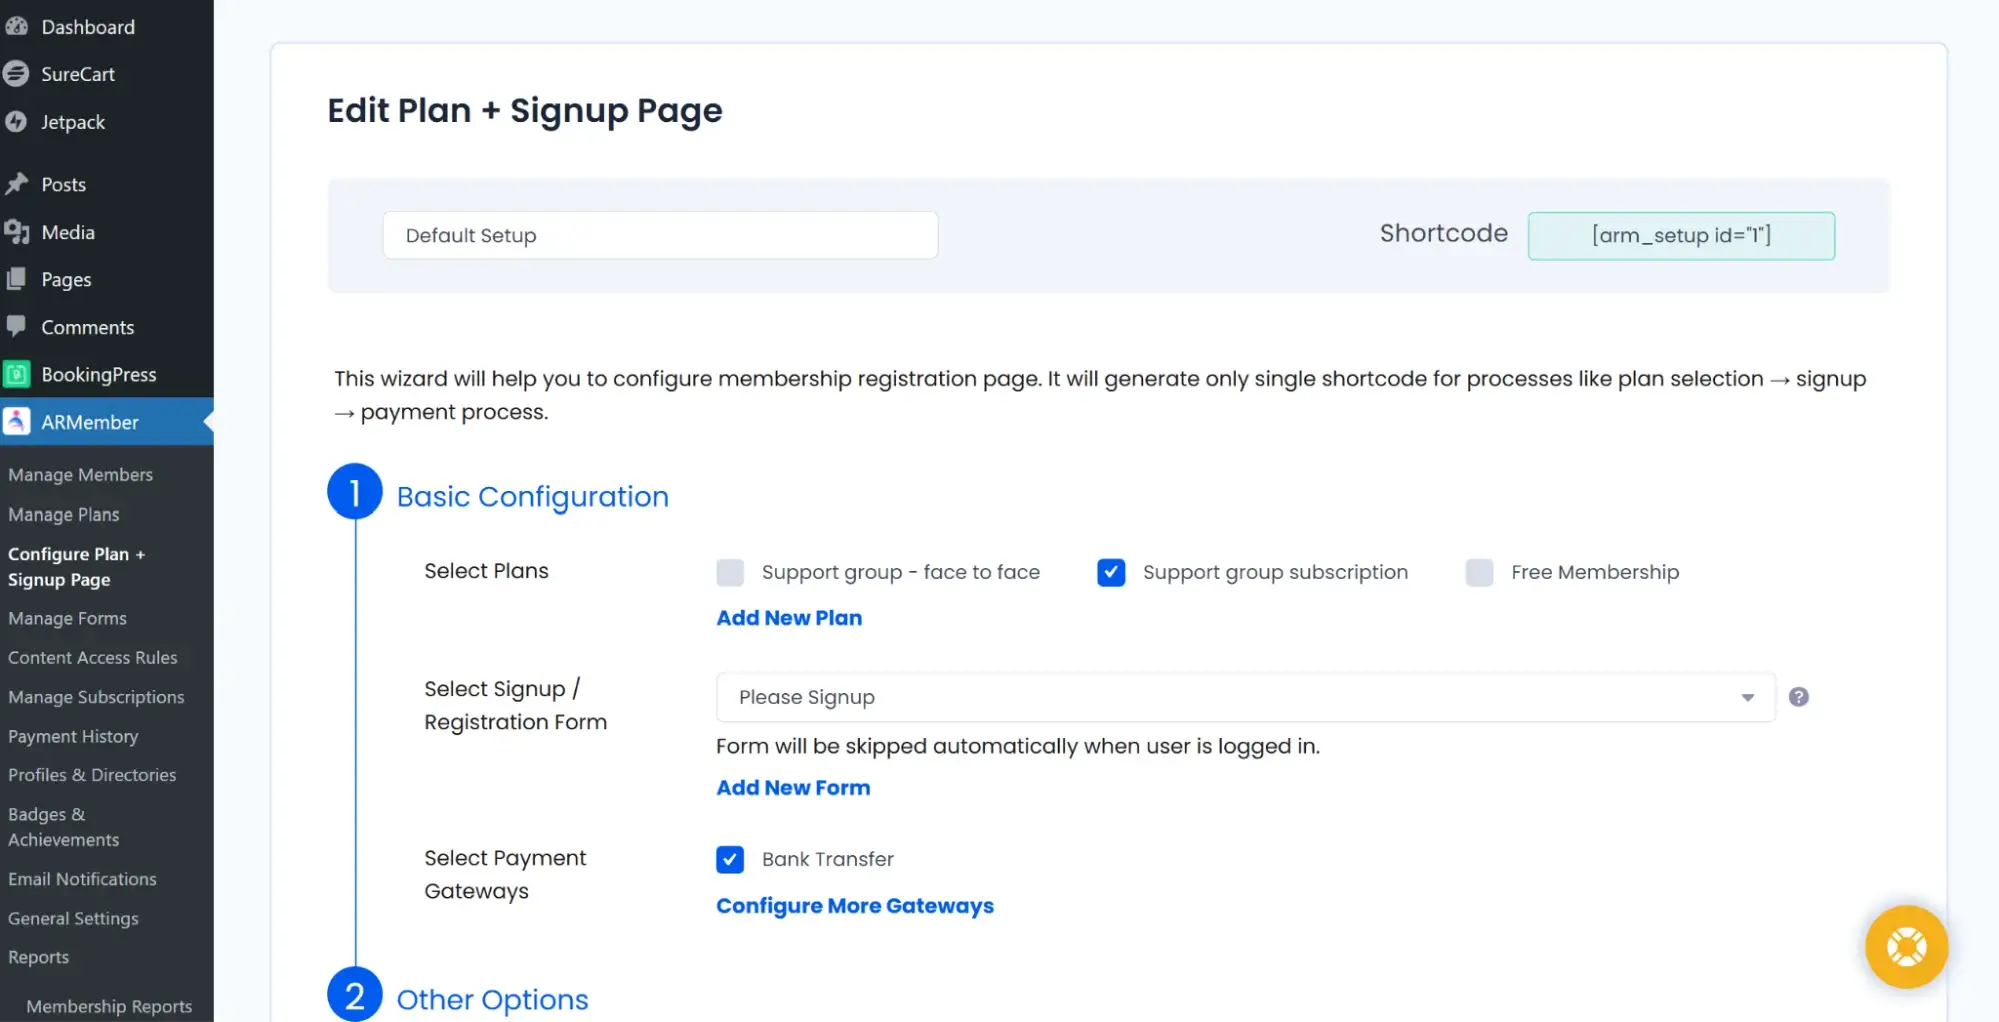
- Customize the signup process with plan selection, signup forms, and payment integration.
- Apply content protection by plan for posts, pages, categories, menus, and custom content types.
Once the basic setup of your membership business site is ready, you can start adding more features, customizing plans, and forms for the front end.
Once you are satisfied with your settings, it’s time to replicate them on the live site.
Use ARMember Widgets in Elementor
Since ARMember fully integrates with Elementor, this allows you to drag and drop membership forms and features like regular Elementor widgets without a need to manually build your shortcodes.
Each widget for your Elementor membership site helps you build essential pages for your membership site, for example, to handle registration, login, profile updates, subscriptions, and content protection.
Here is a short step-by-step guide to adding your ARMember widgets to your Elementor site:
1. Open the needed page in Elementor (click ‘Edit with Elementor’).
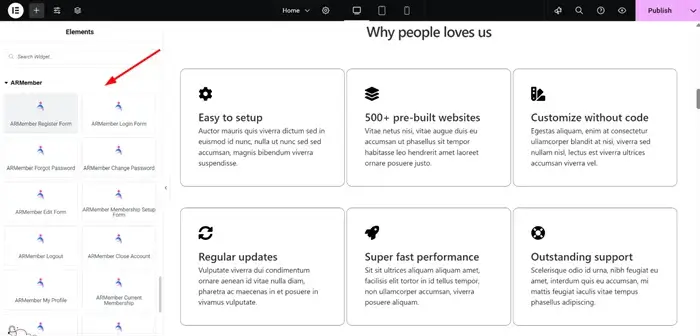
2. In the Elementor sidebar widgets, scroll down to find the ARMember. Here, you’ll see all available ARMember widgets. Don’t see the widgets? Make sure you are using the latest version of Elementor and that you upgraded ARMember to the premium version.
3. Pick the widget you need and drag it into any section of the page. You can do that in fresh or custom-created layouts.
4. After adding your desired ARMember widgets, click Update/Publish.
For example, if you are looking to create a member registration page, this is what you would normally need to do:
1. Open a page called Register or similar that you want to use for client registration.
2. Drag in the ARMember Register Form widget.
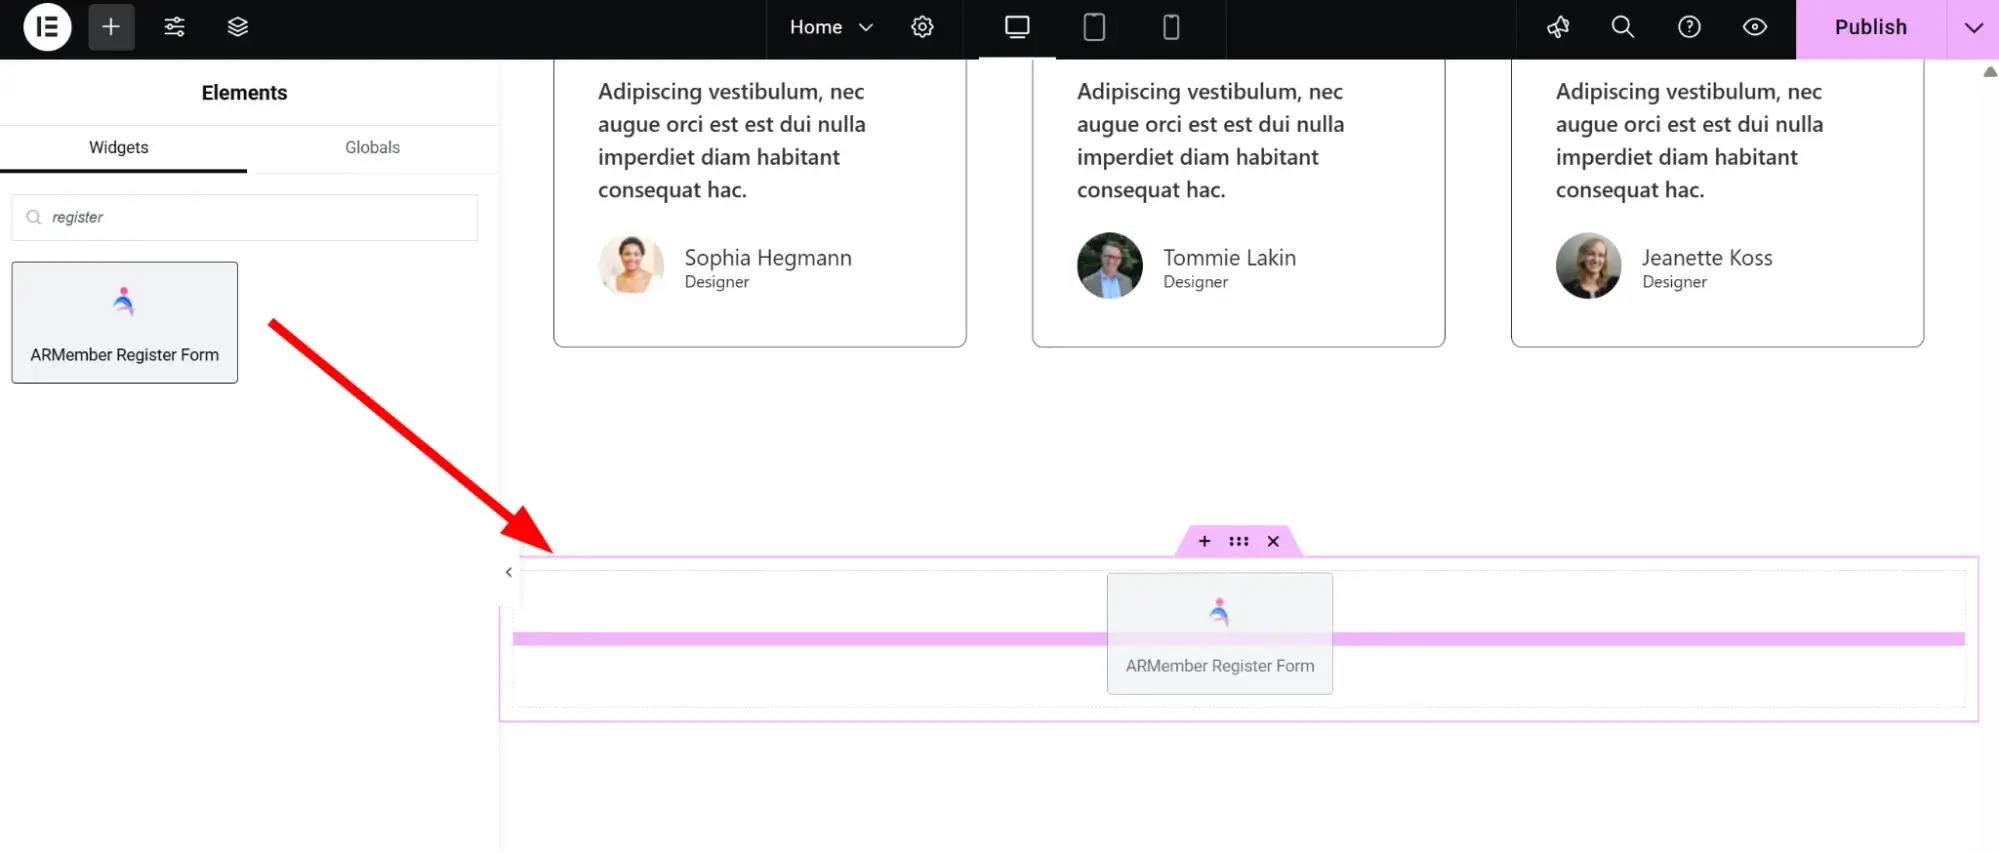
3. Select your saved registration form from the dropdown.

4. Customize styling if needed.
5. Click Publish.
Overall, ARMember comes with 20+ widgets for Elementor. Some of these pages with these widgets/shortcodes can be created if you start with the plugin using a wizard.
Here are some of the Elementor widget examples to explain the most common cases of using the plugin’s widgets for the page builder.
ARMember Elementor Widget Examples
| Page Name | ARMember Widget | Purpose |
|---|---|---|
| Login | ARMember Login Form | Allows members to log in to their account. |
| Forgot Password | ARMember Forgot Password | Lets users reset their password. |
| Change Password | ARMember Change Password | Adds a password change form for logged-in users. |
| Edit Profile | ARMember Edit Form | Members can update their profile info. |
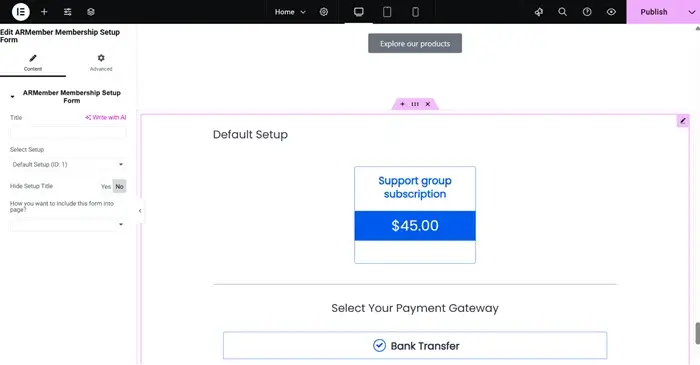
| Membership Setup | ARMember Membership Setup Form | Display your plan selection and signup flow. |
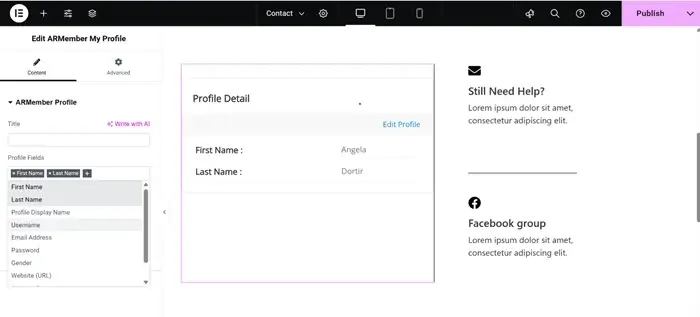
| My Account | ARMember My Profile | Shows user’s membership info and profile details. |
| Logout | ARMember Logout | Simple logout button. |
| Payment History | ARMember Payment Transactions | Members can view their past payments. |
| Restricted Content | ARMember Content Restriction | Select the plans to which the content sections are available. |
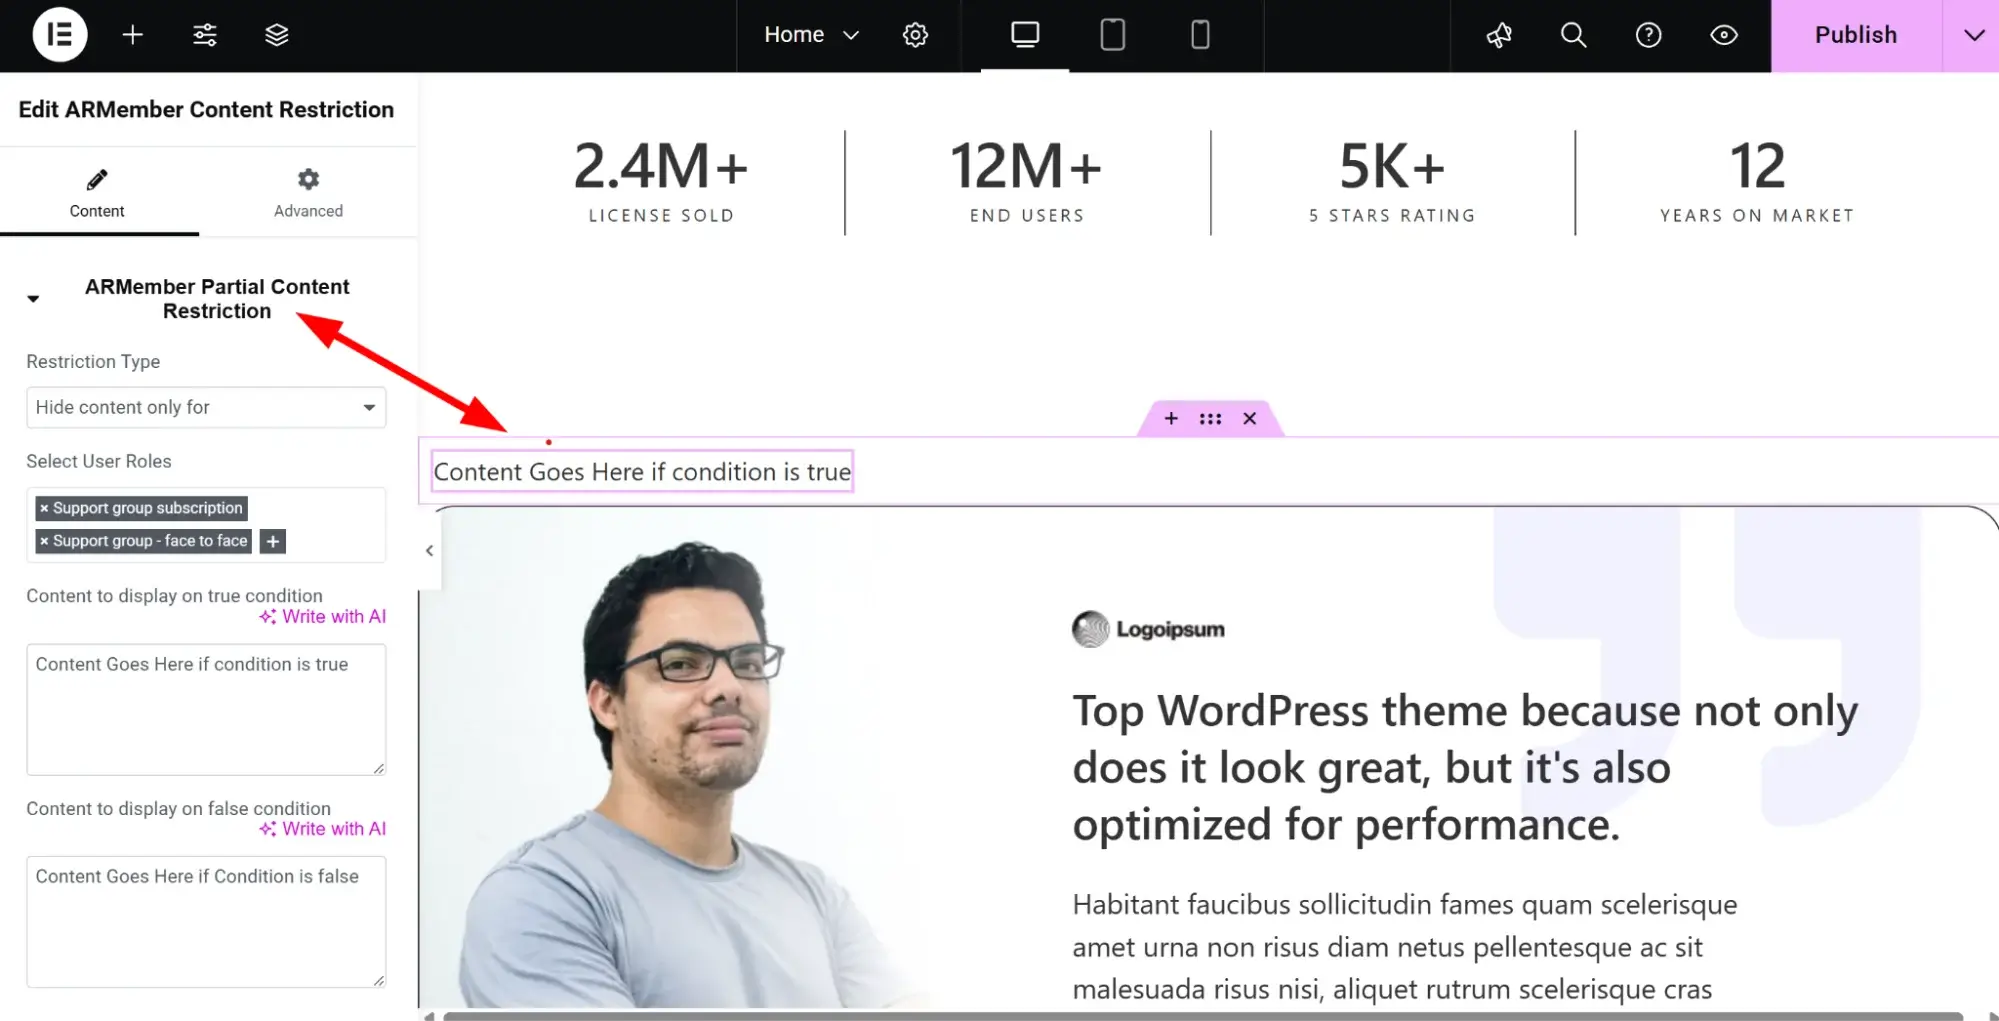
Let’s view some more examples you can use on your Elementor site with ARMember. Each widget will have a set of crucial settings you can customize in the visual mode in the Elementor interface. For instance:
1. Partially restrict content to only specific user roles.
2. Create login pages for members (frontend example).

3. Membership setup page for customers.
4. Customize a member’s profile info.
Content Restriction with Elementor
Moreover, you can also show or hide Elementor sections based on a user’s membership plan. For example, you want to display premium content only to users with a ‘Pro’ (any paid) membership plan.
Using ARMember settings in the Advanced tab, you can restrict content on the Container level as well as the individual widget level.
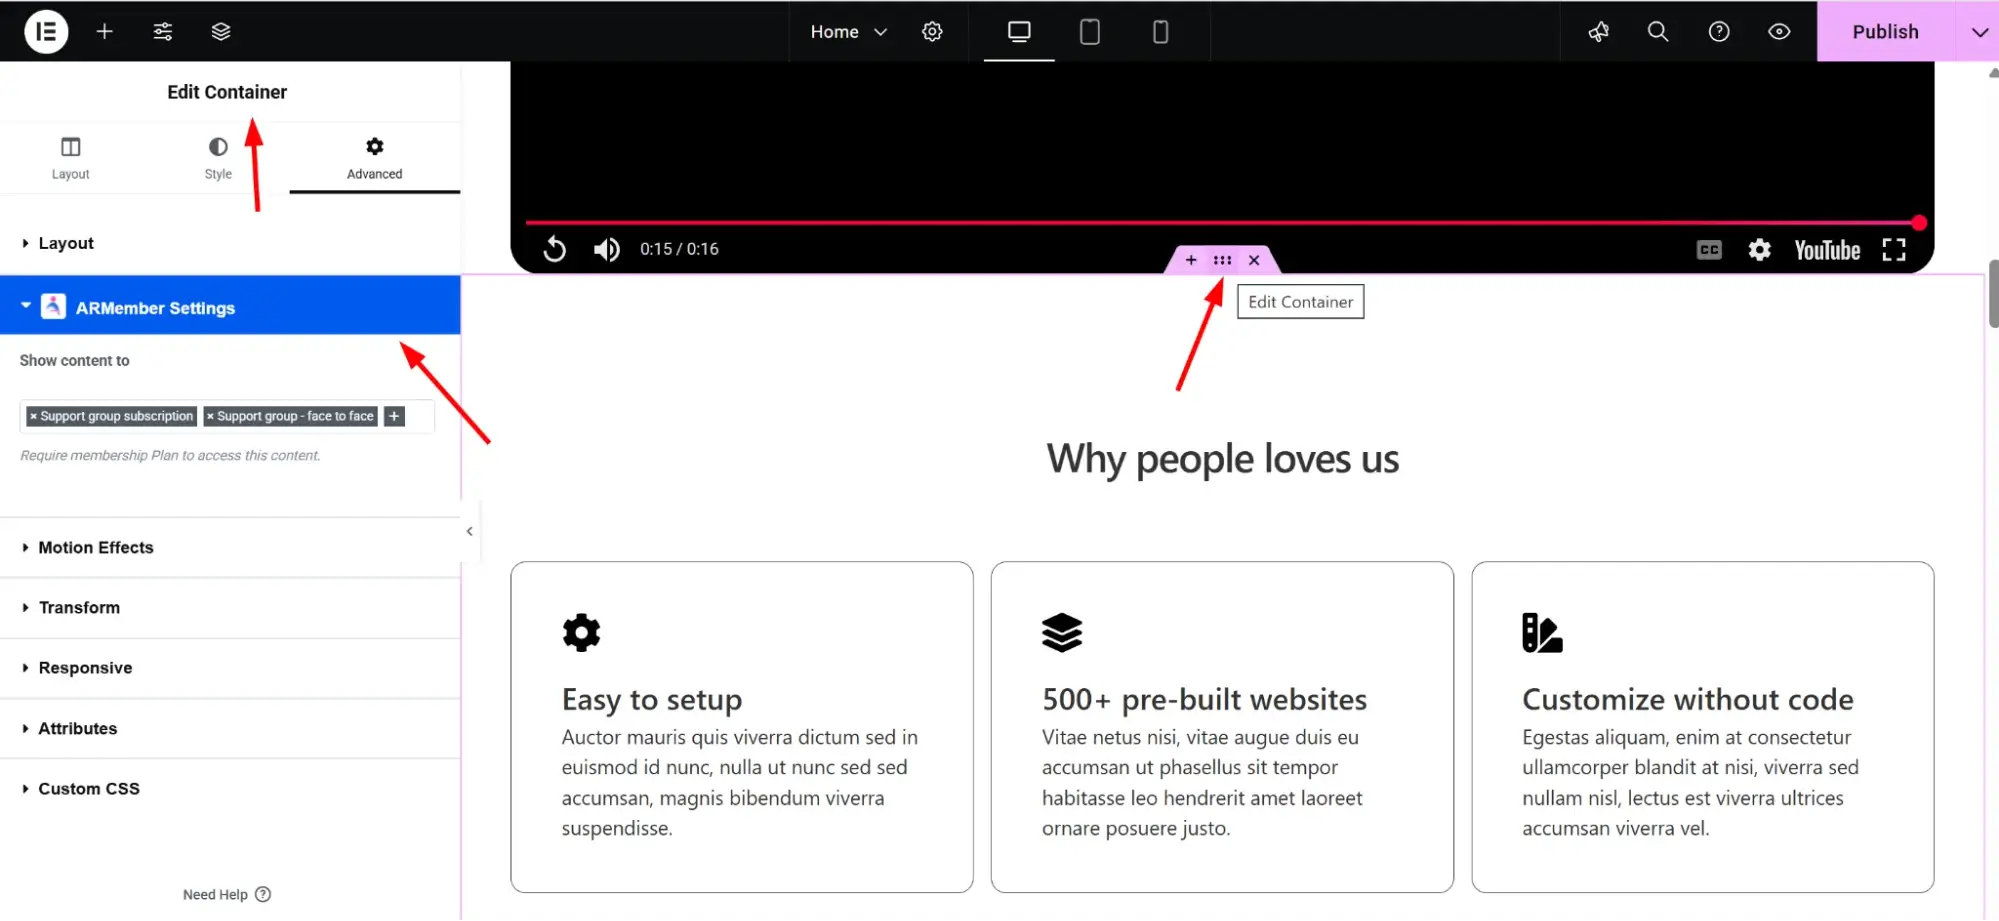
Here is how you restrict a section on your membership website to specific plans:
1. Right-click on any Elementor section > Edit Section/Widget.
2. Go to the ARMember Restrictions tab.
3. Choose which plans can view this section (in the ‘Advanced’ tab of Elementor).
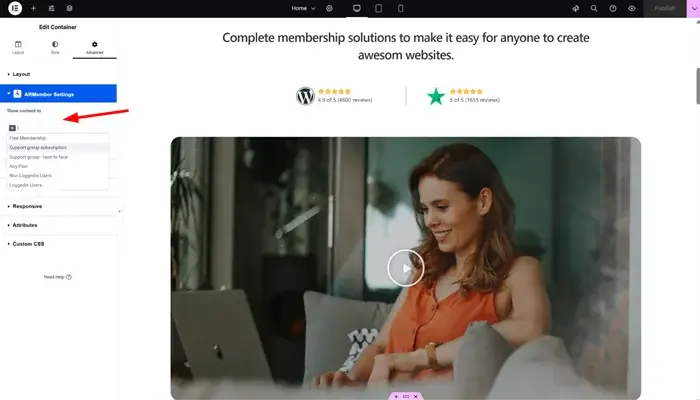
4. Save the page.
Once you create one layout (e.g., a styled login page), save it as a template in your Elementor site. You can reuse and tweak it on other pages.
It also makes sense to visit the page as a regular user or test with different membership levels to ensure restrictions and forms are working correctly.
Conclusion: Create an Elementor Membership Site with ARMember
To sum up, how do you create a membership site with Elementor and ARMember?
ARMember, as a robust membership WordPress plugin, allows you to easily build a membership site with Elementor thanks to numerous user-friendly widgets crafted specifically to integrate both plugins.
Use ARMember to customize your preferences for content restrictions, payments, user management, etc., and then easily control how this content appears and functions on your site using Elementor widgets and customization panels.
Create an Elementor membership site and start selling subscriptions, building communities, and enjoying your website editing tasks!
Looking for help? Contact us.
FAQs
1. What is the best way to create a membership site using Elementor?
You can easily create a dedicated membership site using Elementor by combining it with a WordPress membership plugin like ARMember. Elementor’s blocks plus ARMember’s block restriction compatibility help you run a robust membership site.
2. Do I need coding skills to create a membership site with Elementor?
Elementor’s intuitive drag-and-drop interface helps you build fully functional pages visually. ARMember helps you add all the membership functionalities via widgets for an easy, quick setup.
3. What are the essential pages for an Elementor membership site?
Essential pages for a membership site using Elementor include,
- Member Registration
- Login and Logout
- Profile Update
- Membership Plan Selection
- Payment History
- Restricted Content Access
Related articles:


Leave a Reply
You must be logged in to post a comment.