

Ultimate Guide to Building a WordPress Site With Premium Content

Want to sell content from your WordPress site? Dream of your own premium educational platform, wellness community, or content hub?
In this guide, we explore the ways to build a WordPress site with premium content of any type using a membership plugin.
Most importantly, you’ll learn from the people who invent and use such software (us)!
Such plugins solve tasks of building a community and selling member-restricted content, all within your WordPress site, with almost no tech skills or previous knowledge.
Our guide will be suitable for anyone already having a site or just creating a new one – and will explain the general workflow of building a community and selling premium content with WordPress.
You’ll see that it’s not that difficult!
Part 1. Structure Your Content with Access in Mind
We hope you’ve already installed WordPress and picked a design for your WordPress site with premium content.
Don’t know which theme to choose? Check out the always best WordPress themes in our editor-curated collection.
Also, we are sure you have already created your compelling content that you want to sell or probably even give for free as a free trial.
Your task is to first organize it on your WordPress site into posts, pages, and other so-called custom post types (which might appear when you use extra dedicated plugins). This is basically adding content to your site.
This allows you to organize your content from the beginning, clearly defining what’s public and what requires membership.
So, hold off publishing any content you want to keep for paying members until you have a membership plugin installed. This plugin will act like a paywall, protecting your exclusive content.
For example, with the ARMember plugin that we’ll be using to show you the steps for building a WordPress site with premium content, you can then use various membership features for those pages, including:
- content dripping (releasing content gradually).
- creating membership levels with varying access and applying the level of access only to chosen pages.
- creating free trials.
- adding downloadable files to content.
Part 2. Install a Membership Plugin
The ARMember membership plugin we’ll be using in our tutorial is made to handle payments, content access control, and member management.
More importantly, no matter the design you have, you’ll be able to create a powerful membership site because the membership plugin is just an intermediary between your content and customers.
Thanks to the built-in membership site setup wizard, we guarantee the process will be fantastically smooth – just follow the guide step by step.
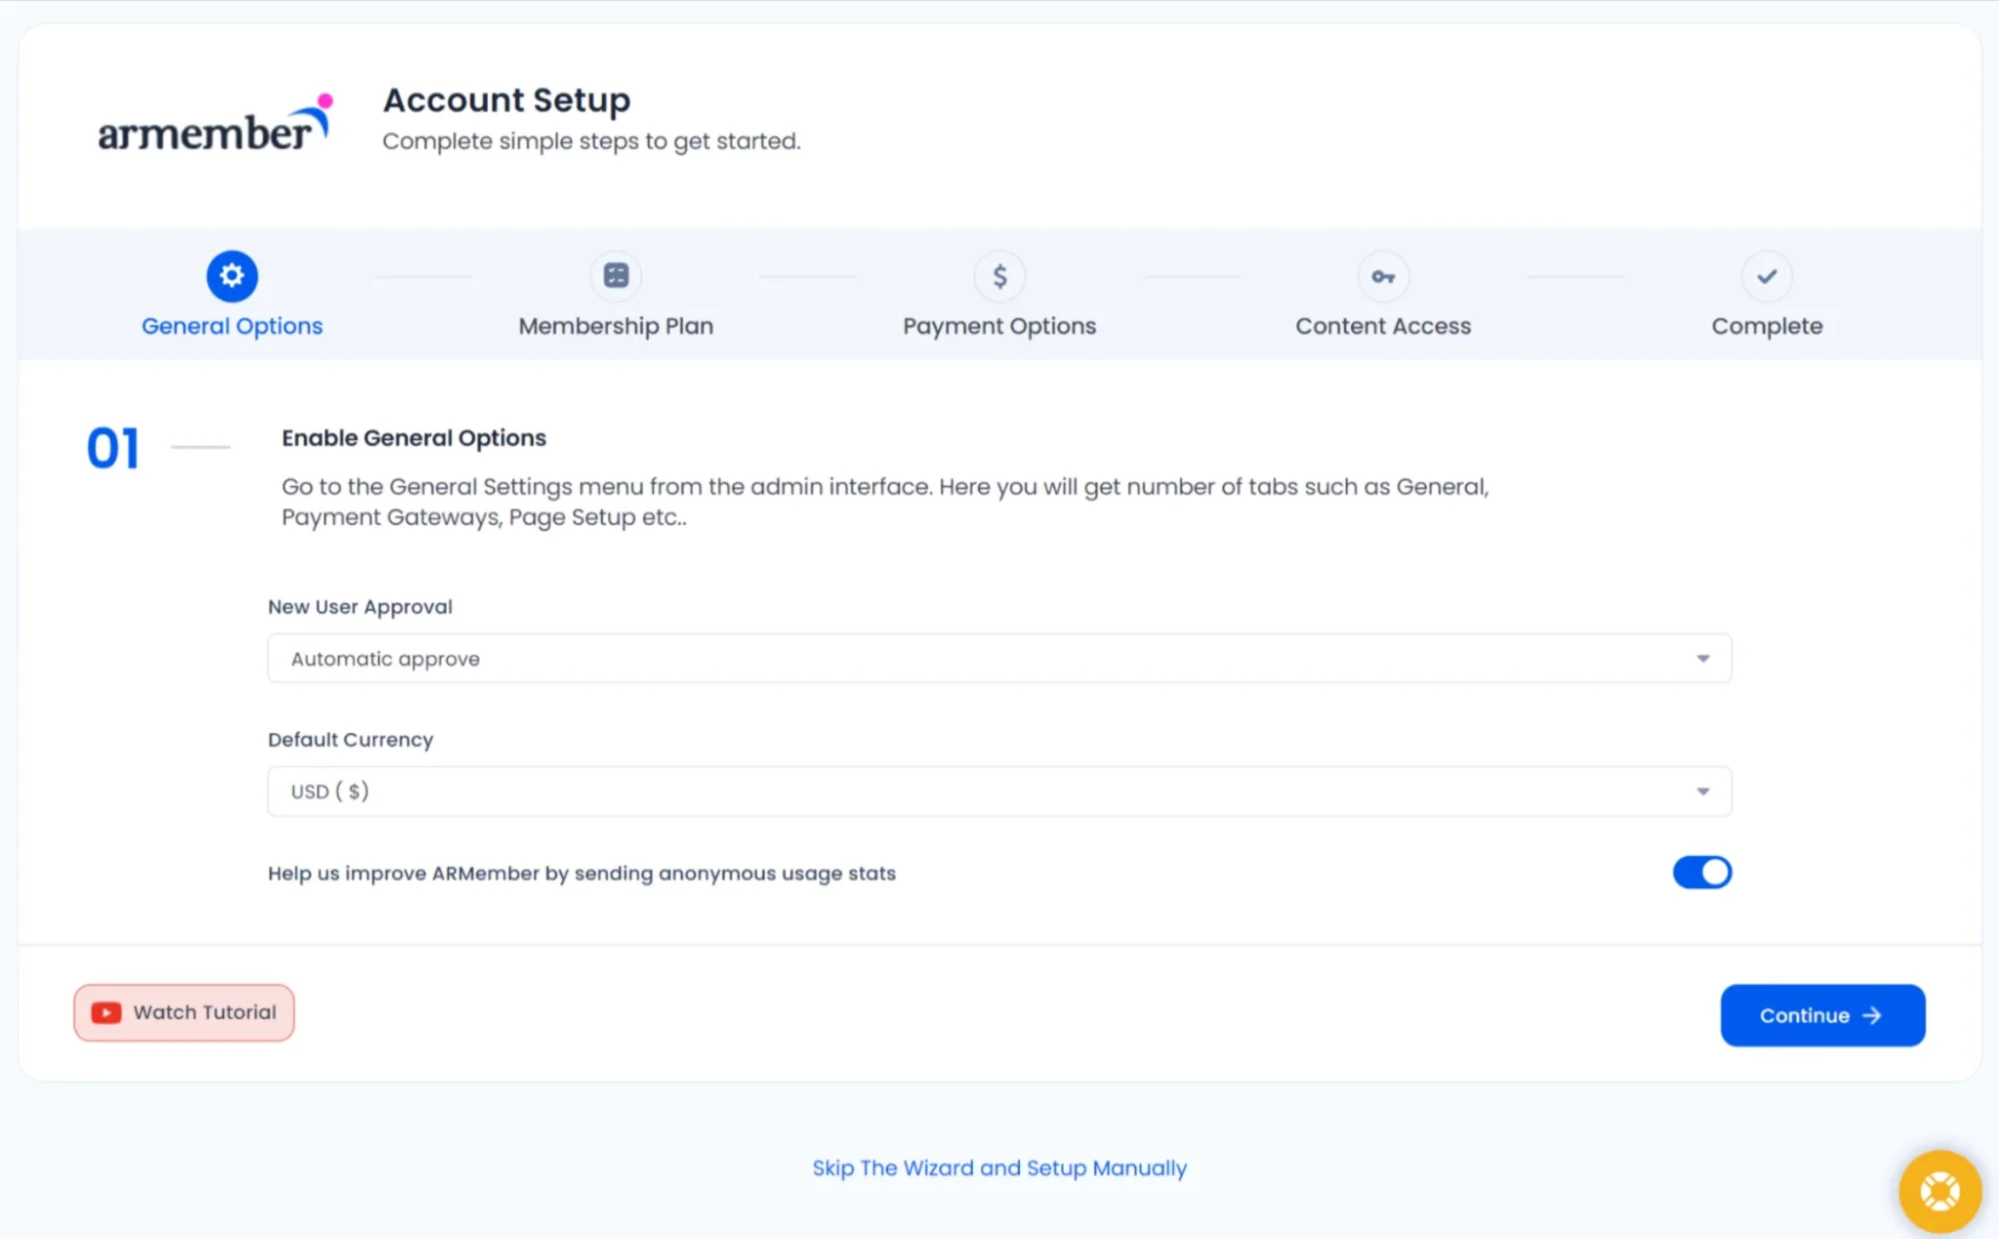
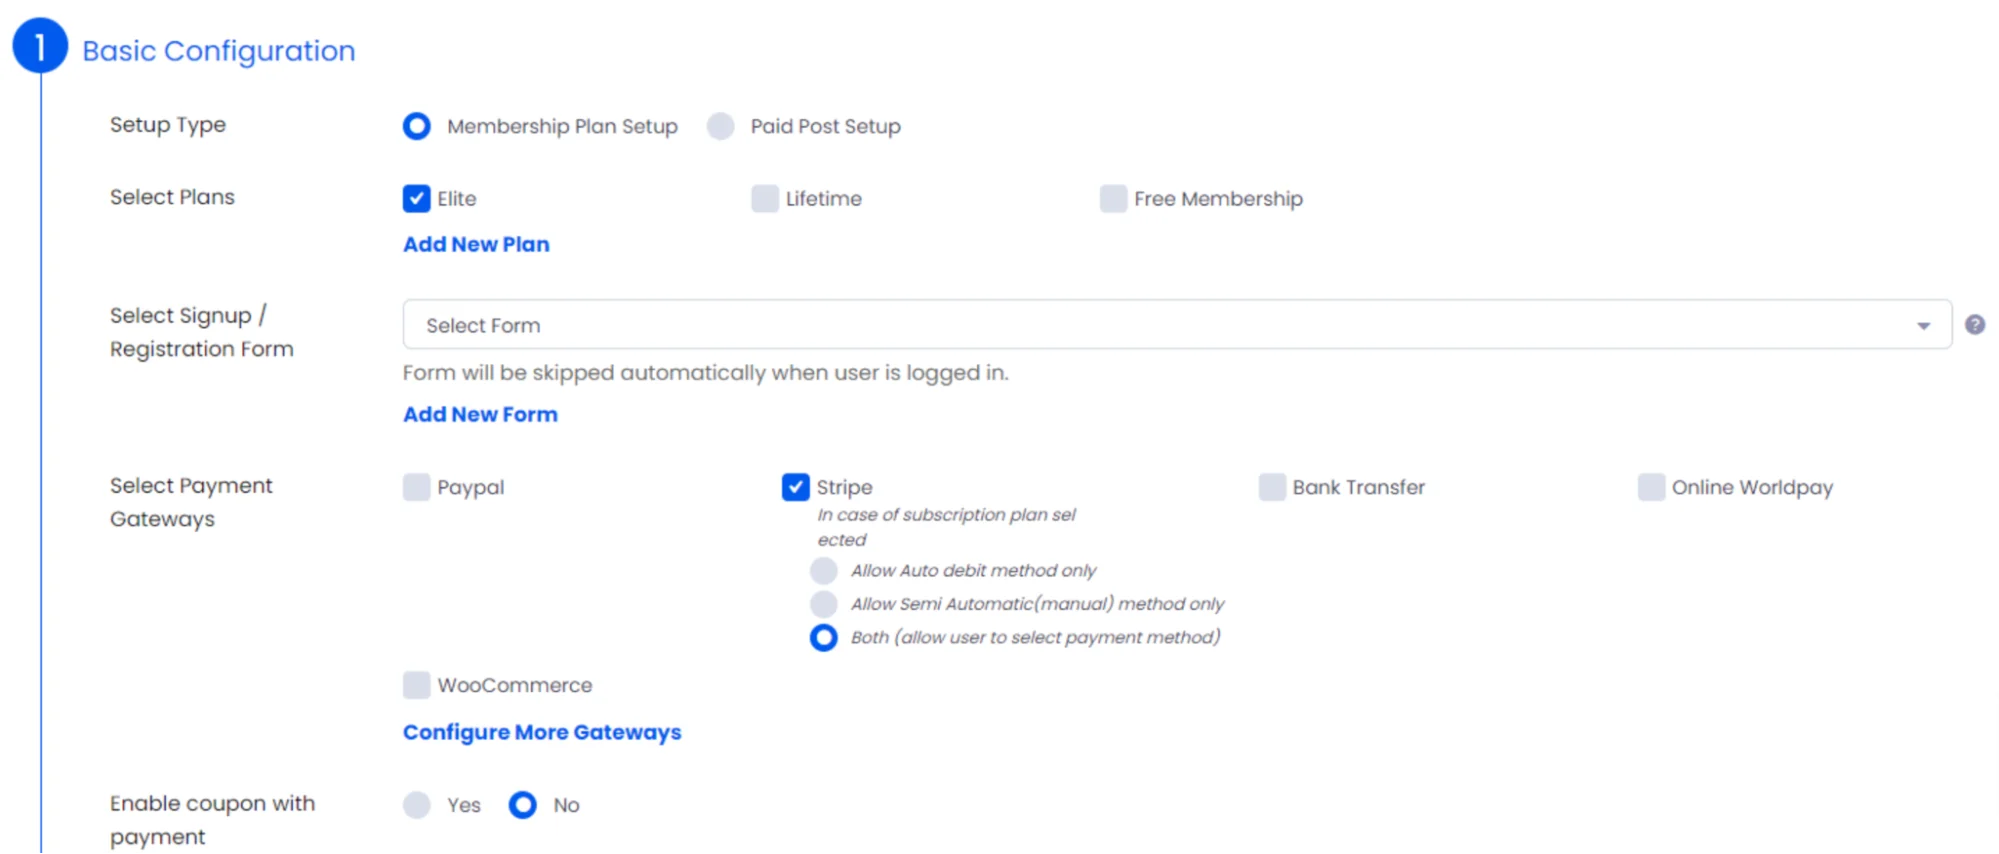
So, first of all, you need to get the plugin setup and running and then do the basic configurations.
Part 3. Choose a Membership Model and Configure the Plugin
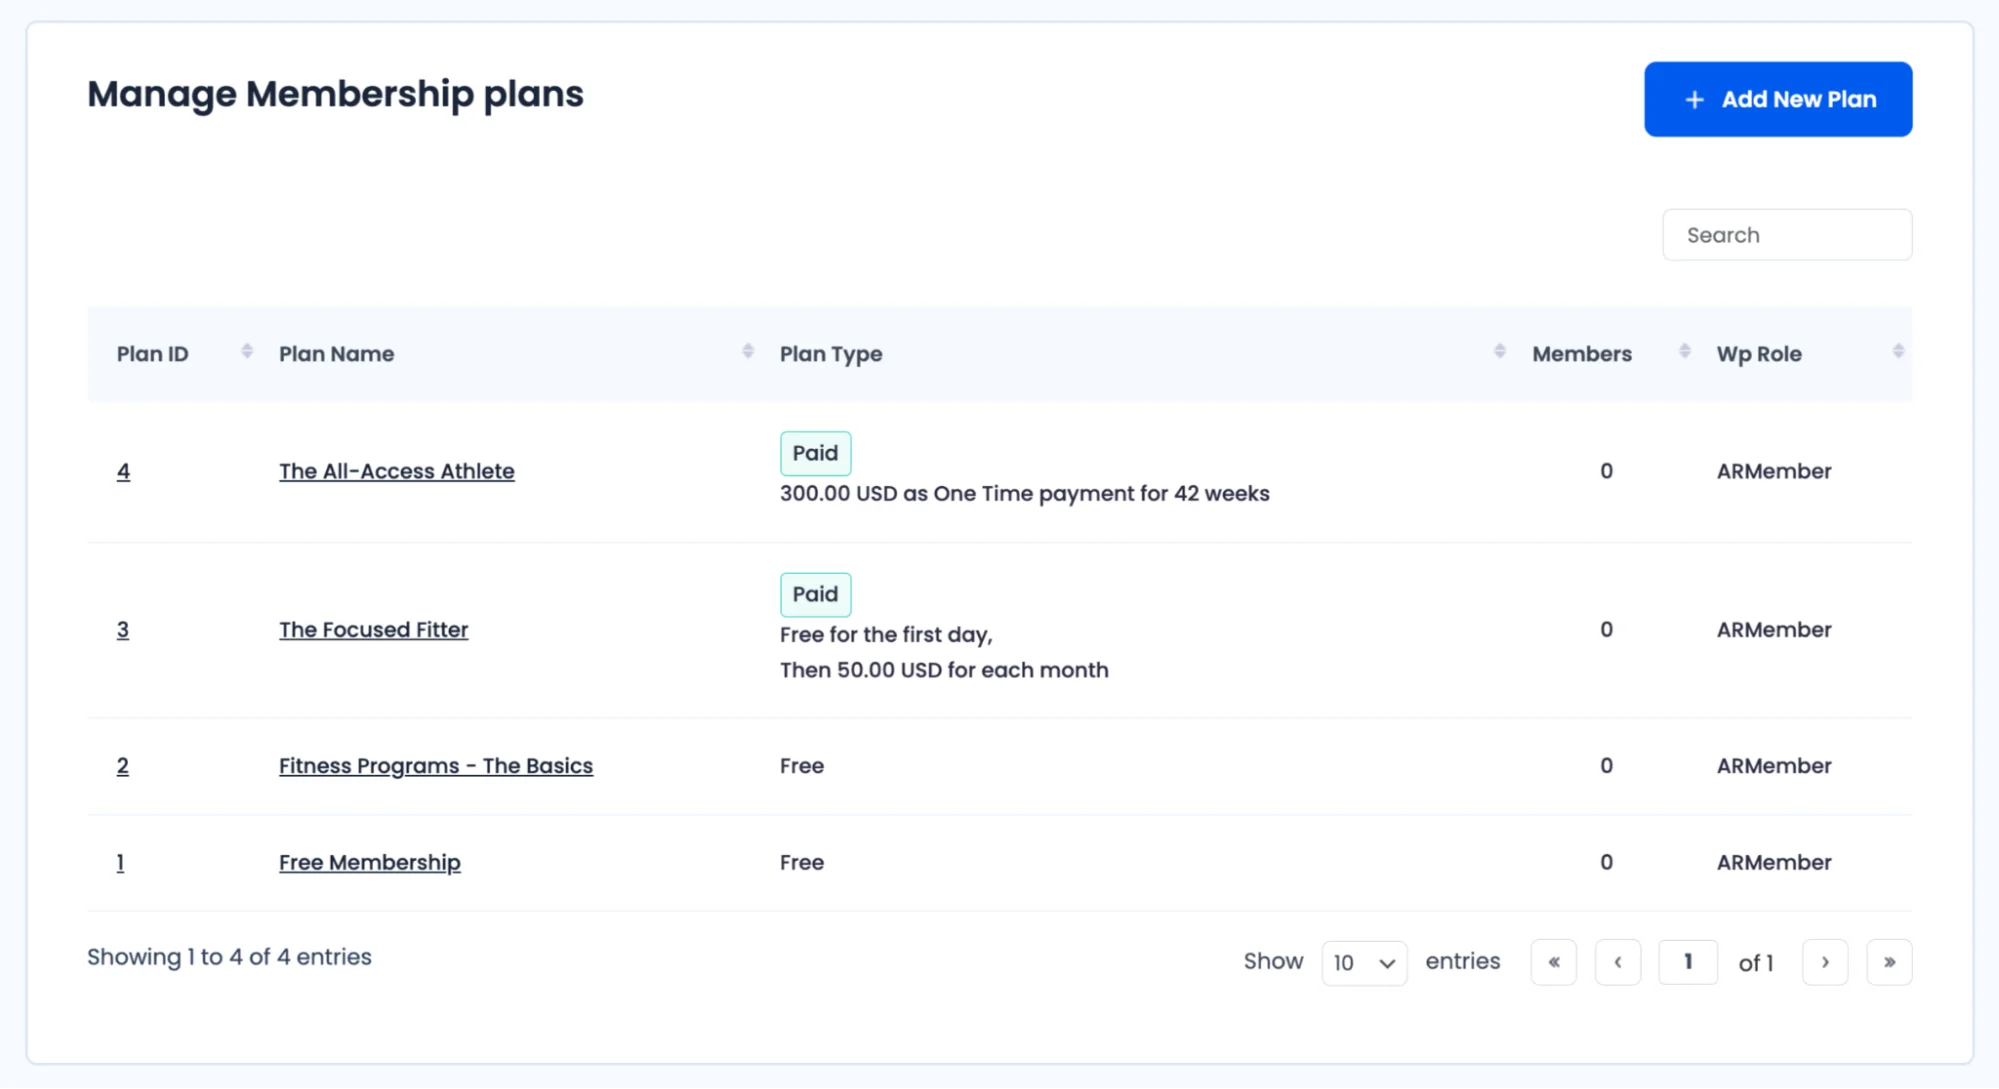
When you set up the membership plugin to control access to your content, you basically create your membership model:
- Create any number of membership plans.
- Definite optional free trials for plans.
- Set their cost and charge type (subscription, free, or one-time payment, etc.).
There are many more vital settings that go into the plugin setup and matter a lot to a membership business.
Here are some essential settings you need for plain sailing with ARMember:

- Notifications (emails, SMS, WhatsApp).
- Security measures.
- Create digital downloads.
- Create coupons.
Part 4. Restrict Content
To set content restrictions according to the membership plans you create, you simply need to tick the needed boxes via the ARMember plugin > Content Access Rules.
It will output a list of plans along with the exact pages you can restrict plan-wise.

Upon creating a new page, post, or custom post, the default Access Rules from your plugin’s general settings will automatically apply – as well as you can manually set the restrictions directly from the new page you add.
For more flexibility, you can even sell only specific posts or pages thanks to the exclusive pay-per-post feature.
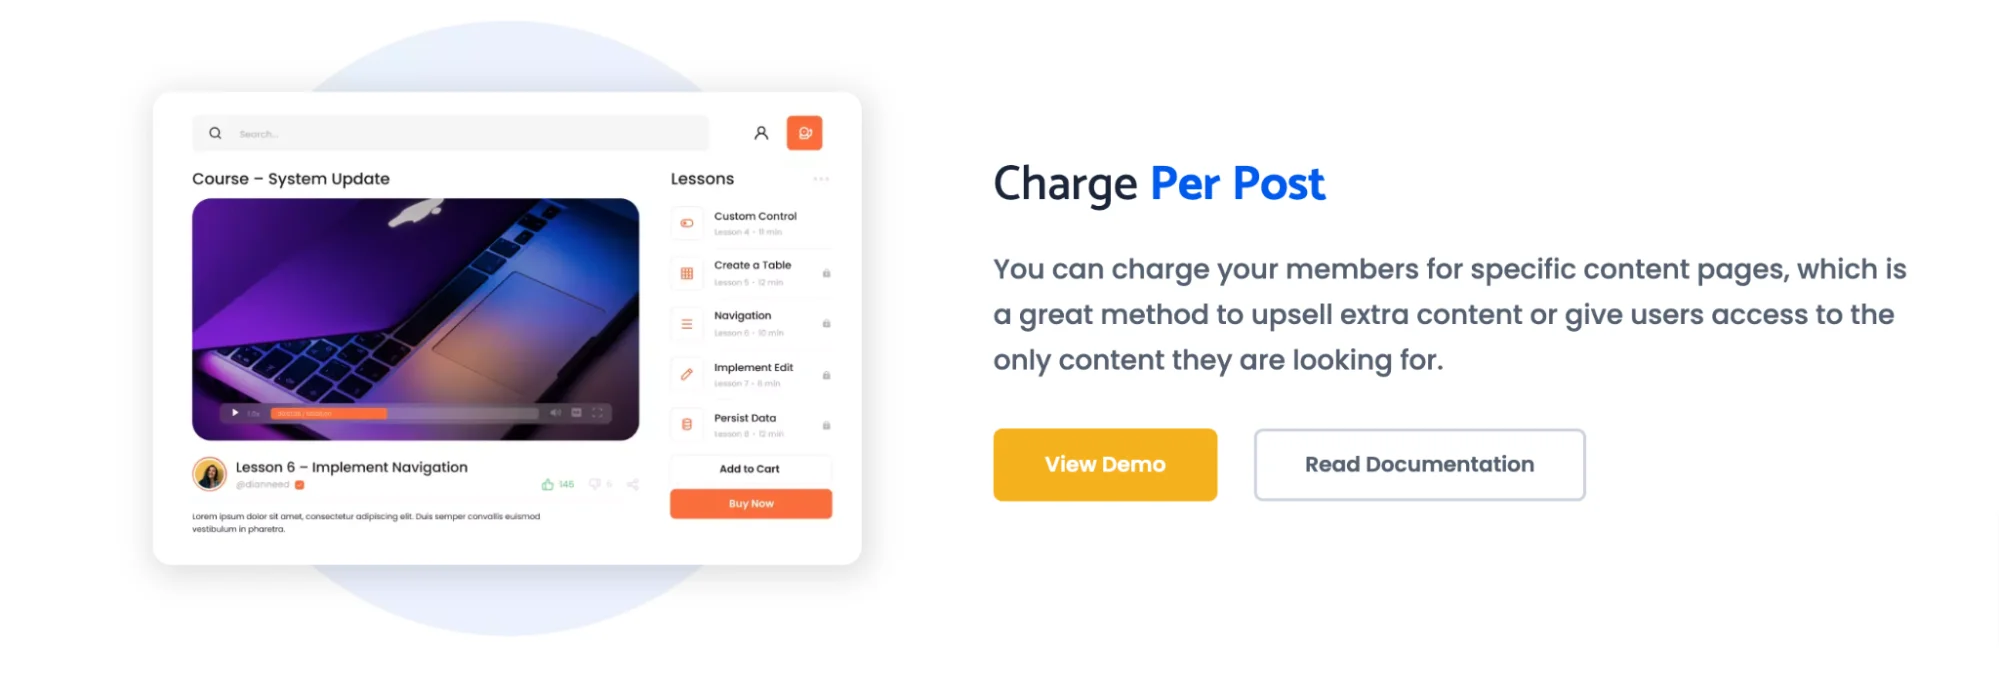
Paying per post allows your members to purchase only the specific content (even if it’s just one page or downloadable materials from one specific lesson/topic) that they need.
Part 5. Create a Paywall
When you finally get to the step of creating a paywall by enabling suitable payment gateways, ARMember gives you an ultimate list of methods, from popular PayPal and Stripe to Mollie, Razorpay, Square, Skrill, Klarna and other outstanding and secure gateways.
In addition to free trials and free lessons you can offer, your premium content that is accessible only after payment can be distributed using the following options in ARMember.
Subscriptions
This is when a recurring payment is in place. Using ARMember, you can create different membership plans with custom names, charging frequencies (monthly, annually, etc.), and subscription costs.One-time Payments
You can sell your premium content with WordPress also just once – set the one-time price and the period during which customers can have access to the content.Pay Per Post
We’ve briefly mentioned this feature before, but let’s highlight it once more – you don’t have to offer entire courses or memberships! You can sell individual lessons or downloadable resources – perfect for those who want to pick and choose.
The first two options are easy to apply when you are creating a membership plan.
Also, you will be able to choose currency and member confirmation methods, where the main matter is to decide if you want to confirm new registrations manually or upon payment. Your members can easily change a subscription plan using upgrades and downgrades.Part 6. Create User Registration Pages
How to get your clients on your WordPress membership site and make them pay for your content?
ARMember provides integration with the most popular website builders, including the block editor and Elementor, to help you add user registration forms to your website and design them right in the plugin – add your favorite colors, fonts, etc.
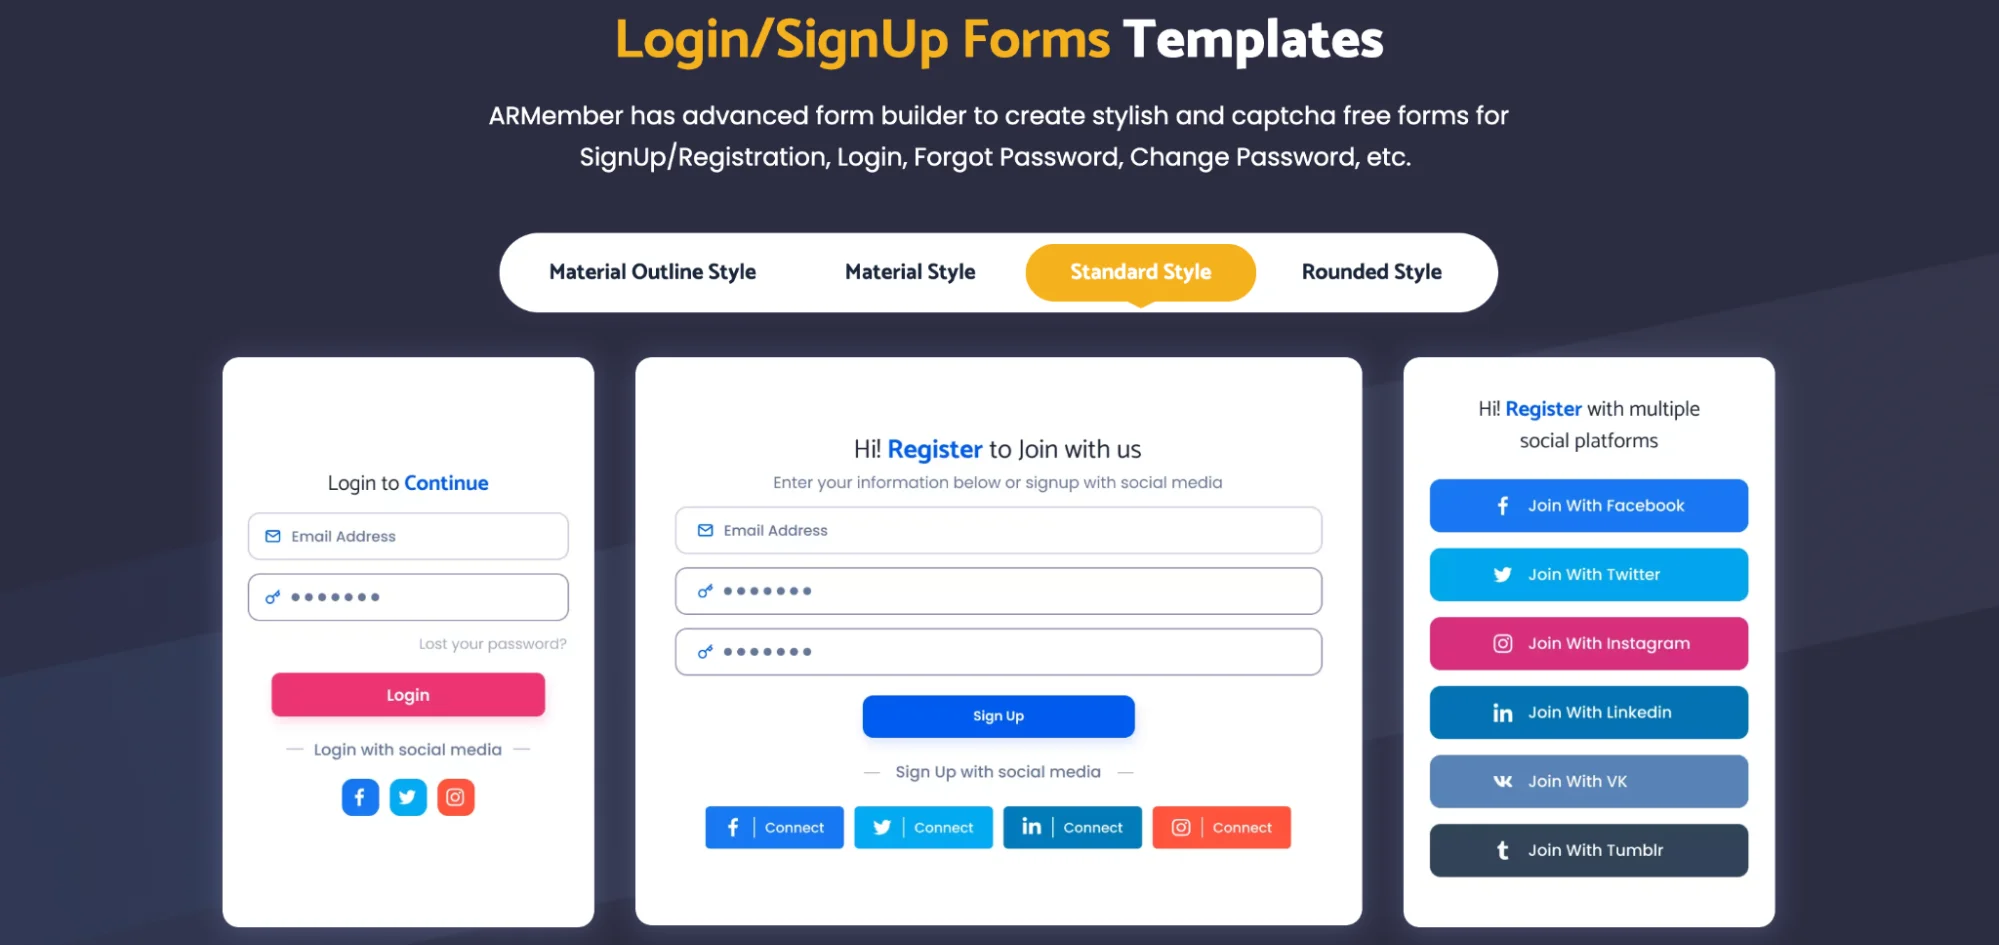
On top of that, there is more flexibility:
- Create direct login links for your customers (without logins and passwords).
- Add a two-factor authentication for a more secure login process.
Part 7. Promote Your Membership Site
Once you configure the main settings for your membership site, and when everything is published, the hard job awaits, meaning, promote your content and find more members!

There are plenty of recommendations but we can stop on the following ones today:
- tap into customers’ creativity, create member-oriented sessions and workshops to get insights on how to develop your content strategy.
- create authentic content that really engages with your customers – because this is why they choose you.
- embrace coupons to create personal discounts for members.
Conclusion & Takeaways
Selling content on WordPress is convenient and straightforward with ARMember, which ensures you have dozens of features for content restriction, plan creation, member, and payment management.
- Work fast with the member content using ARMember settings for content control (smart content dripping, finite and one-time payments, pay-per-post).
- Organize social activities on your membership site with many community-building features.
- Manage invoices, payments, and payment gateways with dedicated tools.
More insightful articles:


Leave a Reply
You must be logged in to post a comment.