

How to Create Membership Levels and Pricing Plans with ARMember

Published in How To
May 8, 2023
5 min read

Membership websites are one of the easy ways to make passive income online. You can turn your passion into profit if you have detailed knowledge of something.For example, you can earn money by creating a gardening membership website if you love gardening. This way, you can earn a steady income.However, setting up a membership can be easy and challenging. If you look at the bright side, with a robust CMS like WordPress, you can create any membership website with a few mouse clicks.
But configuring the pricing options and plans can be a challenging task.
This article will share a definitive guide on setting up membership levels and pricing plans with the ARMember plugin.
Keep reading this guide if you are new to membership websites and need to know how it’s done.
 From there, you can install the plugin.
 After installation, activate it.
 Once the plugin is activated, you can see every configuration on the left-hand side.

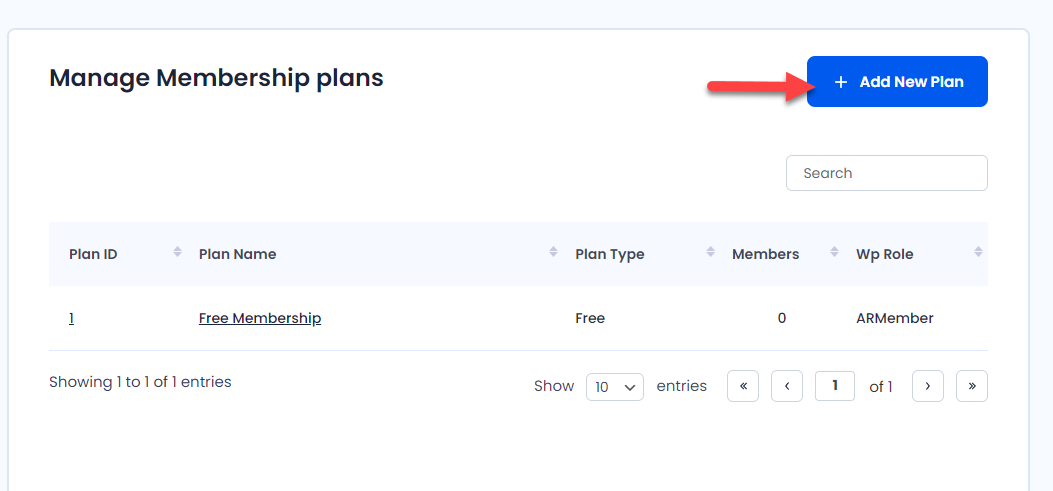
 Under ARMember settings, you will see an option called Manage Plans. You need to open the option to manage and create new plans.
 By default, the plugin will create a sample membership plan. But you are in total control and can tweak it according to your preferences.
Click the Add New Plan button to create a new membership plan.
By default, the plugin will create a sample membership plan. But you are in total control and can tweak it according to your preferences.
Click the Add New Plan button to create a new membership plan.
 On the next page, you will see these options:
 You can configure the membership plan according to your requirements. For example, if you plan to create a membership plan where clients can access your service for a lifetime, you should choose the paid plan (infinite).
That’s it!
This way, you can create membership plans using ARMember.
You can configure the membership plan according to your requirements. For example, if you plan to create a membership plan where clients can access your service for a lifetime, you should choose the paid plan (infinite).
That’s it!
This way, you can create membership plans using ARMember.
 You can see the PayPal payment gateway integration on top. By default, the gateways are offline. You can turn it on from that same page.
On top of that, to complete the authentication, you should fetch the API username keys from the dedicated page. Once you have the credentials, paste them into the ARMember payment gateway settings and complete the authentication.
This way, you can complete the payment gateway integration. So when someone pays you for the membership, the amount will be credited directly to your respective account.
For example, if the client uses the PayPal payment gateway, the subscription fee will end up in your PayPal balance. The same will happen with Authorize.net and Stripe.
You can see the PayPal payment gateway integration on top. By default, the gateways are offline. You can turn it on from that same page.
On top of that, to complete the authentication, you should fetch the API username keys from the dedicated page. Once you have the credentials, paste them into the ARMember payment gateway settings and complete the authentication.
This way, you can complete the payment gateway integration. So when someone pays you for the membership, the amount will be credited directly to your respective account.
For example, if the client uses the PayPal payment gateway, the subscription fee will end up in your PayPal balance. The same will happen with Authorize.net and Stripe.
How to Choose a Membership Plan for Your Business
Having a membership website with only one membership level is a bad idea. Some membership websites offer a lifetime subscription, whereas others provide a yearly or monthly one. Choosing a membership plan depends on your business idea, structure, and expenses. A monthly subscription would be feasible if you offer a gym membership or an online bookstore. On the other hand, if you are handling a business where you only need to be active, a yearly subscription will do just fine.Why Having Multiple Membership Levels a Good Idea?
When you have multiple membership levels, you can offer various features according to the membership level. For example, if you have a basic membership plan, you can provide essential services to that tier. As the membership plan costs more, you can offer premium service and priority support. A lot of businesses are following the same structure for their membership website. Alternatively, you can earn more income by offering a lifetime subscription for customers. Most clients prefer lifetime subscriptions instead of monthly or yearly subscriptions if the price is right. So, having multiple membership levels and pricing plans will help you get better conversion rates and revenue from your online membership website.How to Set Up Membership Plans with ARMember
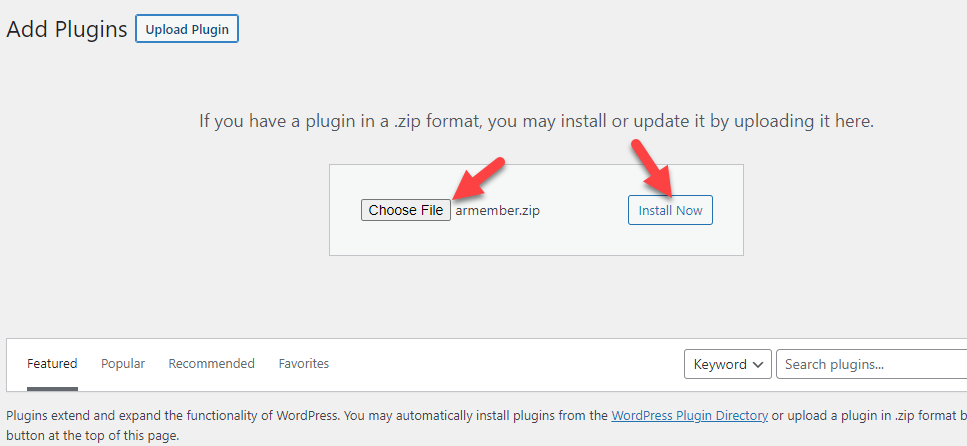
The very first thing you need to do after installing WordPress inside your web hosting server is to install and activate the ARMember plugin. When the plugin file is ready, go to Plugins > Add New.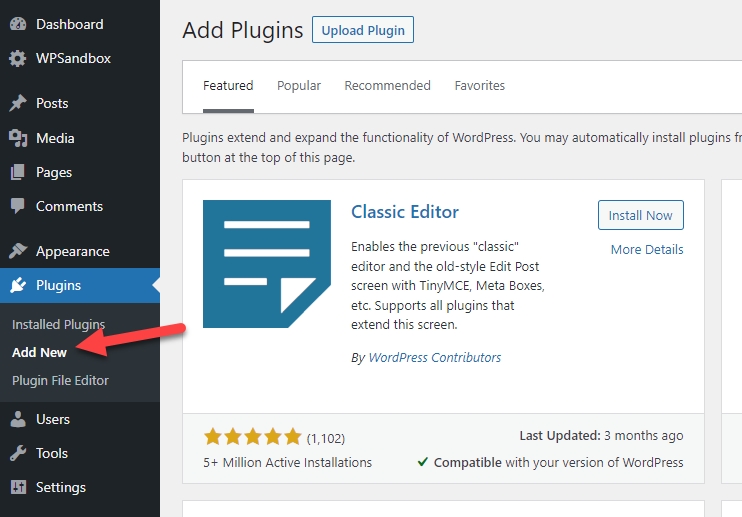 From there, you can install the plugin.
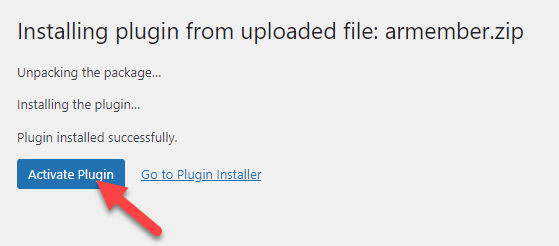
 After installation, activate it.
 Once the plugin is activated, you can see every configuration on the left-hand side.
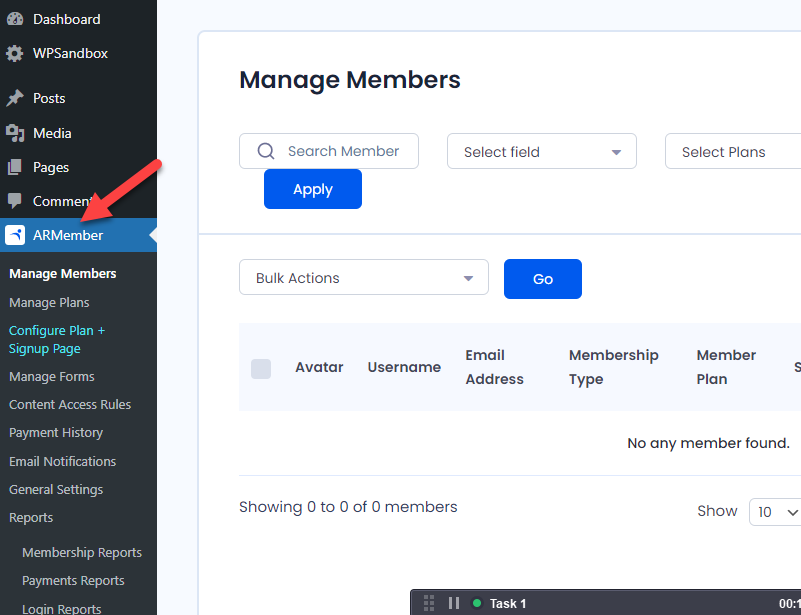 Under ARMember settings, you will see an option called Manage Plans. You need to open the option to manage and create new plans.
 By default, the plugin will create a sample membership plan. But you are in total control and can tweak it according to your preferences.
Click the Add New Plan button to create a new membership plan.
By default, the plugin will create a sample membership plan. But you are in total control and can tweak it according to your preferences.
Click the Add New Plan button to create a new membership plan.
 On the next page, you will see these options:
- Plan Name
- Plan description
- Plan Type & Pricing
- Free
- Paid plan (infinite)
- Paid plan (finite)
- Recurring
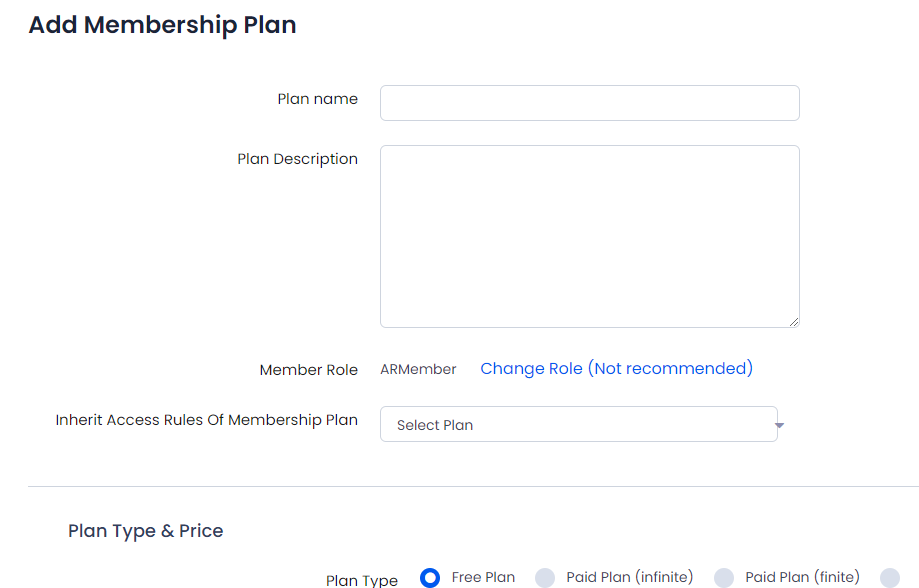 You can configure the membership plan according to your requirements. For example, if you plan to create a membership plan where clients can access your service for a lifetime, you should choose the paid plan (infinite).
That’s it!
This way, you can create membership plans using ARMember.
You can configure the membership plan according to your requirements. For example, if you plan to create a membership plan where clients can access your service for a lifetime, you should choose the paid plan (infinite).
That’s it!
This way, you can create membership plans using ARMember.
Setting Up a Payment Gateway
Once you have created enough plans for your online membership business, you must set up a payment gateway service. Thankfully, ARMember comes with multiple payment options. Some of the popular ones are: And so on. Under General Settings, you can see the Payment Gateway settings.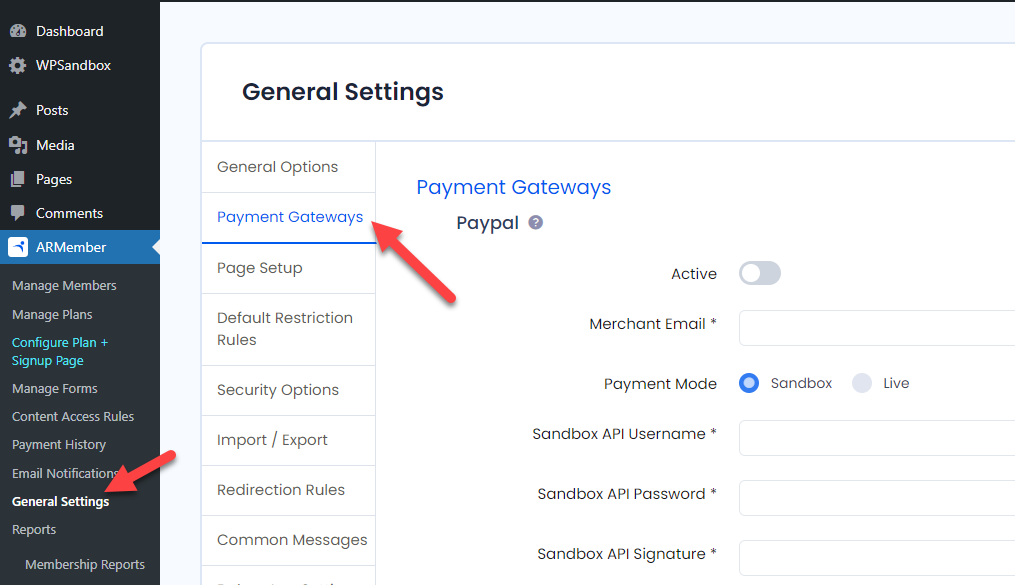 You can see the PayPal payment gateway integration on top. By default, the gateways are offline. You can turn it on from that same page.
On top of that, to complete the authentication, you should fetch the API username keys from the dedicated page. Once you have the credentials, paste them into the ARMember payment gateway settings and complete the authentication.
This way, you can complete the payment gateway integration. So when someone pays you for the membership, the amount will be credited directly to your respective account.
For example, if the client uses the PayPal payment gateway, the subscription fee will end up in your PayPal balance. The same will happen with Authorize.net and Stripe.
You can see the PayPal payment gateway integration on top. By default, the gateways are offline. You can turn it on from that same page.
On top of that, to complete the authentication, you should fetch the API username keys from the dedicated page. Once you have the credentials, paste them into the ARMember payment gateway settings and complete the authentication.
This way, you can complete the payment gateway integration. So when someone pays you for the membership, the amount will be credited directly to your respective account.
For example, if the client uses the PayPal payment gateway, the subscription fee will end up in your PayPal balance. The same will happen with Authorize.net and Stripe.
Conclusion
Anyone can create a membership website with a powerful ad feature-rich membership plugin like ARMember. Since it offers multiple unique features, creating a stunning membership website would be a cakewalk. Starting a membership website, you should spend enough time deciding the membership plans and pricing. As you can see in this tutorial, creating multiple membership plans with ARMember is easy. You can create as many membership levels as you need. Since you integrate a payment gateway to your membership website, accepting payments online would be a seamless experience. That’s it! This is how you can create membership levels and pricing plans with ARMember. If you need help, get in touch with the support team. Feel free to go through our blog archive to learn more about managing a membership website.Share Article:


Leave a Reply
You must be logged in to post a comment.