

Steps to Set up Membership For Your Website
The ARMember Setup Wizard is automatically displayed when you first install the plugin. This user-friendly wizard specifically simplifies the process of configuring ARMember, guiding you step-by-step to ensure that all necessary settings are applied correctly. With its intuitive interface, you can easily customize your membership site according to your specific needs, making the setup process not only straightforward but also efficient.
- License Activation
- General Settings
- Setup Plan
- Set Payment Options
- Setup Forms
- Configure Plan + Signup Page
- Content Restriction / Drip Content
Membership Setup Guide Through Setup Wizard :
- Step 1: License Activation
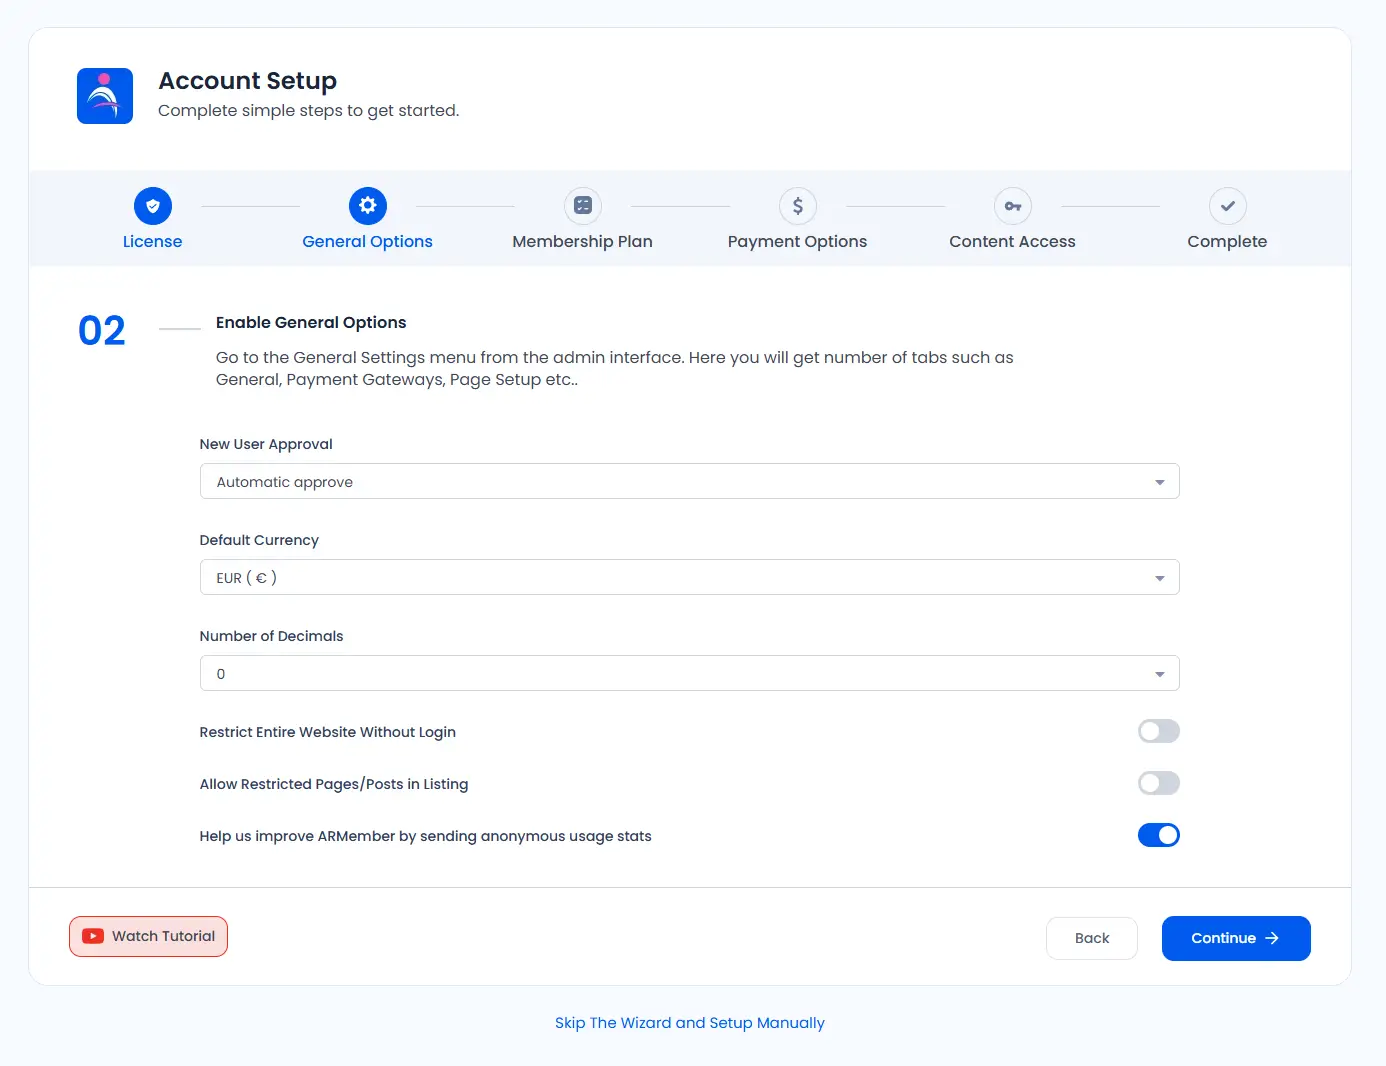
- Step 2: General Settings
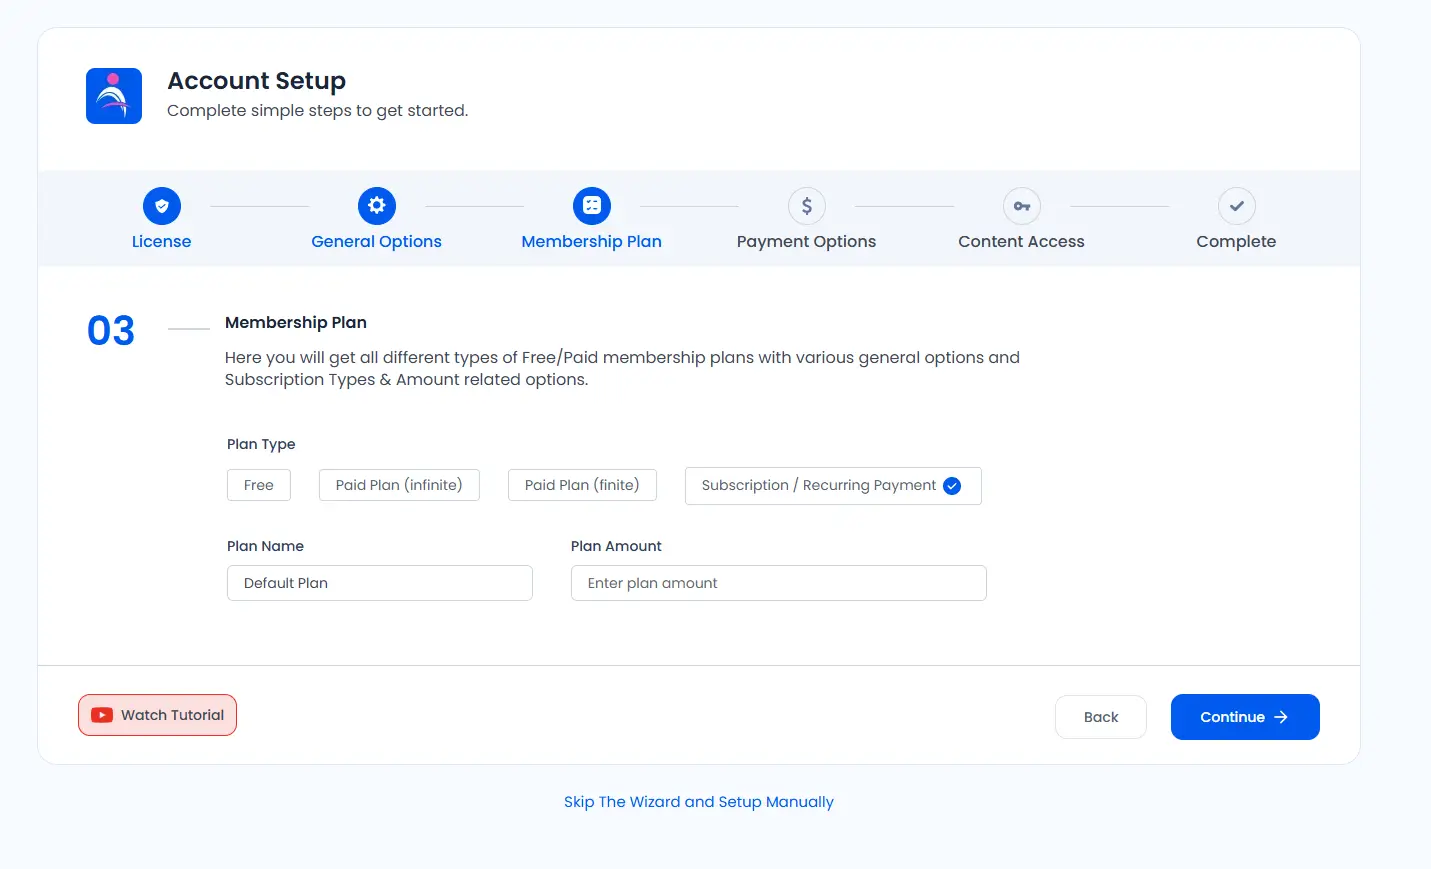
- Step 3: Setup Plan
- Step 4: Set Payment Options
- Step 5: Configure Plan + Signup Page/ Setup Forms
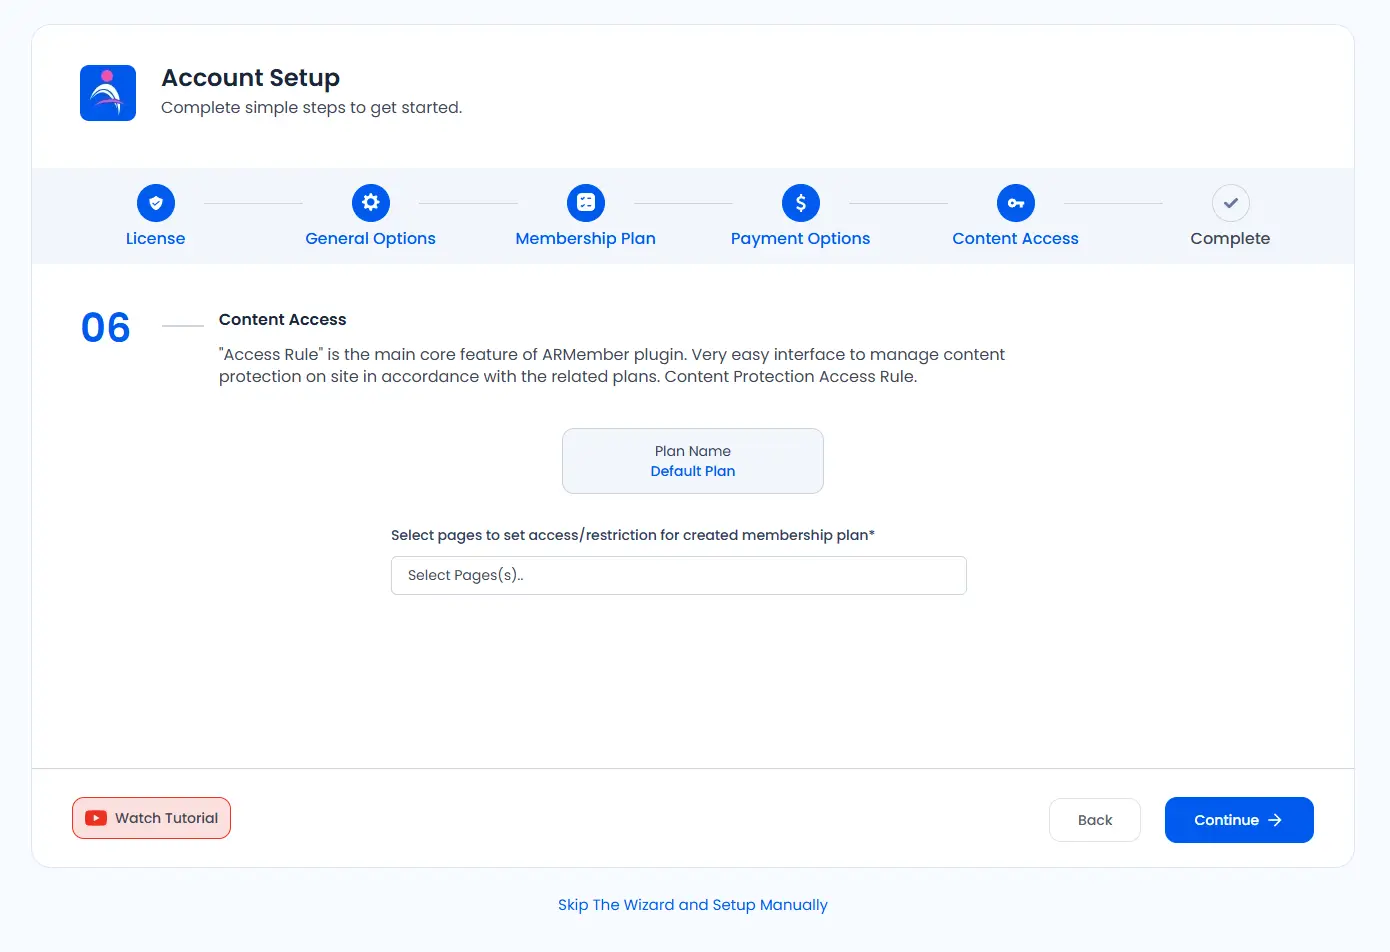
- Step 6: Content Restriction
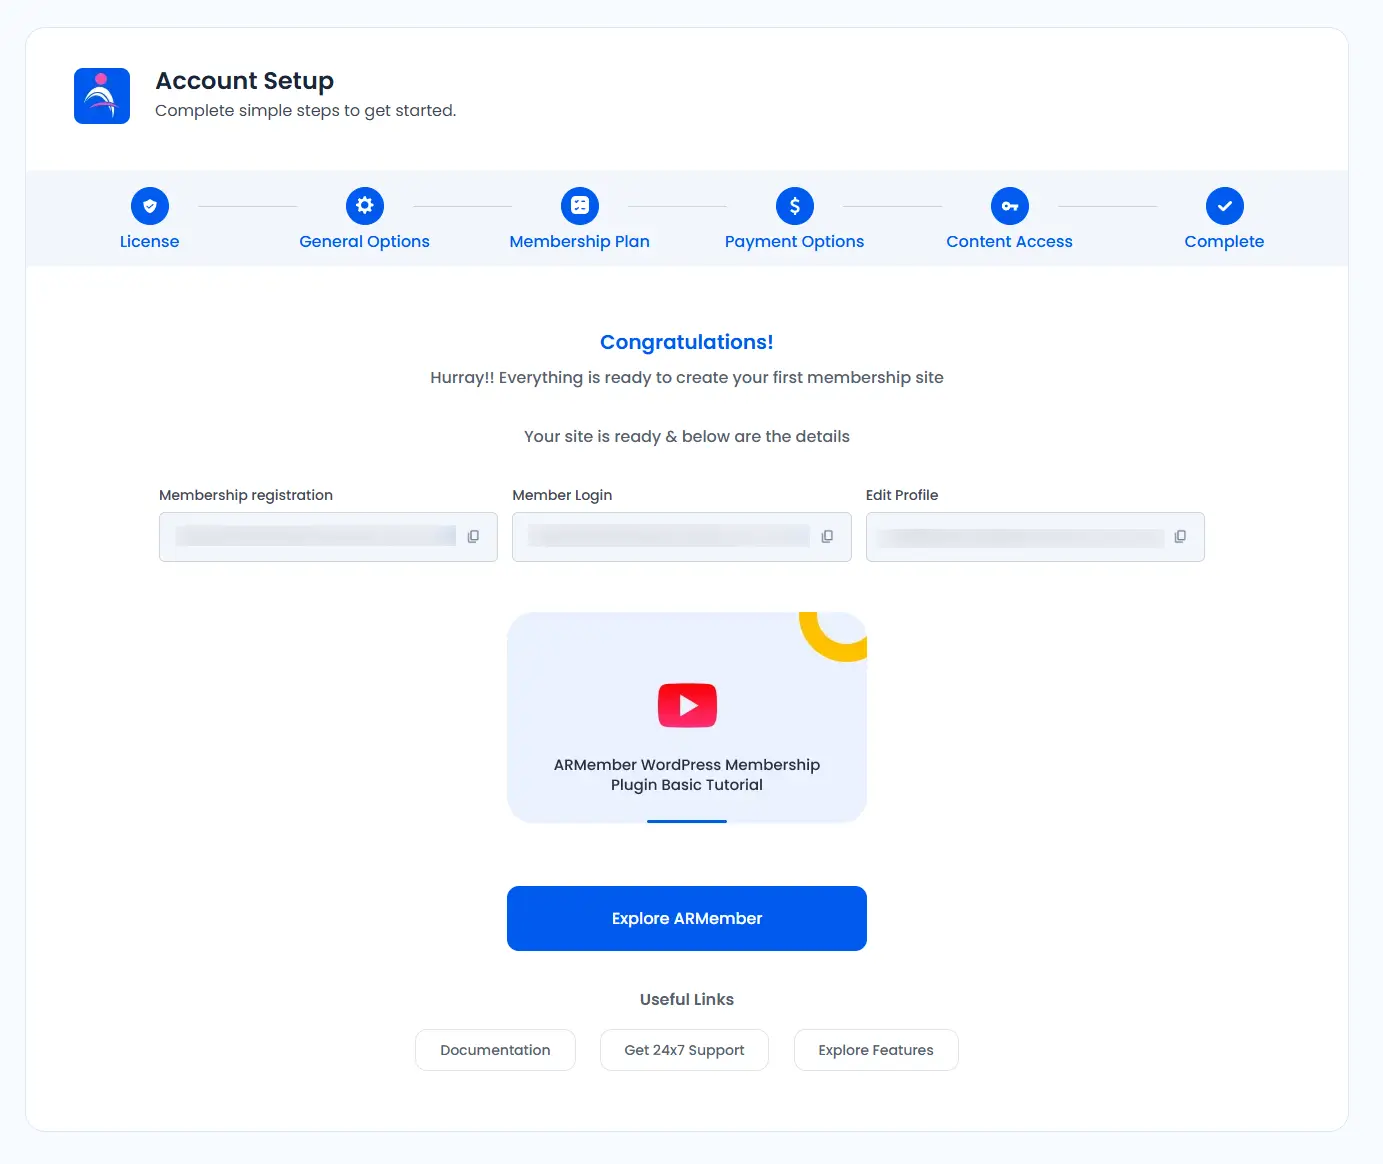
- Step 7: Complete
Firstly, to set your account, you need to activate the license. Activating the license is important to get the updates and the support. Furthermore, it is also mandatory to activate the license to use the inbuilt addons

To get started, you will need to configure the plugin’s basic settings directly from the General Settings tab. The General Settings tab has the multiple options in order to set up your website initially. Thus, setup and configure the few required information here.
Then create free/paid subscription plans. Set description for your plan, select plan validity, select payment process if plan is paid. For all those created plans, you can specifically define restriction related to content for the user of that particular plan. ARMember does provide four different types of plan which can be created at your site as per your site requirements.
In order to receive payment at your site for the paid plans created, ARMember provide inbuilt 6 payment methods, from which at the setup wizard you can select anyone from the three. You must need to select at least one payment option if you want to charge the user for paid plans. Most Popular Payment Gateways are as follows:
1. PayPal
2. Stripe
3. Bank Transfer

Then create a new membership setup wizard with configure plan and signup option for new user subscription process. You will also find options for plans, forms, payment gateways and coupons. Configure setup as per your need. Furthermore, you can add your custom styling for specific setup. After setting membership setup wizard, finally add setup shortcode in one of your front-end page to let member register in your site.
You can protect your website content from different plan members. You can add protection on your pages, posts, categories, navigation menus, custom post types, custom taxonomies etc.
That’ all you are at the end of setting up your membership website. Now once you have set up the membership website then you can explore the features offered by ARMember plugin, and dive into creating and managing the members efficiently along with other multiple features to engage the members at your site.
Membership Setup Guide Manually :
This guide will walk you through the process of setting up a membership system for your website one-by-one, if you skip the setup wizard then you can follow the steps shown here and set up the ARMember. You’ll configure the plugin’s basic settings, create subscription plans, set up user registration, and define restrictions for content access.
- Step 1: Activate the license
- Step 2: Configure Basic Plugin Settings
- Step 3: Creating Plans
- Step 4: Set up a Plan Purchase Form
Once you are done up creating the plans, then it is essential for the site to have a purchase form through which your site’s end users will be able to purchase the plans as per their comfort. In order to create and configure this, you can navigate to the
Admin Panel⇾ARMember⇾Configure Plan + Signup Page, and create a form as per your requirements. - Step 5: Protect the Content
- Step 6: Email Notifications
To set up your account, the first step is to activate your license. This is essential for receiving updates and support, and it’s mandatory to use the built-in add-ons. Navigate to Admin Panel ⇾ ARMember ⇾ Licensing and here activate the license for the ARMember and addons.
The next step is to configure the plugin’s basic settings from the General Settings page. In order to set up email server, new user approvals, redirections and much more can be setup, all this up at the plugin’s settings. Navigate to the Admin Panel ⇾ ARMember ⇾ General Settings, set up the things as per your requirements.
Furthermore, the next thing to set up comes for the process of creating the plans. ARMember offers multiple options while creating a plan. Additionally, you can also create the plan as per your desires from the 4 different types of the plans options. In order to create the plans, you can navigate to the Admin Panel ⇾ ARMember ⇾ Manage Plans and create the exclusive plans you wish to offer.
You can secure your website content from different plan members. You can add protection on your pages, posts, categories, navigation menus, custom post types, custom taxonomies etc. In order to protect these, kindly navigate to the ARMember ⇾ Content Access Rules page.
Now comes up the step to set up the email notifications for your site to stay connected with the members of your site. Navigate to the ARMember ⇾ Email Notifications, create the email notification as per your requirements.
Explore more features with the ARMember as this is not the end, dive deep into more configurations and setup of basic thing. The above guide will help you kick-start building the site with the ARMember!