Please note that while uninstalling ARMember, if any user has auto recurring subscription then that will be canceled from payment gateways.
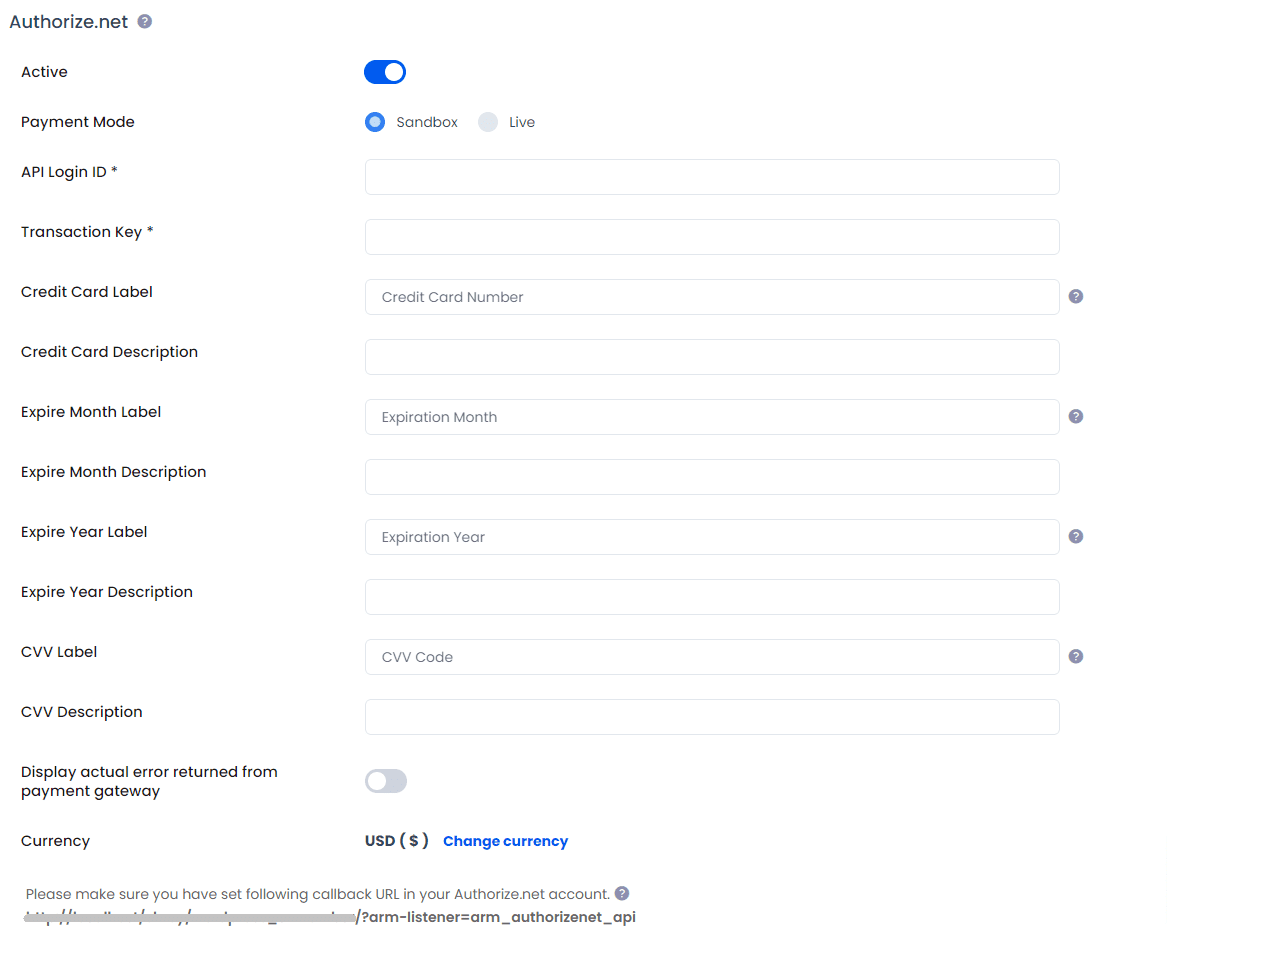
To activate Authorize.Net gateway, you must require API Login ID and Transaction Key.
Follow below steps to get API Login ID and Transaction Key:
- Log into your Merchant Interface at https://account.authorize.net/.
- Click Account from the main toolbar.
- Click Settings in the main left side menu.
- Click API Login ID and Transaction Key in the Security Settings section.
- Under Create New Transaction Key, enter your Secret Answer.
- Note: When obtaining a new Transaction Key, you may choose to disable the old Transaction Key by clicking the box titled, Disable Old Transaction Key(s). You may want to do this if you suspect your previous Transaction Key is being used fraudulently.
- Click Submit.
For more detail about API Login ID and Transaction Key, please click here.
- Click Account from the main toolbar.
- Click Settings in the main left side menu.
- Click Silent Post URL in the Transaction Format Settings section.
- You will find an option to set URL. Please add
http://yoursite.com/?arm-listener=arm_authorizenet_apiinto URL input. - Click Submit.
In case of auto debit payment, first payment will be taken as one time payment irrespective of the plan whether it includes trial period or not. Date of second recurrence will be set as subscription start date in authorize.net website for respected plan.
Trial Period + Authorize.NET
In Authorize.NET, you must keep the same unit for trial period and billing cycle. (For example, if your billing cycle is for 1 month, then you are allowed to set a trial period in months only.)
But with ARMember plugin, you can override this limitation. You are allowed to keep Trial Period in Days and Billing Cycle in months in ARMember. (In short, there is no more requirement to set same unit for trial period as billing cycle while using this plugin.)
Authorize.net does not support billing cycle less than 7 Days. Also, you can not set “Year” in billing cycle, as it is not supported in authorize.net.
In case of any error at setup, form you may display the actual error returned from Authorize.Net payment gateway by enabling Display actual error returned from payment gateway switch, as you can see in screenshot.
If payment gateway allow filling billing address, city, state, zip code and country then you need to create a field in register form as given below meta keys:
Billing Addressfield meta key: addressBilling Cityfield meta key: cityBilling Statefield meta key: stateBilling Zip Codefield meta key: zip_code
So, after that, above details will be sent to Authorize.net Payment Gateway automatically. If the member is logged in and purchasing membership plan then, firstly member needs to update the required details (in case these details are not available in member account) from Edit Profile page and after that, purchase membership plan.
Update Card
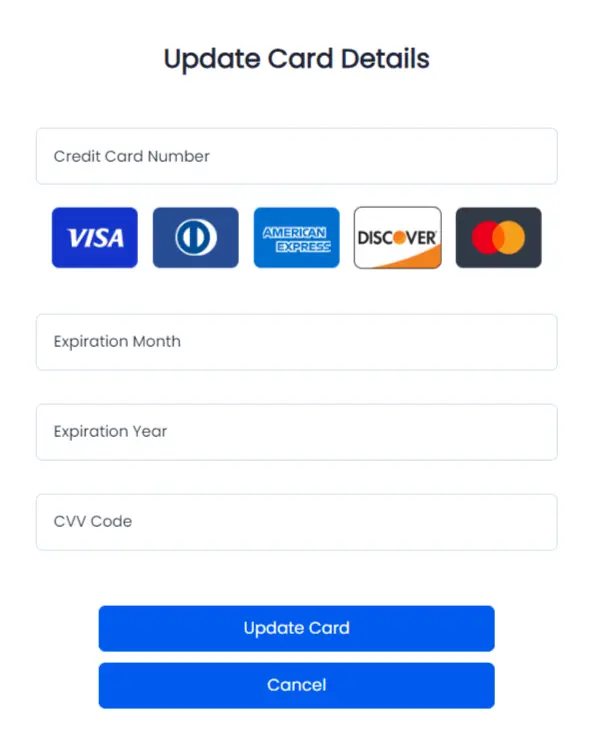
ARMember does provide a facility to update the card, if you want to allow the members to update their card anytime then you can allow them this facility by adding the update card button with the help of the Current Membership Shortcode, you can add this shortcode from Pages ⇾ Membership Shortcode ⇾ Others, for further information on this you can click here.
You can check the below provided screenshot for updating the card.


