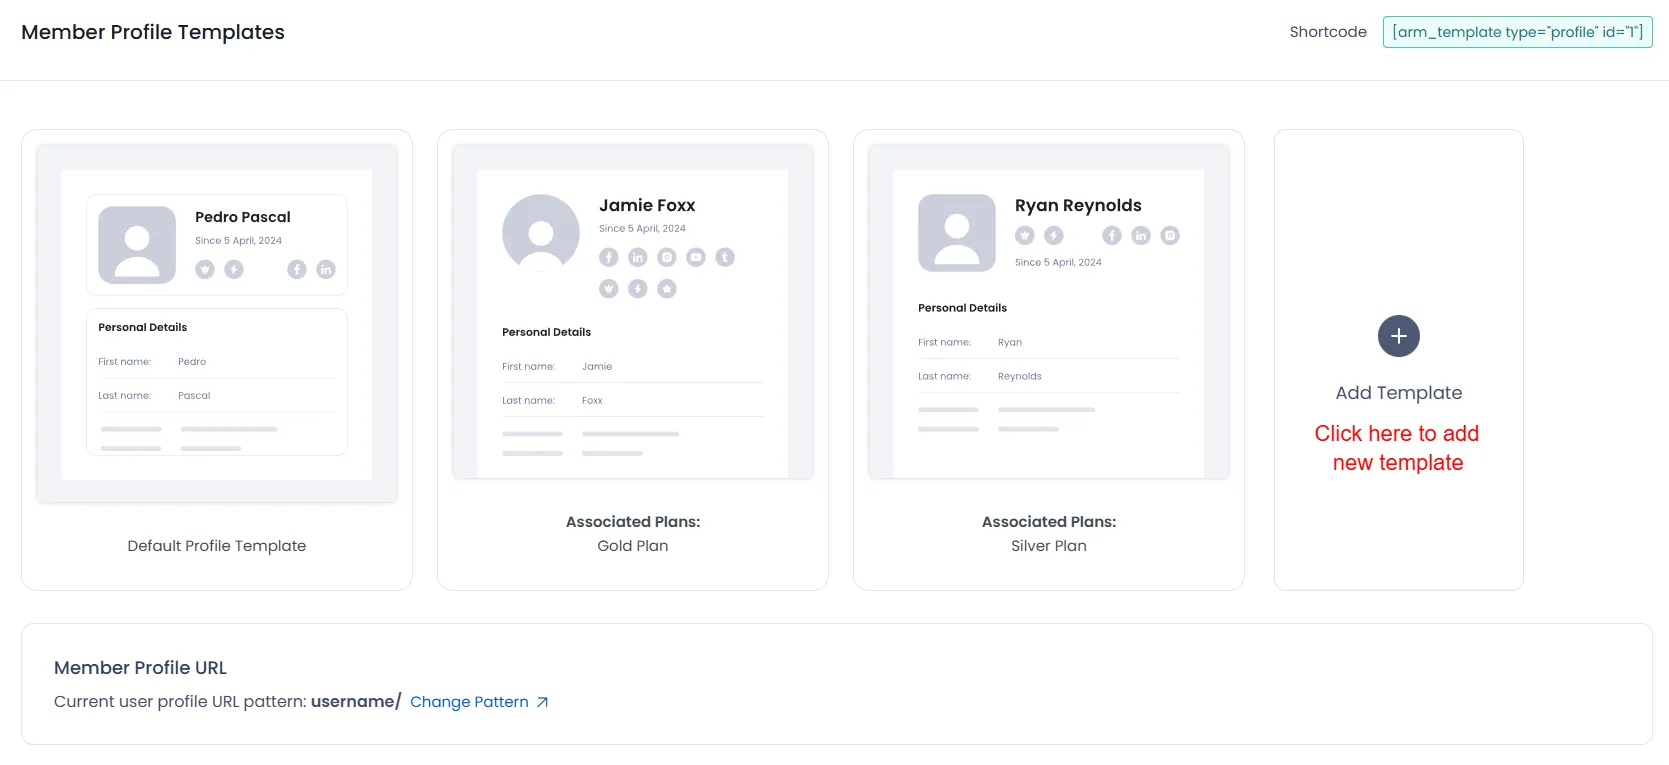
Member Profile Templates
How to Customize Member Profile Template with ARMember Plugin
Member Profile Templates in ARMember allow you to create visually appealing and fully customizable user profile pages tailored to different membership plans. With multiple design options and flexible settings, you can control how user information, social links, membership details, and more are displayed.
Whether you want a simple layout or a highly personalized profile experience, ARMember makes it easy to design, manage, and assign unique profile templates that enhance user engagement and reflect your website’s branding.
Step 1: Activate Addon
In order to create profile and directories it is neccessay to activate an addon. To activate the addon navigate to the ARMember ⇾ Addons page and activate the Social Feature addon.
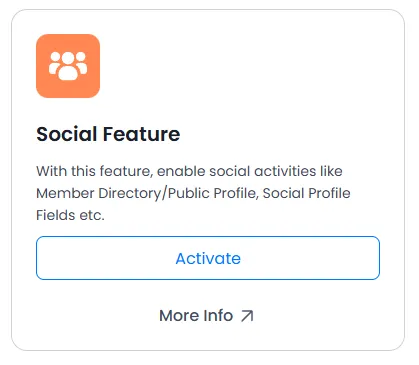
When you activate the add-on, a new Profile & Directories menu appears in ARMember. The system also creates a default profile template.
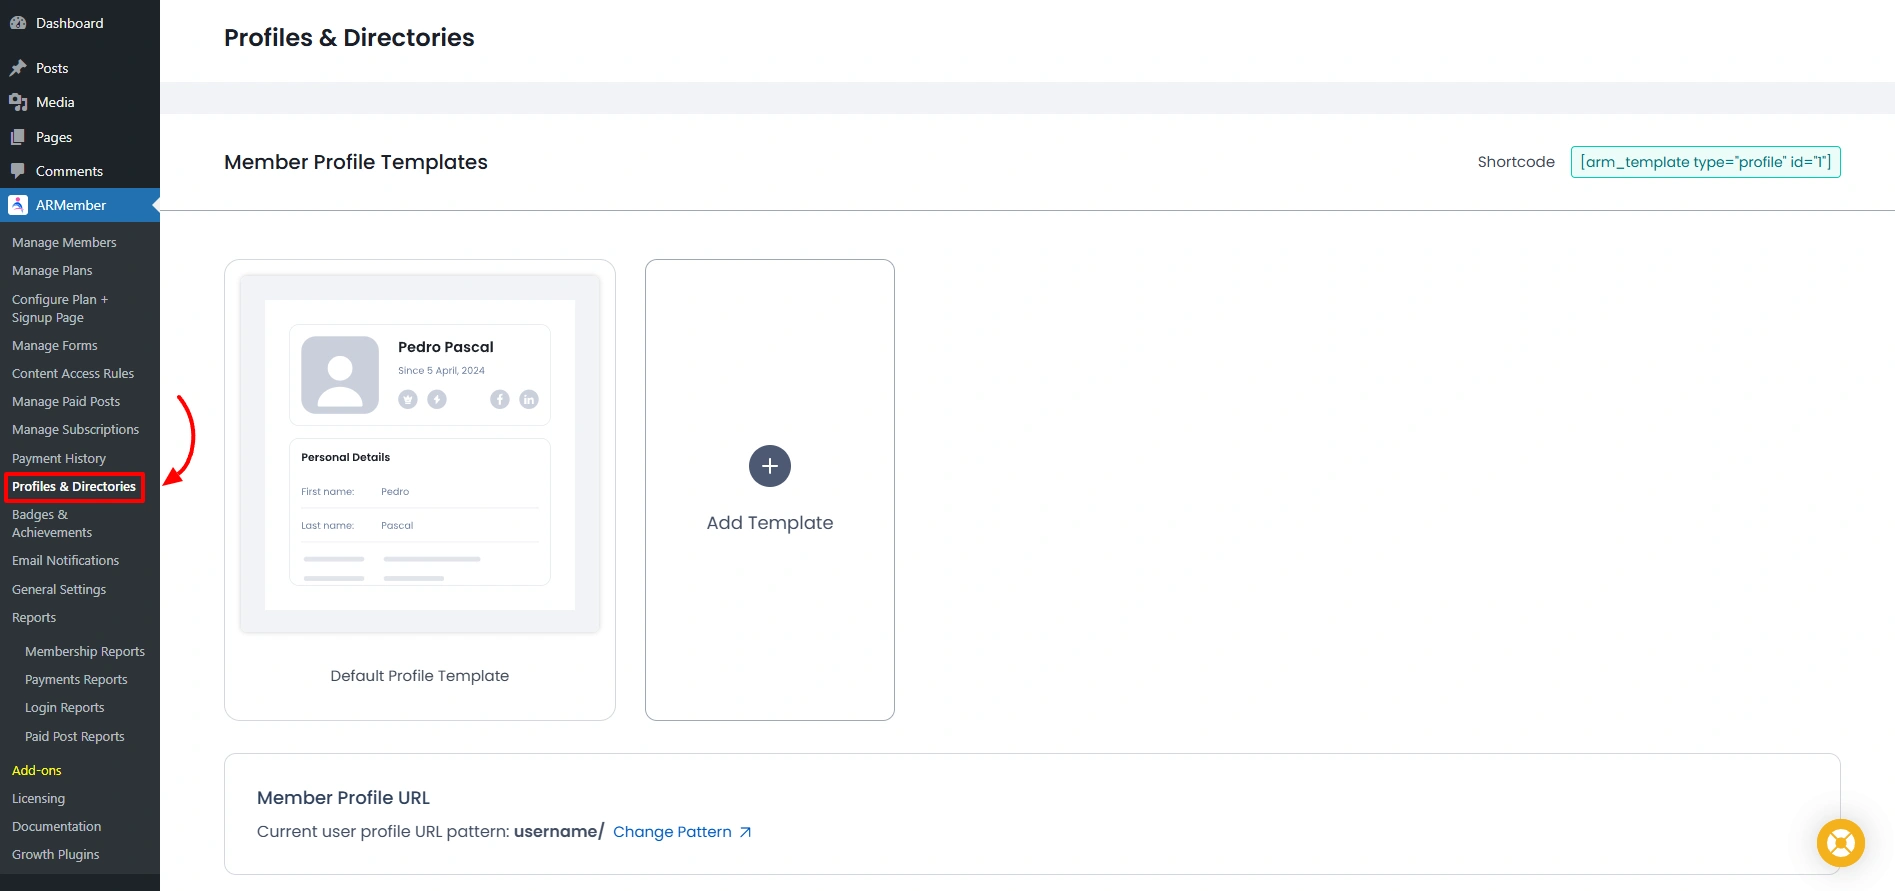
Step 2: Add Template
Open the Profile & Directories page and click Add Template.
Step 3: Select Profile Template
When you click Add Template, a popup opens where you can select a profile template. ARMember offers 6 different templates to choose from.
Click the Next button to add the template. If you don’t want to add a template, click Cancel the button.

Step 4: Profile Template Options
Click Next to open the Profile Editor with all customization options.
When any option is changed, its effect can be seen directly in the profile editor.

Left Sidebar Options
-
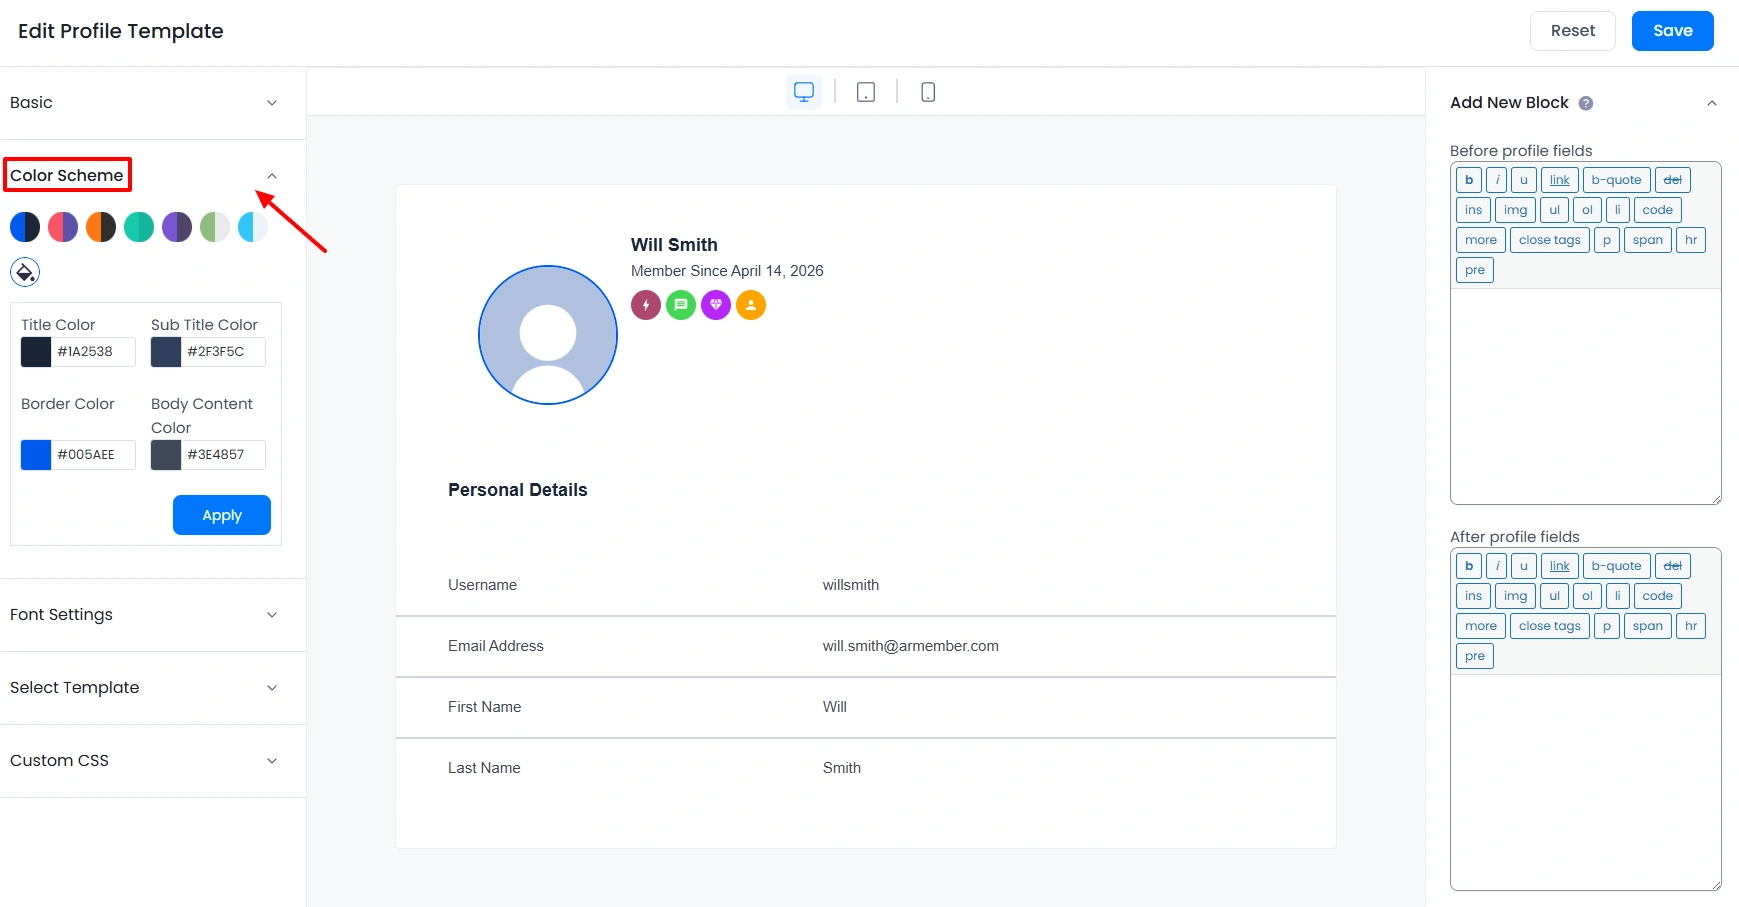
Color Scheme: Multiple color scheme support. Also, you can customize color options by clicking on the paintbrush icon, as you can see in the below screenshot.

-
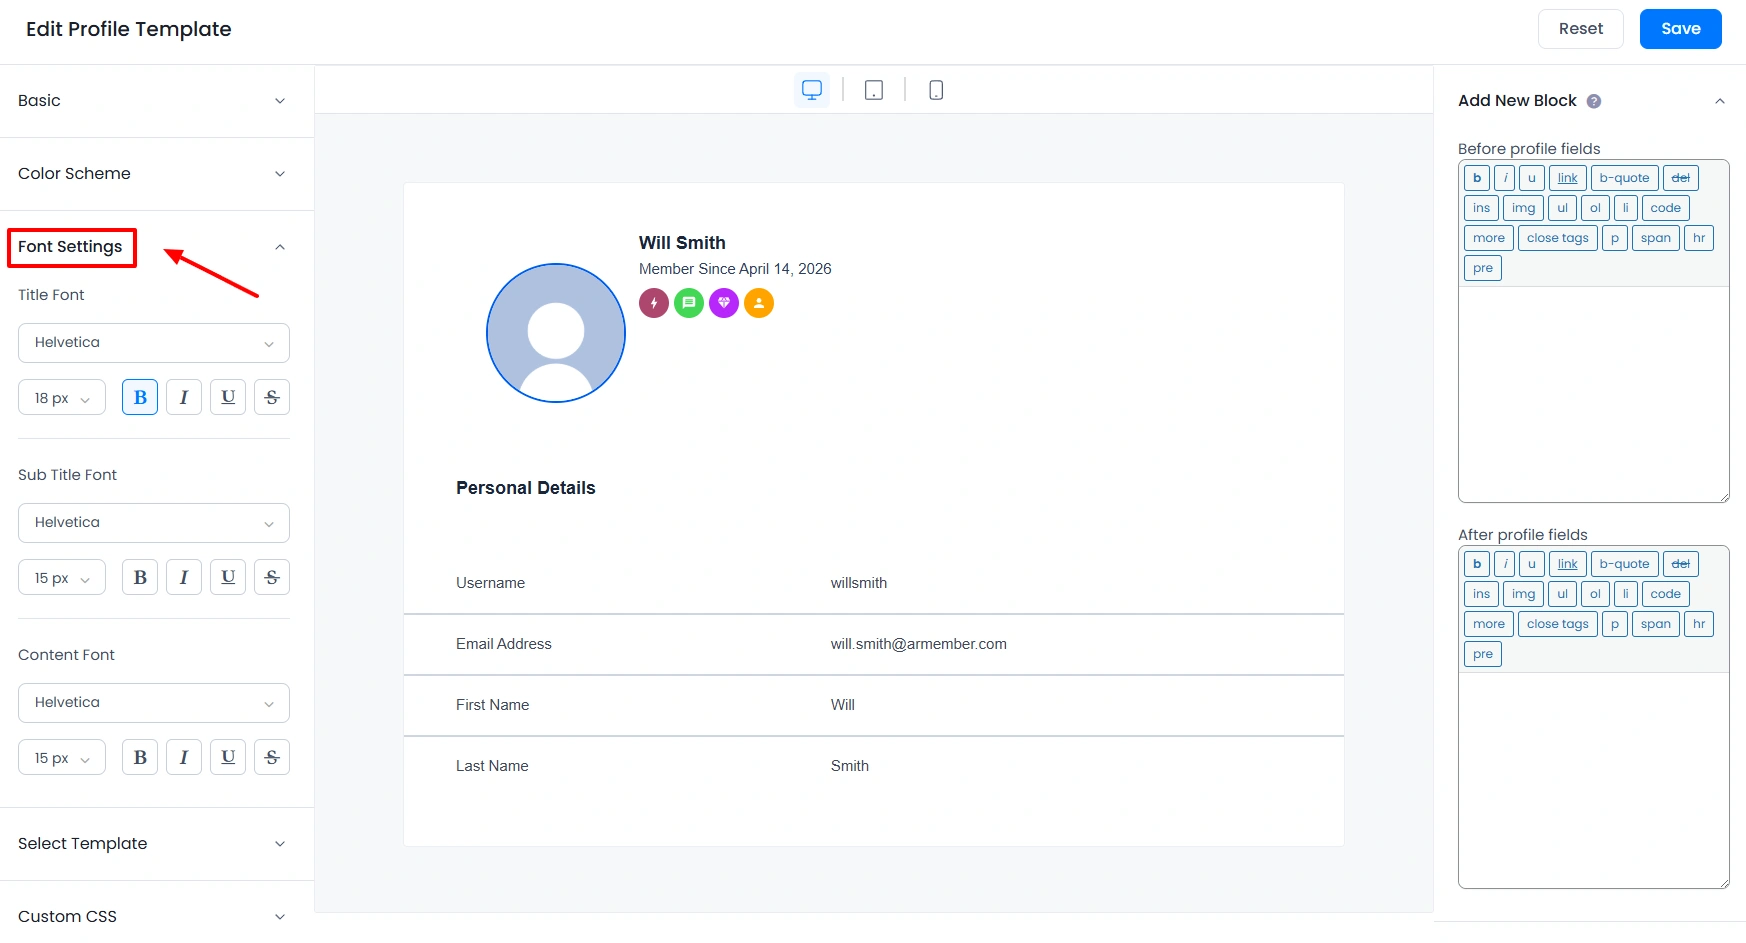
Font Settings: From here you can set font styling like font family, font size, font weight, font style, font decoration, & etc. We also support Google Fonts.

-
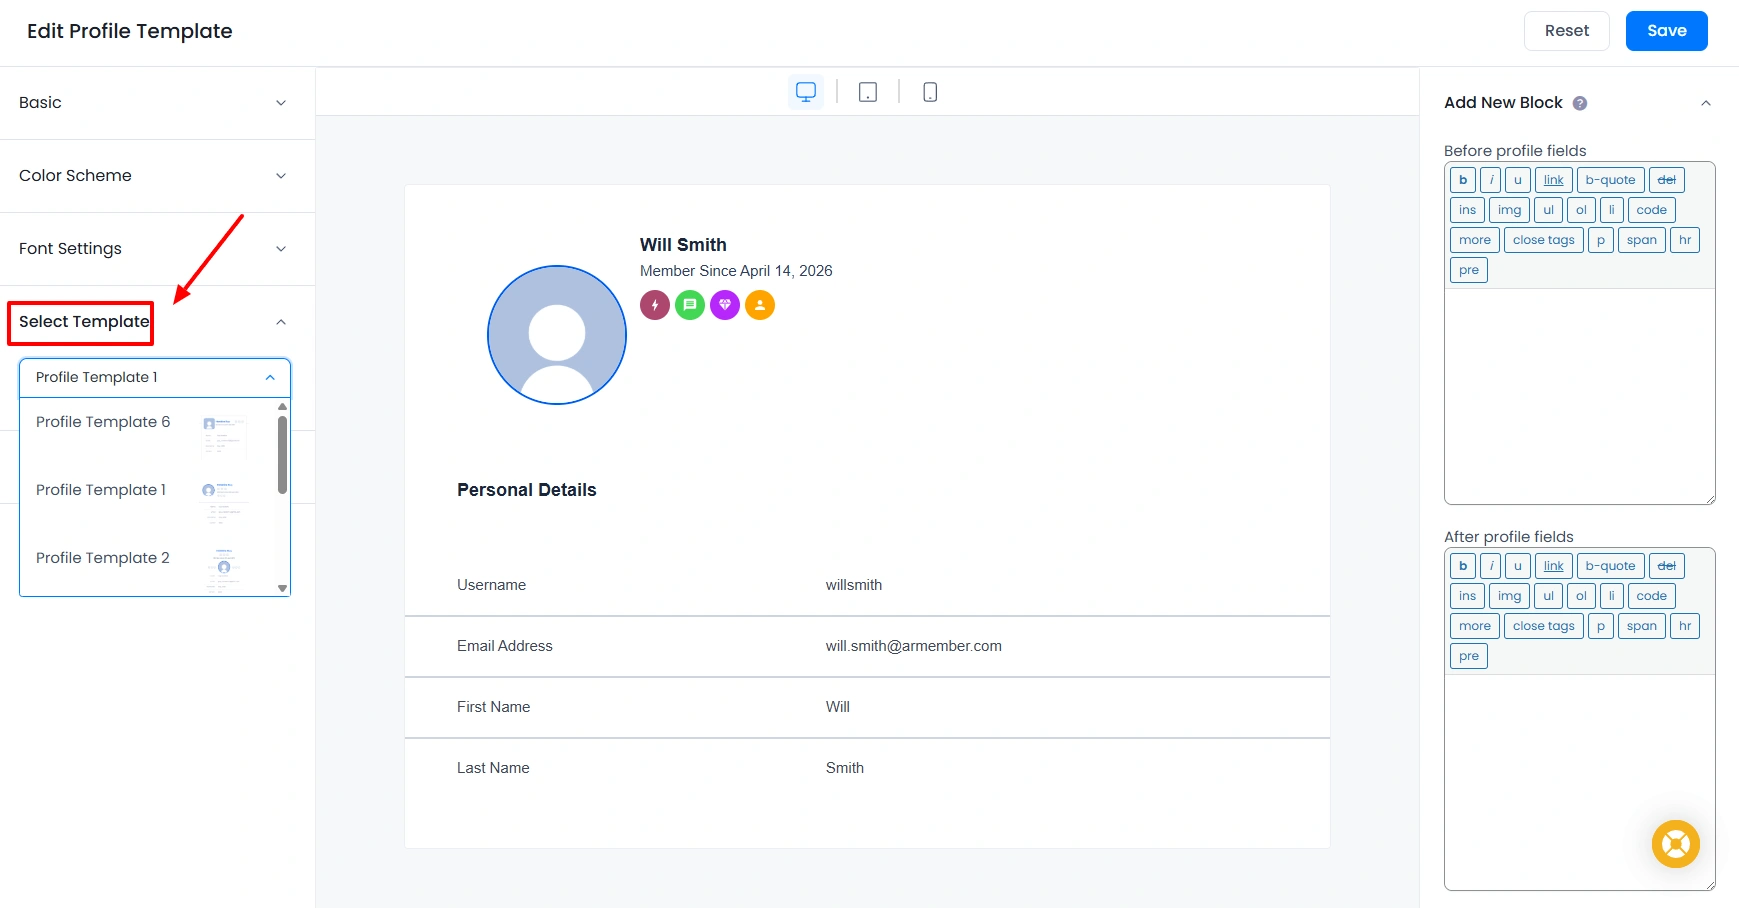
Select Template: From here you can change profile template anytime.

-
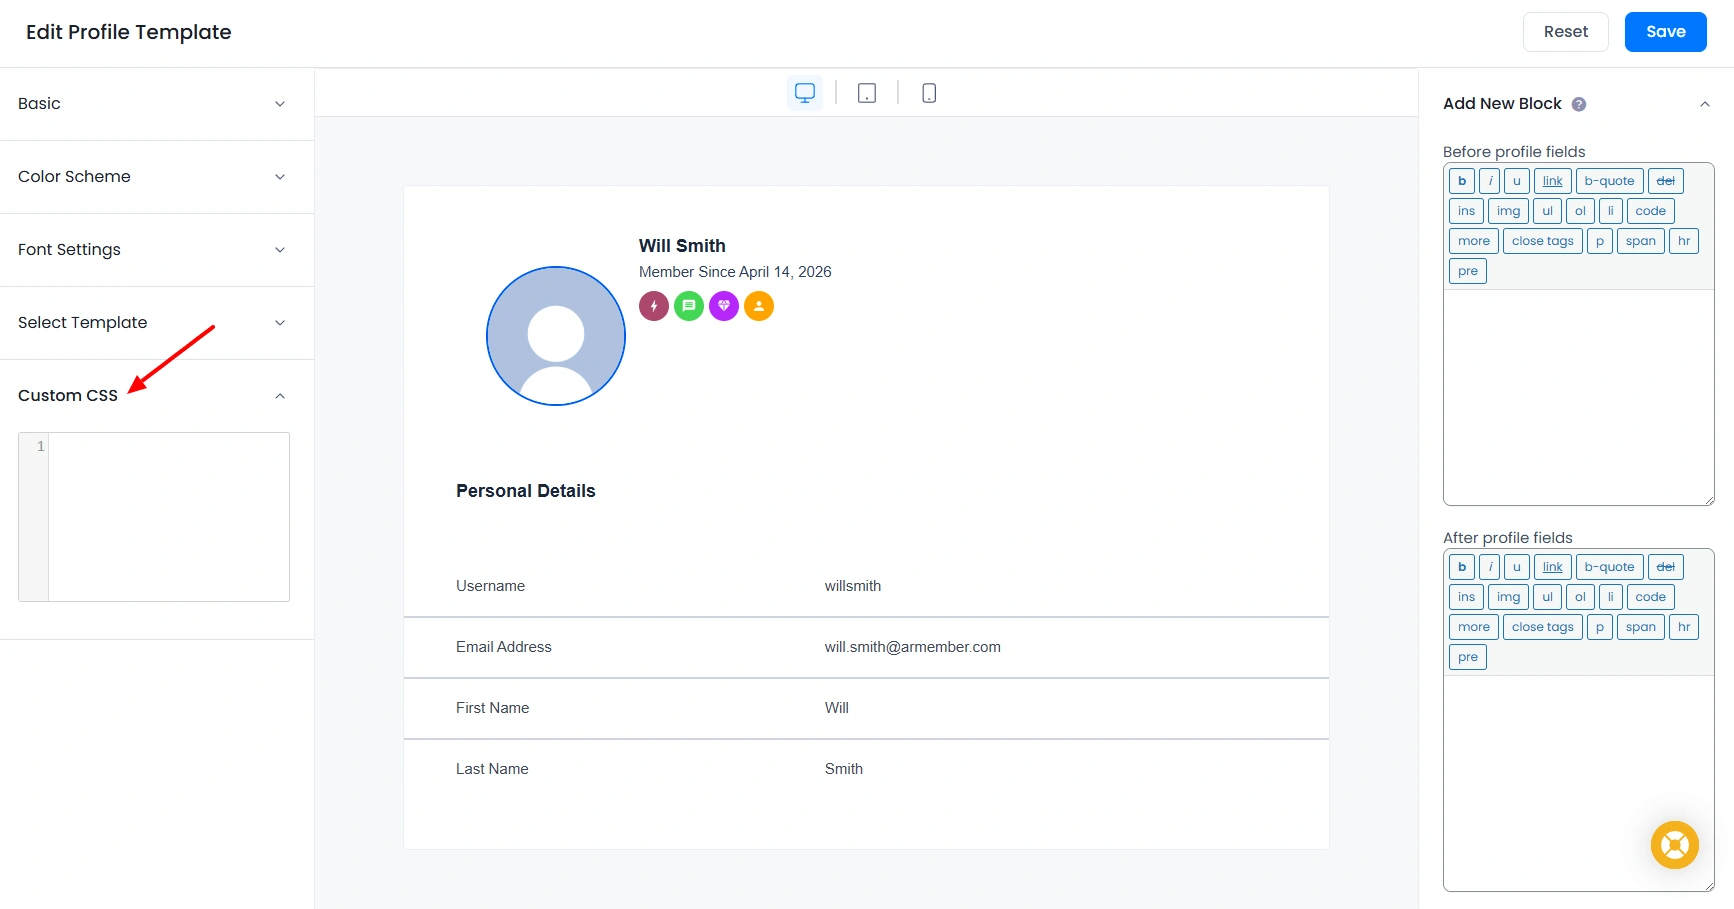
Add Custom CSS: When you click on the Add Custom CSS icon, a popup will open where you can add custom CSS to add your own style in the profile template.

Right Sidebar Options
-
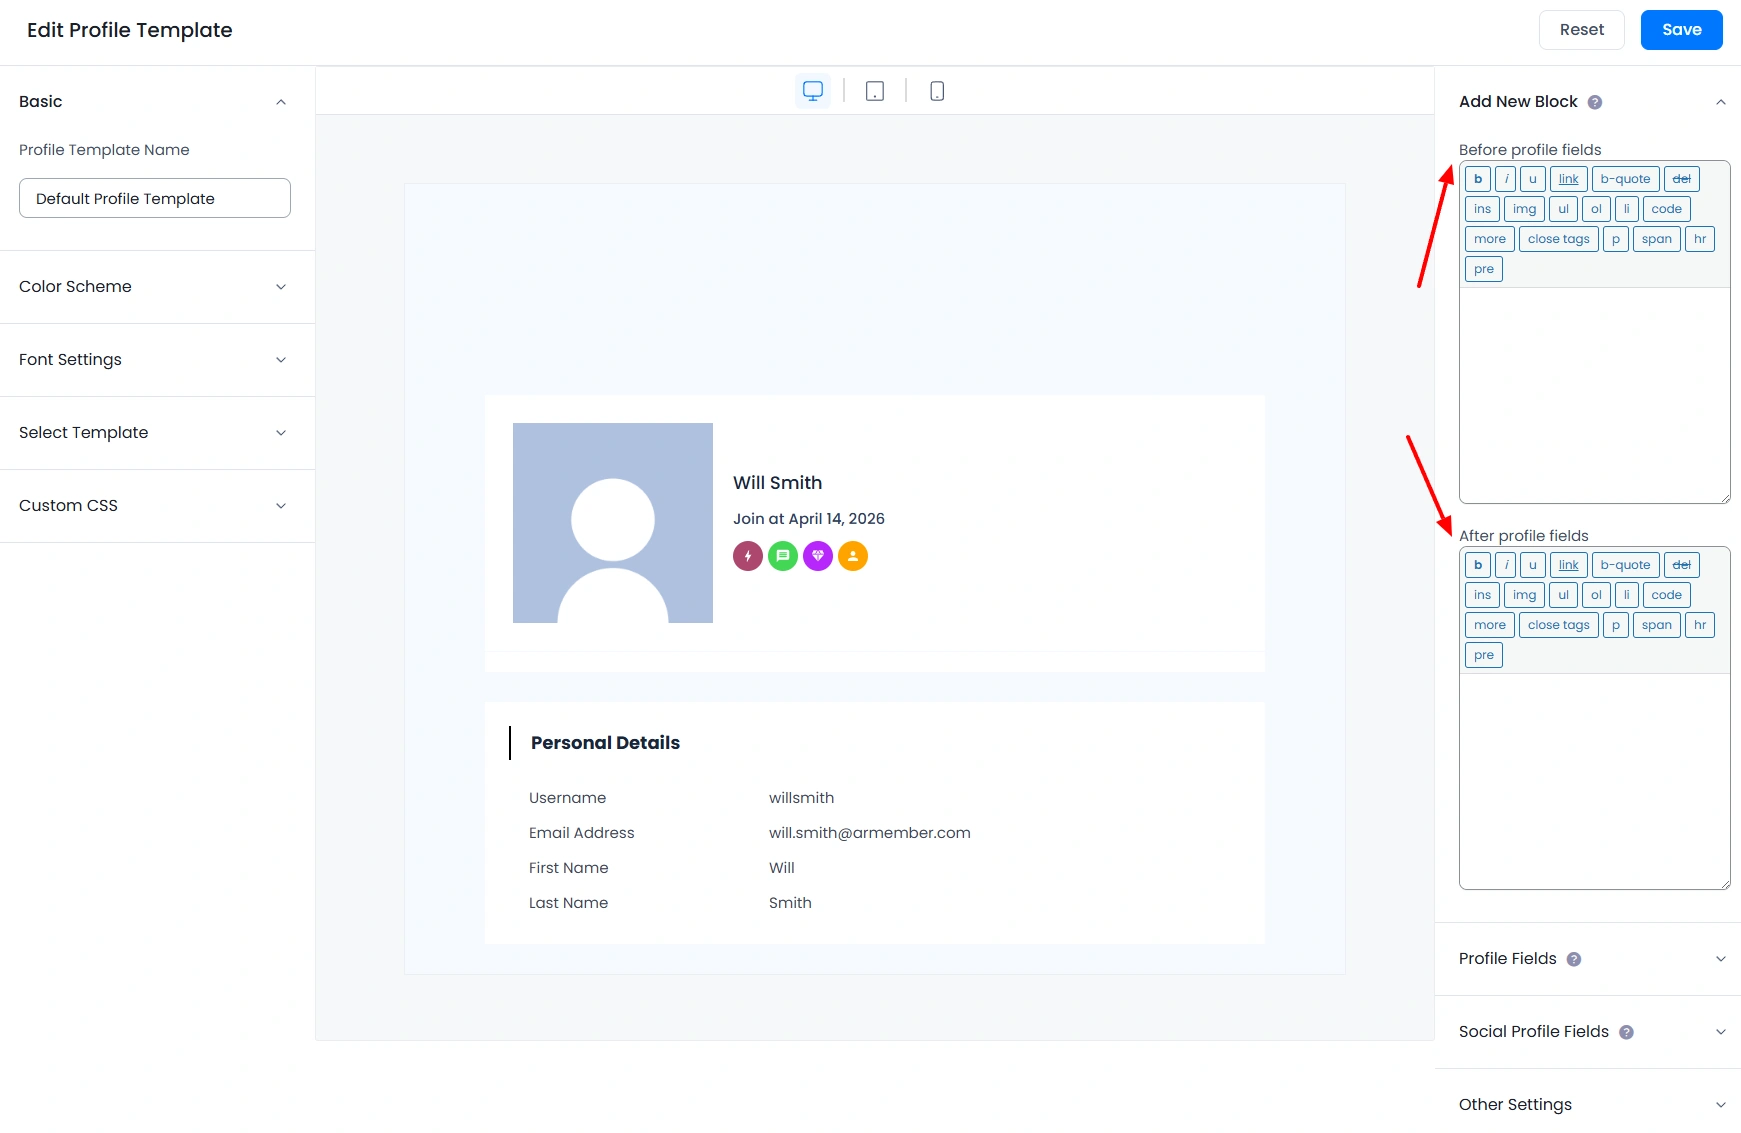
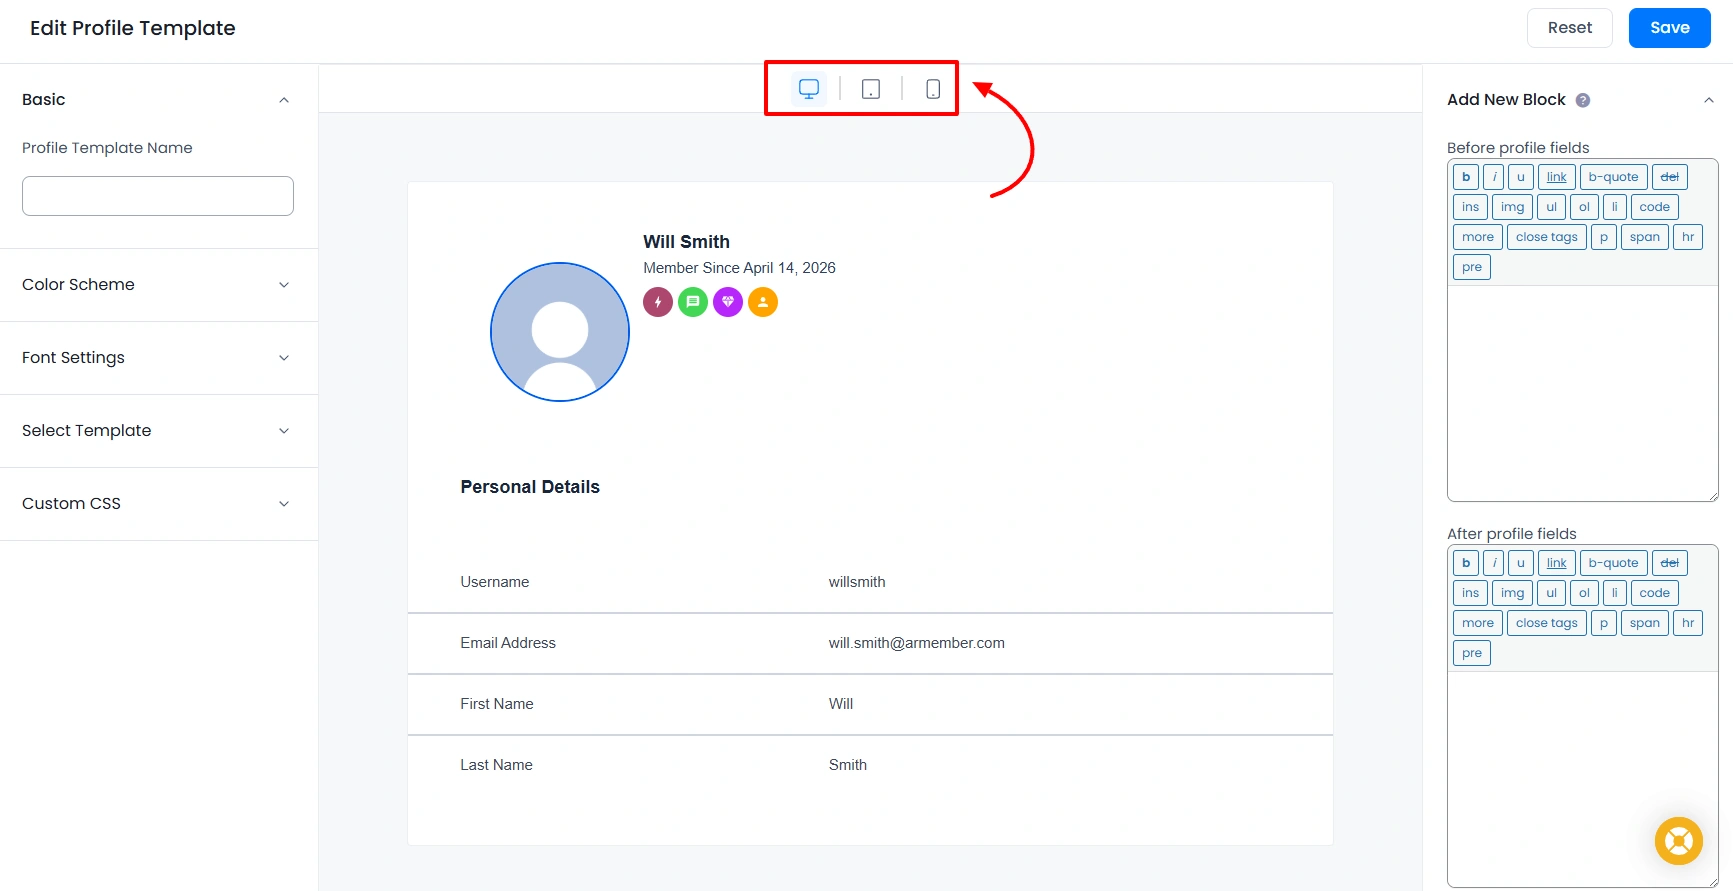
Add New Block: From here you can add any HTML before and after the user profile fields section.

-
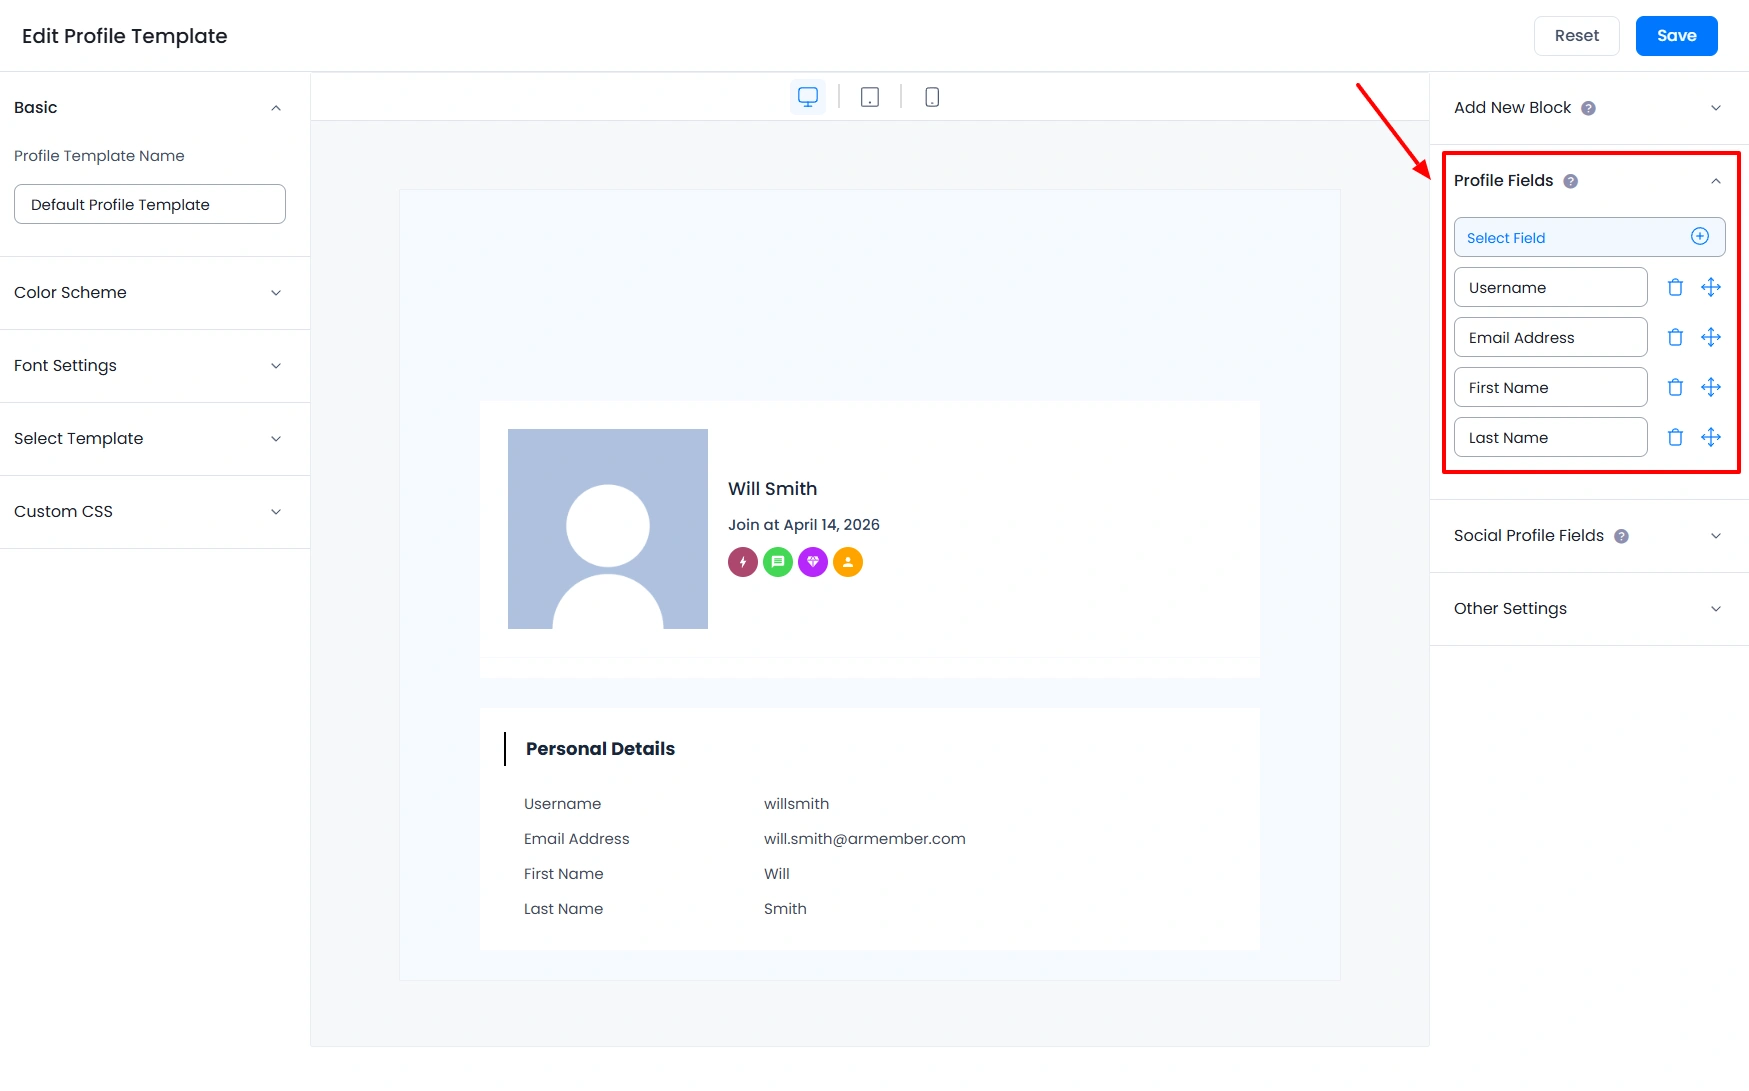
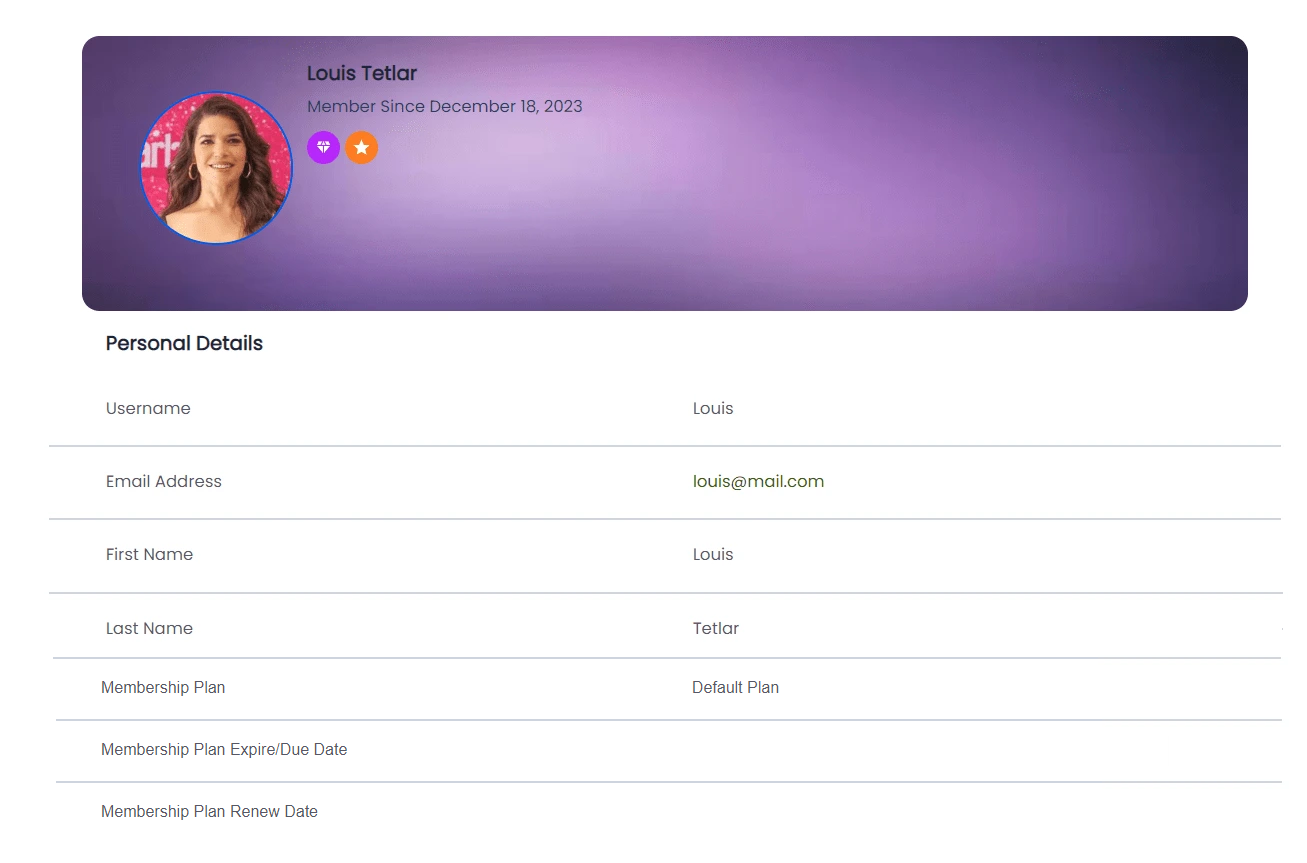
Profile Fields: Select the user fields you want to display in the profile section. Click the edit icon to add translated field labels. Also from here you can change the order in which fields are displayed in this section, and you can display the
Membership Plan,Membership Plan Expire/Due DateandMembership Plan Renew Datetoo.
-
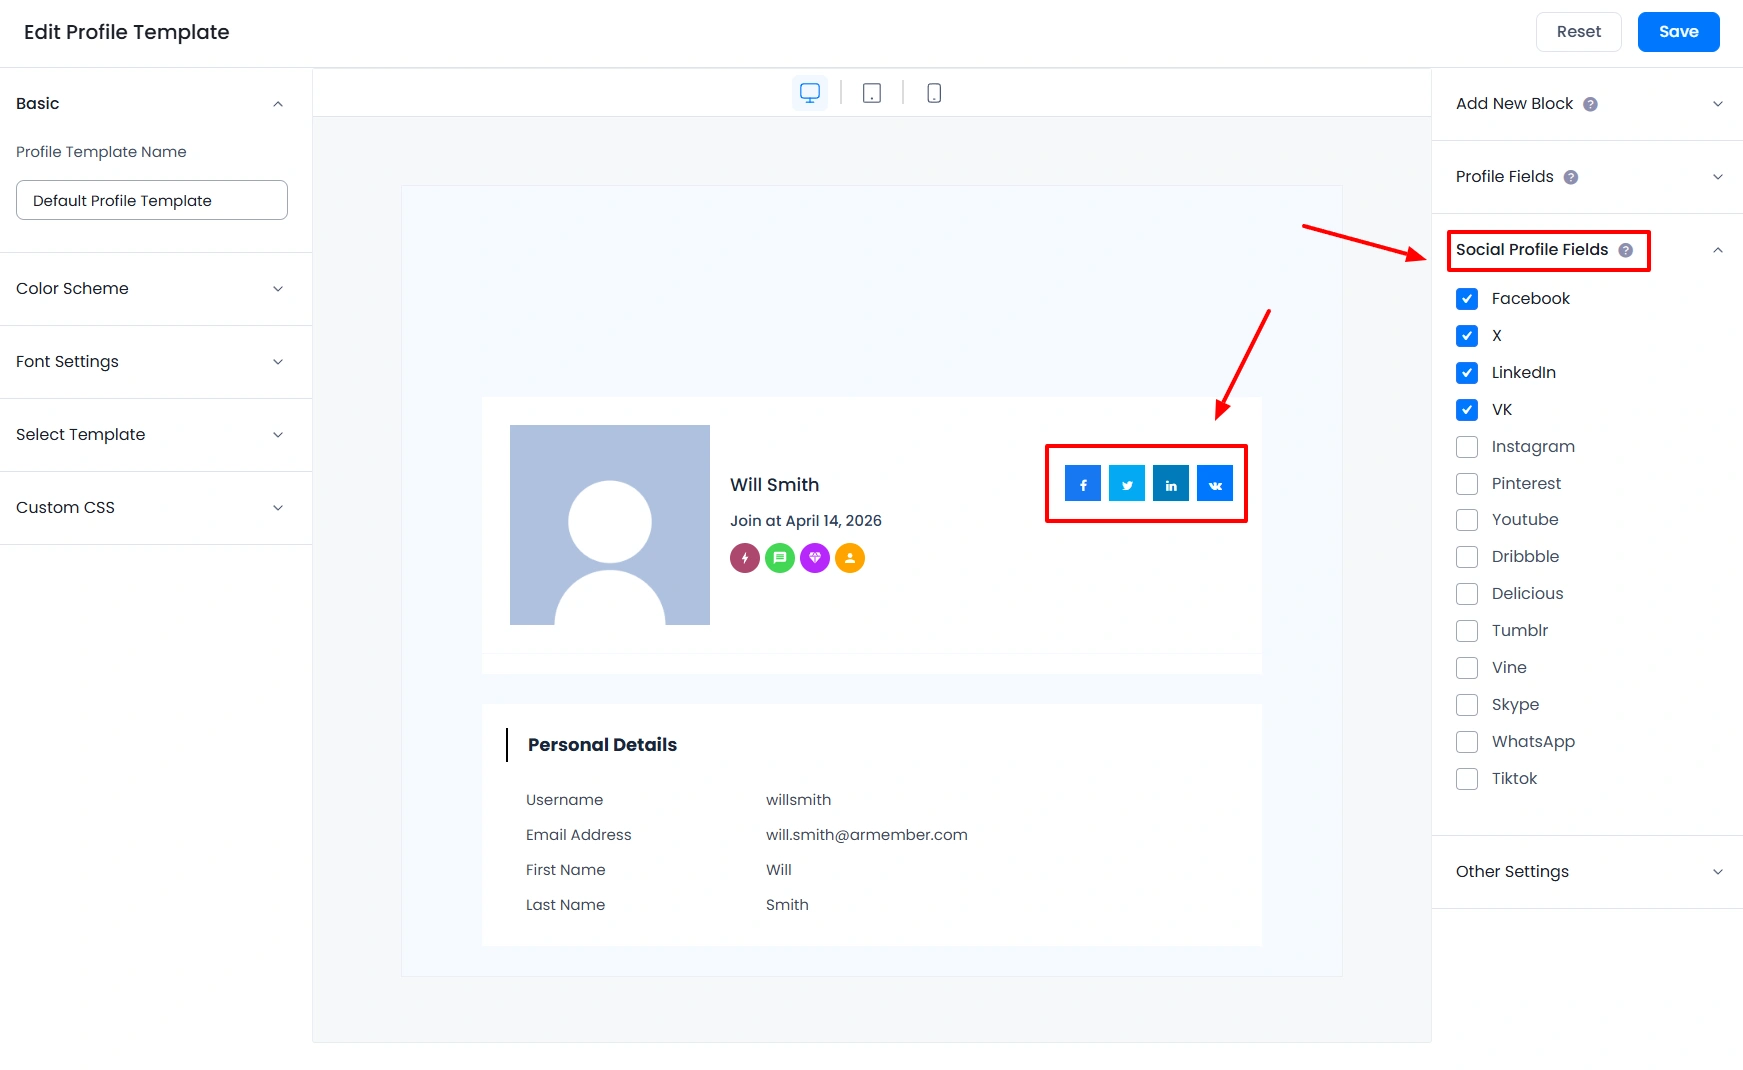
Social Profile Fields: From here you can select which social profile field icons, like Facebook, Twitter, LinkedIn, etc., you want to display in the profile header.

-
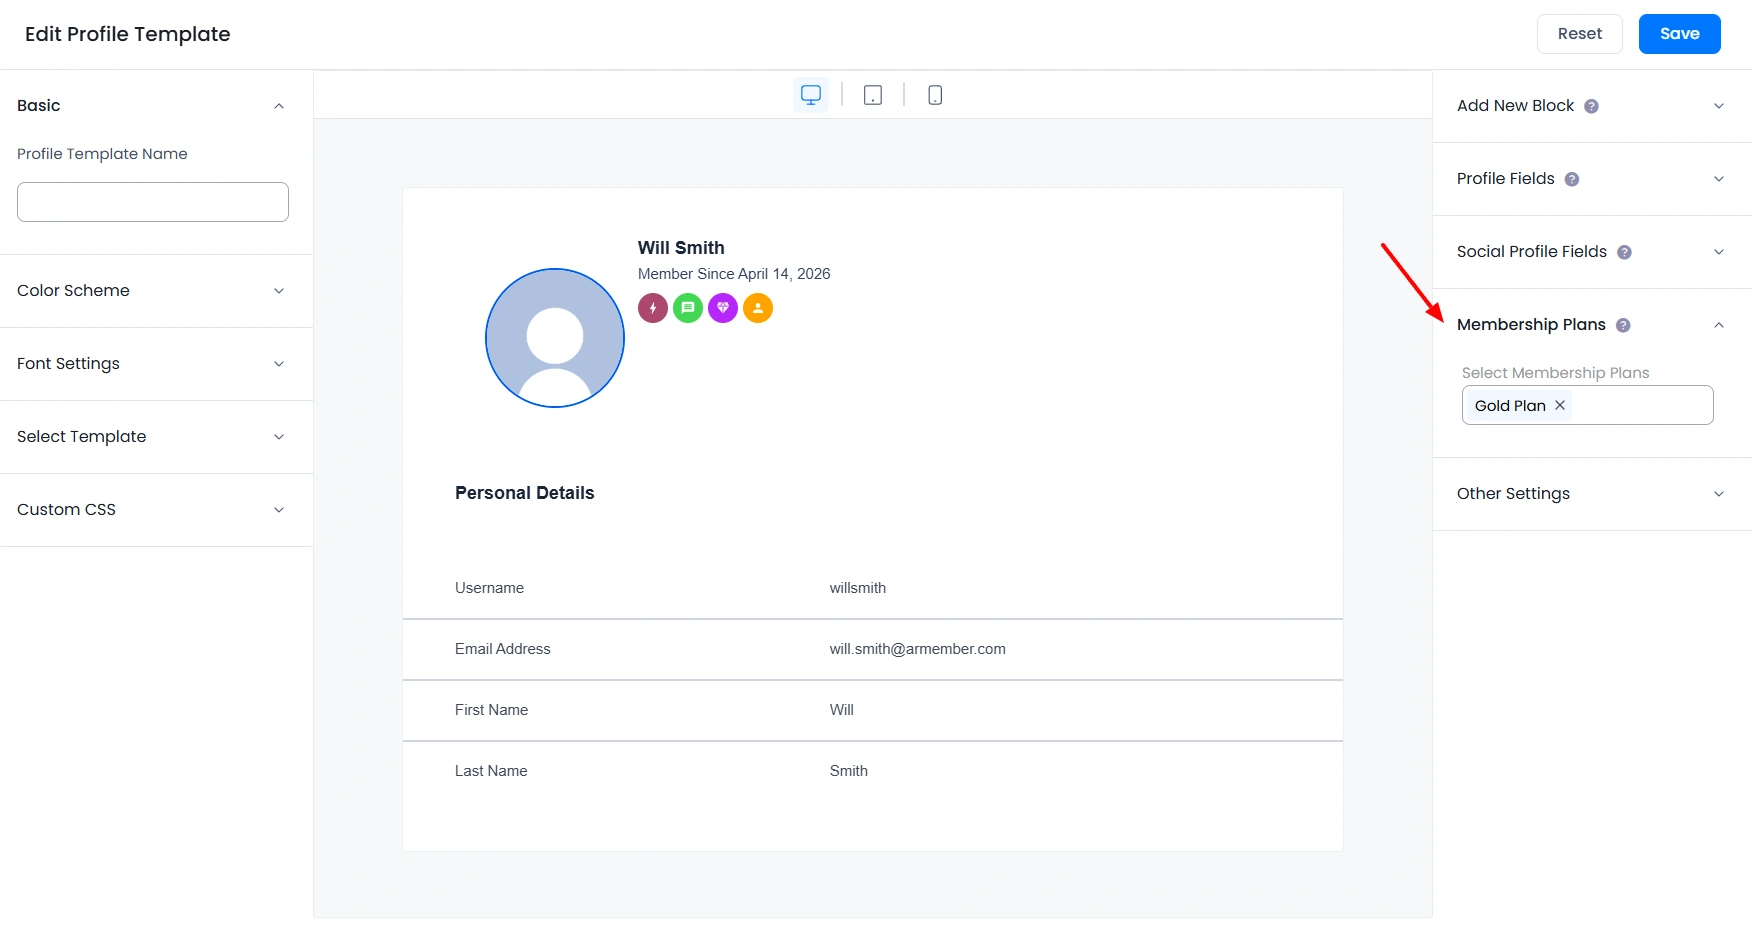
Membership Plans: From here you can select one/more membership plans. This template displays profiles of users who belong to the selected membership plans.

-
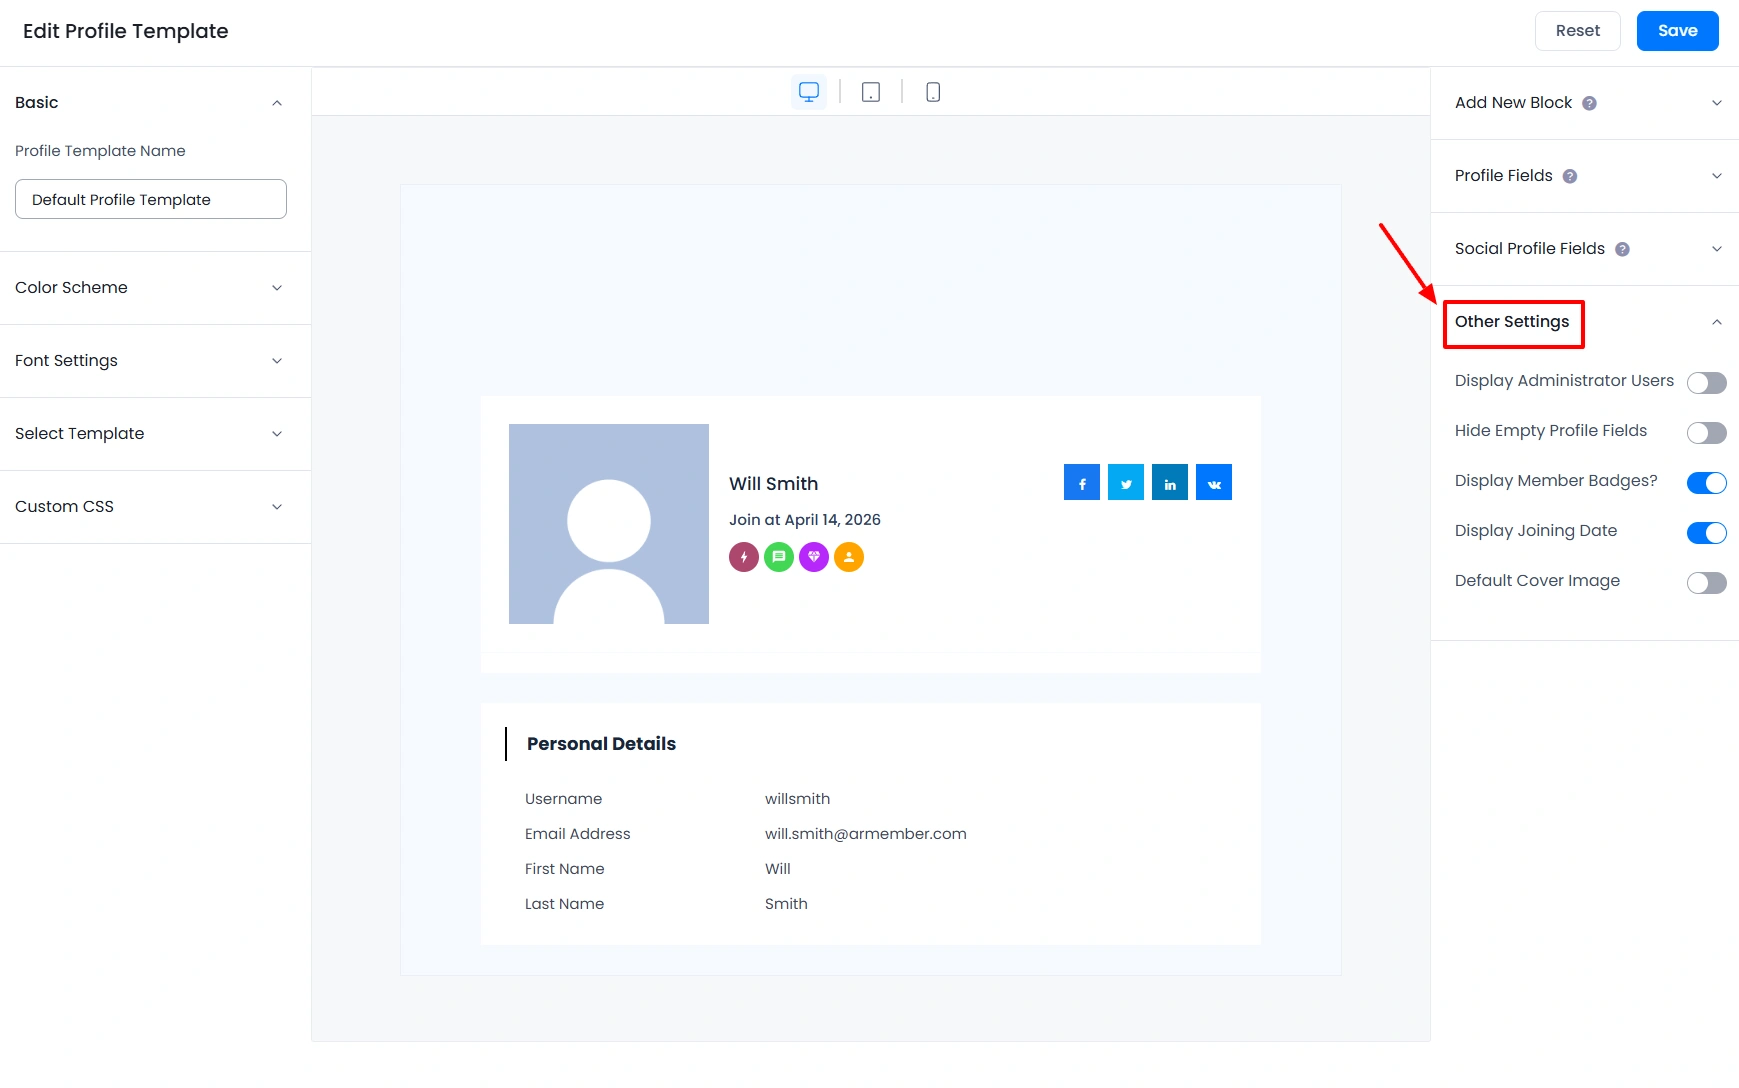
Other Settings:

-
Display Administrator Users?: If this switch is enabled, then only the profiles of administrator users will be displayed.
-
Hide Empty Profile Fields? : If this switch is enabled, then empty profile fields will remain hidden in the profile fields section.
-
Display Member Badges? : If this switch is enabled, then badge icons will be displayed in the profile header if the user has any badges.
-
Display Joining Date?: If this switch is enabled, then only the member’s joining date will be displayed in profile header.
-
Default Cover Image?: If this switch is enabled, then only the default cover image will be displayed if the user has not set any cover image; otherwise, no image will be displayed.
-
Profile Views
You can have a preview of the templates to see how the template will look at the front end. You can also check the responsive view of the template with the help of the responsive options available in the top belt and they are:
How to map the Profile Page?
When you enable the social feature addon for the first time, Default Profile page will be inserted with the profile template shortcode automatically. This page will be used as the user’s profile page. You can change the profile page at any time from Page Setup.
Also, only one shortcode is used for all profile templates. Different profile templates will be displayed according to the user’s membership plan.
Note: If Multiple Membership Addon is activated and you have the profiles differently as per plan, simultaneously if the member holds more than one plan then the template visible to the member will be from the higher valued plan.
Profile Shortcode:
[arm_template type='profile' id='1']Preview Template
You can have a preview of the templates to see how the template will look at the front end. You can also check the responsive view of the template with the help of the responsive options available in the top belt.
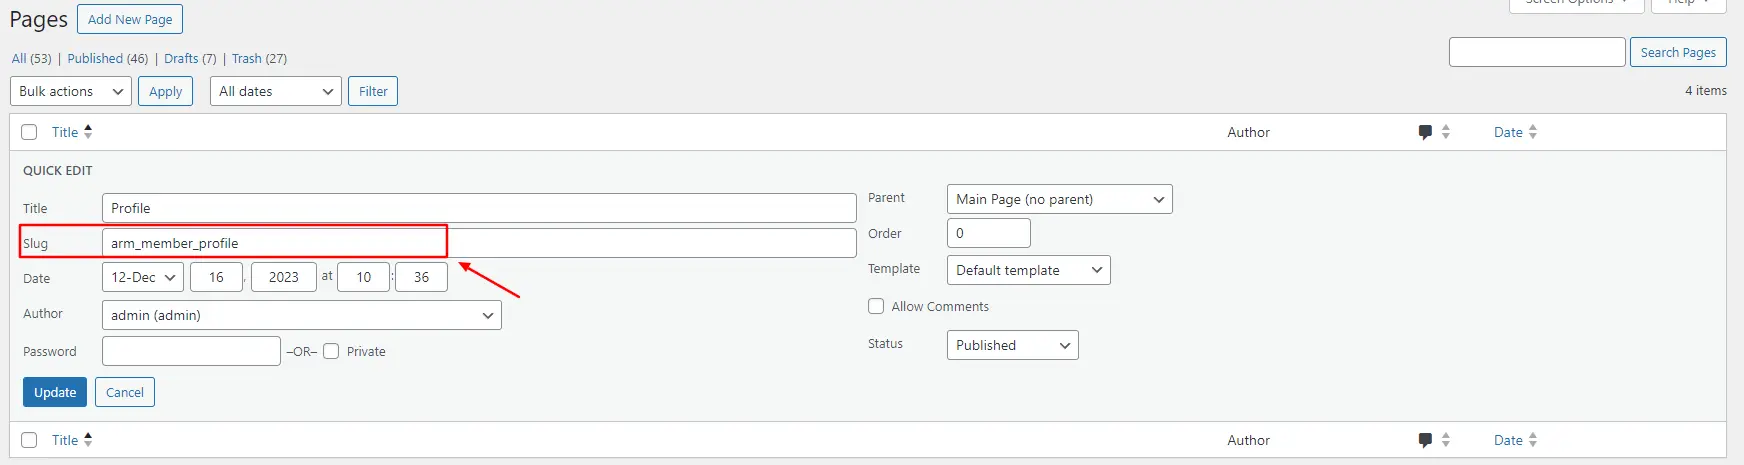
How to change the slug for the profile page?
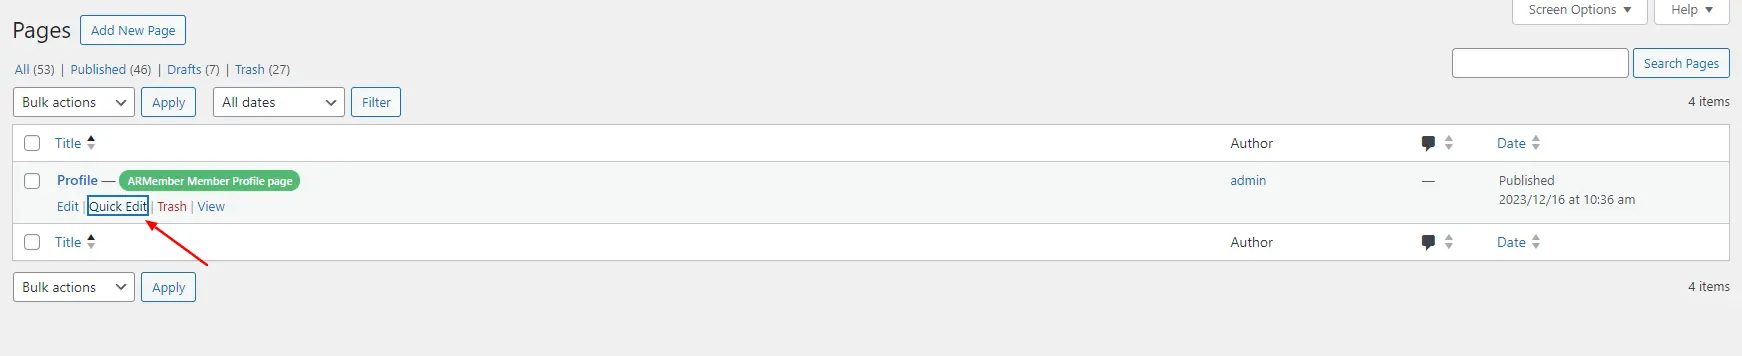
ARMember does create a Profile page by default when you activate the Social Feature Addon. You can check this page from the Admin Panel ⇾ Pages, here a profile page will be created.
And accordingly, when the user views the content, then the URL will be passed as https://site_url/arm_member_profile/{USERNAME} or {USERID}. But if you are willing to change the “arm_member_profile,” then there are two ways to change it.
1. You can navigate to Admin Panel ⇾ Pages and hover on any page, and you will be able to check the Quick Edit option. Click on it and change the “Slug” as per your requirements.
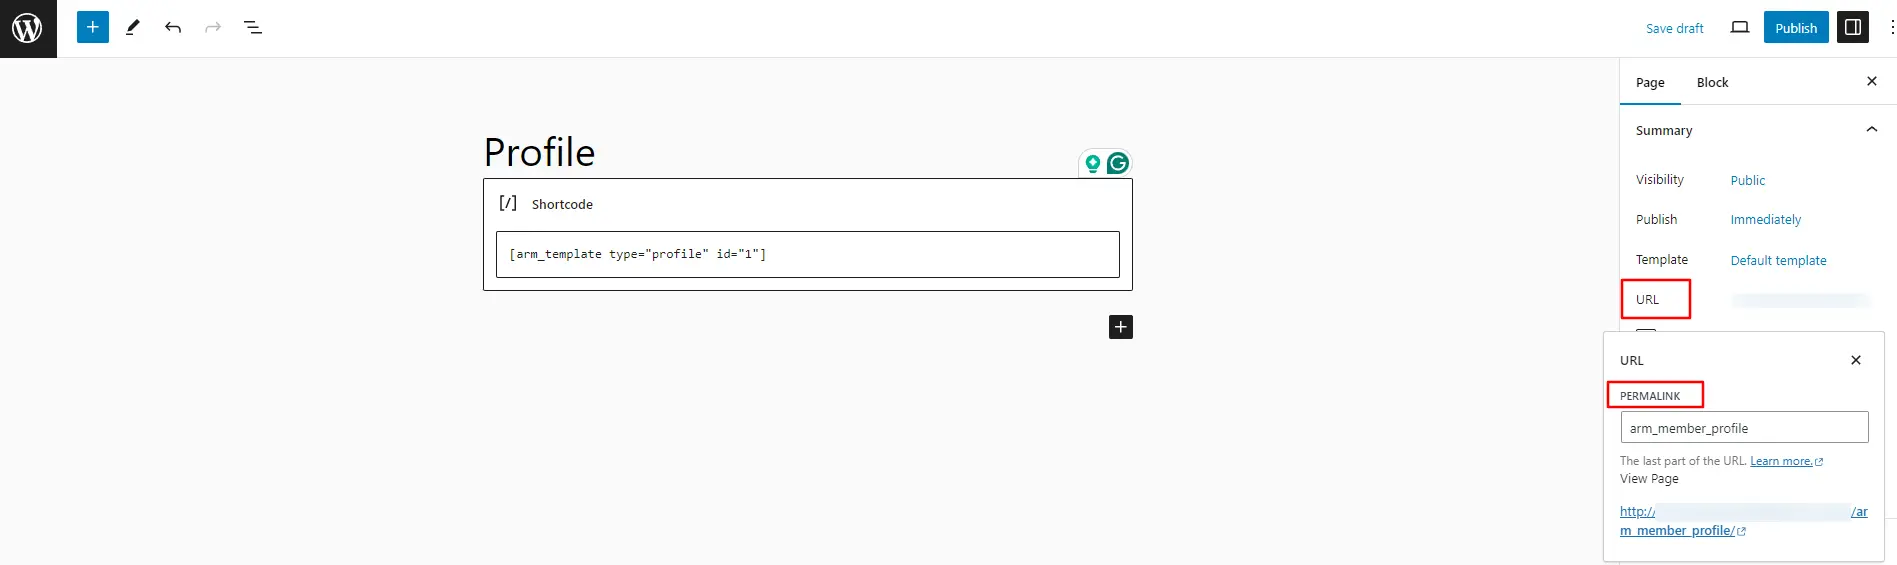
2. The second way is that you can edit the page, and there you will have an option to set the permalink. Kindly check the below screenshot, and accordingly, you can change the permalink as well.
Once you change the permalink/slug, then you need to save the profile page at the page setup again to refresh the data/changes. In order to do so navigate to ARMember ⇾ General Settings ⇾ Page Setup; here at the Profile, you would have selected the profile page, so simply click on the Save button to refresh the changes.