Steps for Configure Social Connect
Social Connect is an inbuilt addon offered by ARMember. This addon delivers the features which are required by the many sites. By activating this addon you can allow the member to log in with multiple social network sites which makes it easy and is a user-friendly feature.
It is very easy to can multiple social connect networks at the login form. To achieve this, very few steps are needed to be followed in order to configure various social connect.
This will be only available if Social Connect Addon is activated from Add-ons.
Basic Configuration
Follow the below provide steps in order to configure the Social connect at your site.
- Configure the settings
- Add the required credentials
- Add the Social Connect at Login Form
- Front-end view
Step 1: Configure the settings
The first step to set up the social connect network on your site, you will need to configure the settings as per your site requirements. To configure, navigate to ARMember ⇾
General Settings ⇾ Social Connect.
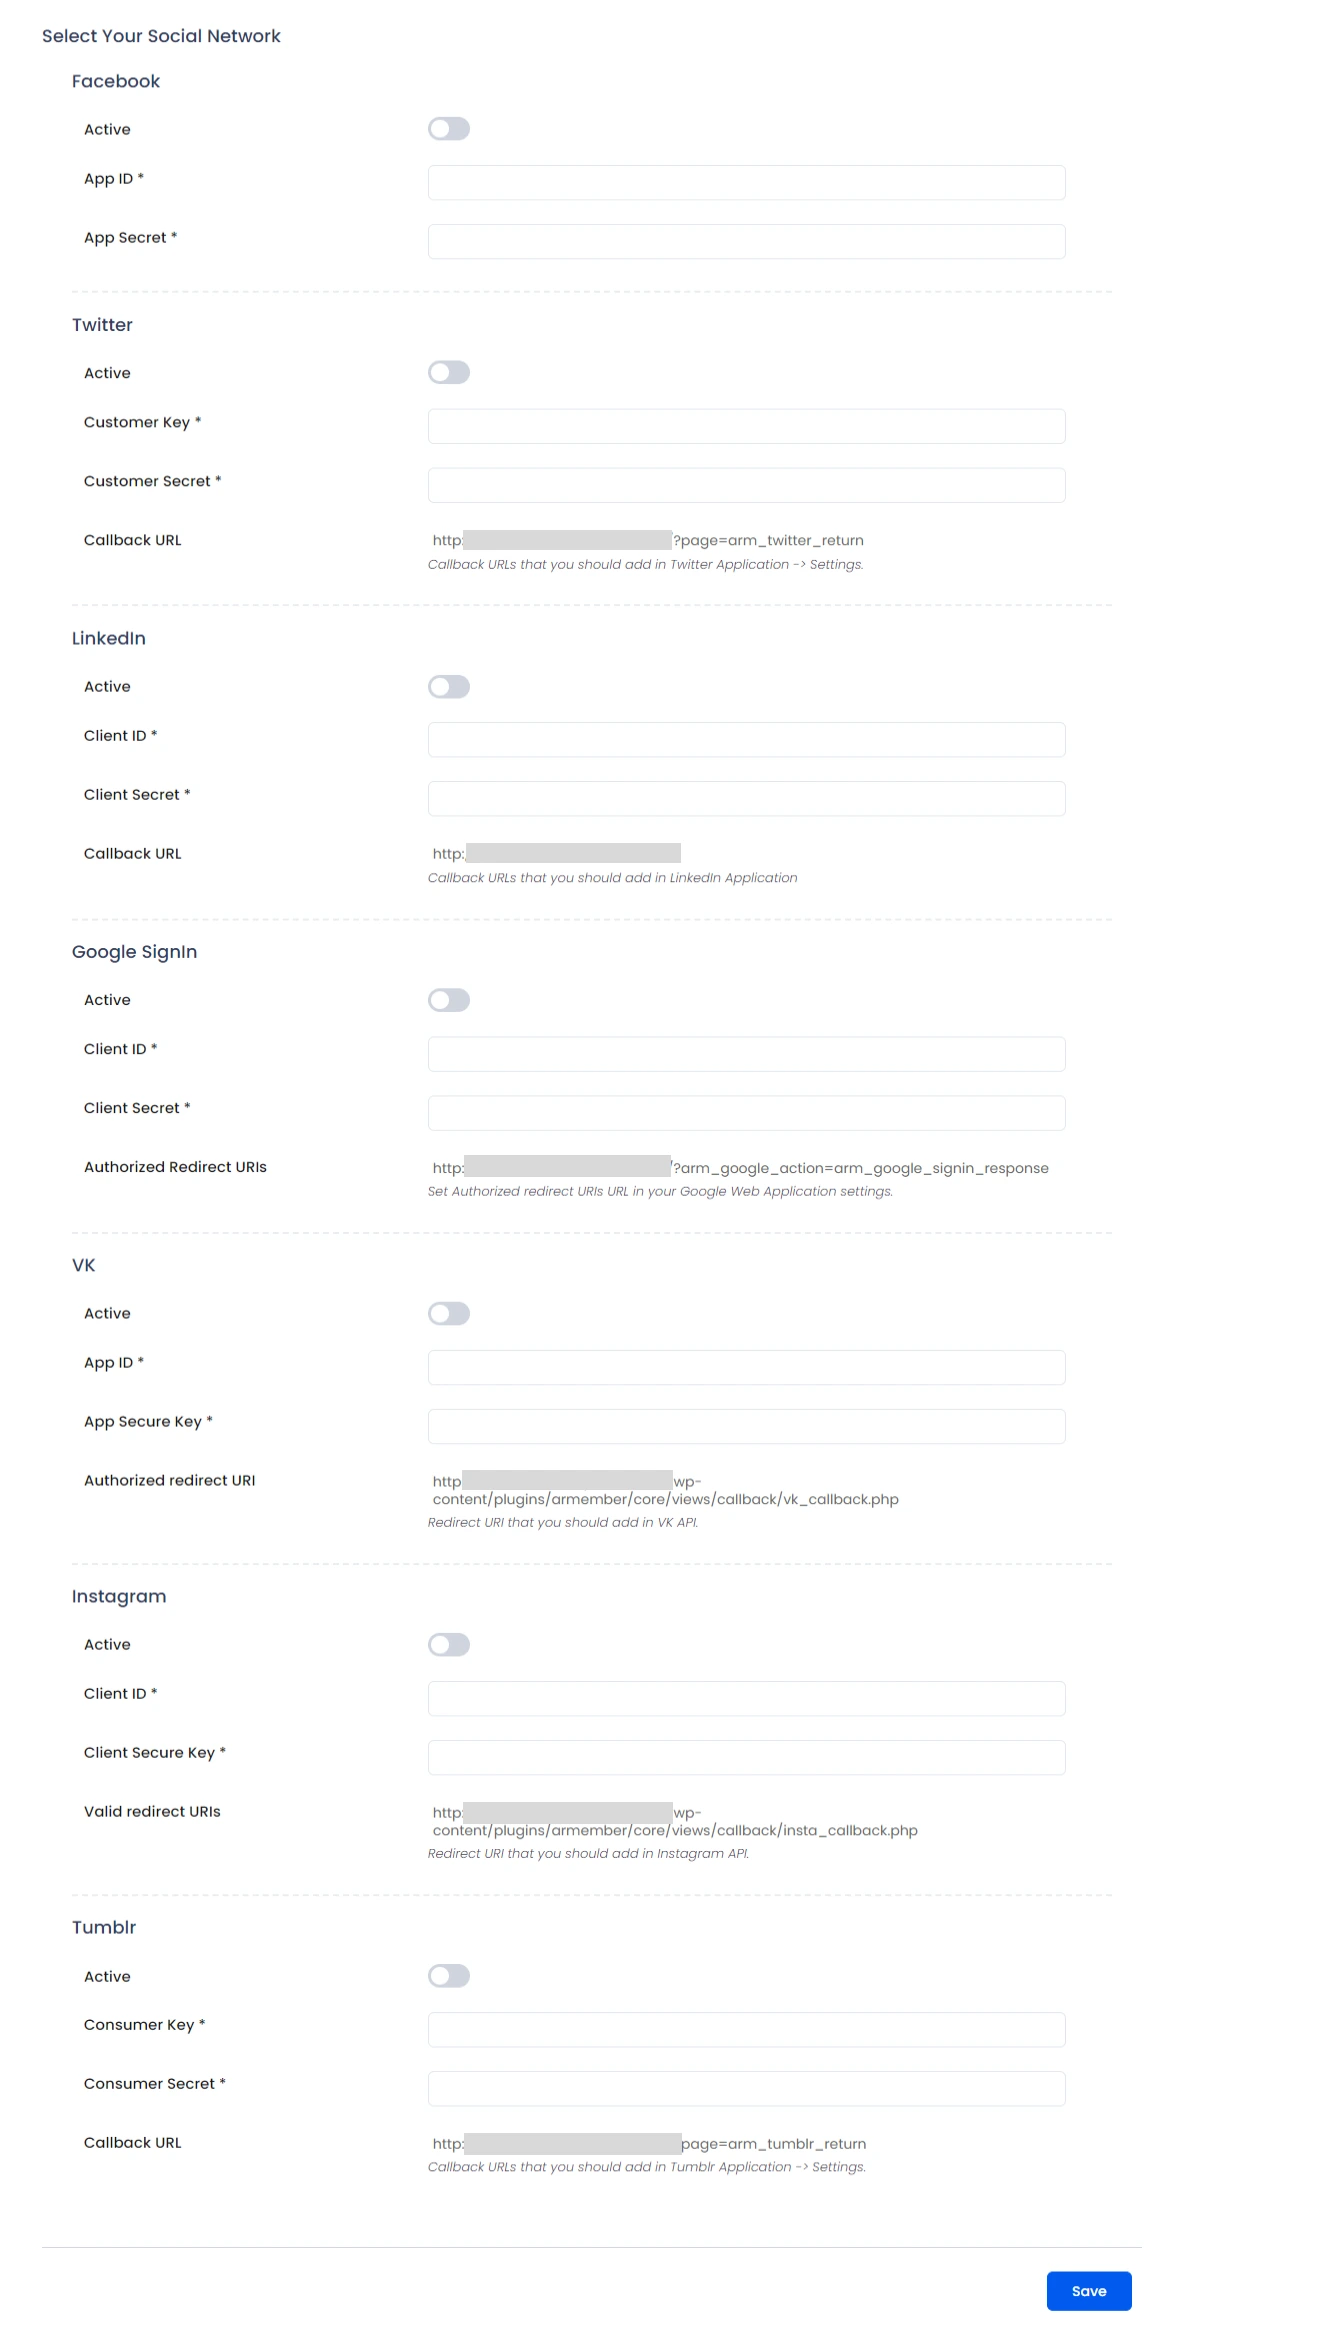
Here you can enable the option to set the social networks. For more information, please click here.
Step 2: Add the required credentials
Once you have set up the settings then you can check the multiple social networks, you can add the proper credentials in order to configure these social networks at your site.
ARMember does provide seven popular social networks to add at your site. If you want to configure, then you can check the individual document for each social network is available at ARMember.
Step 3: Add Social Connect at Login form
As soon as you add the credentials for the required network, then the next step is to add these login buttons to the ‘Login Form’.
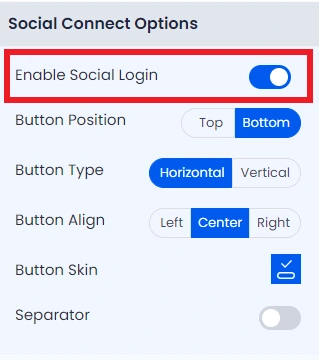
To add the icons you can navigate to ARMember ⇾ Manage Forms ⇾ Add/Edit Login Form , here on the right side you will be able to check the ‘Social Connect Options’
Here you get multiple options such as Button Type, Button Align, Button Position in order to set the login buttons as per your requirements. You get an option Button Skin with which you can choose the type of button you want to be displayed at the front-end.
When you click on the Button Skin then this type of window popup will open, here you will have to check the checkbox on the top which you have to configure at General Settings tab and then select the type of button you want to display.
Step 4: Set Redirection On One-Click Signup
ARMember does provide a facility to set the redirection if you have enabled the option of “One-Click Signup” at the ARMember ⇾ General Settings ⇾ Social Connect. The redirection will be triggered when the social connect button will be clicked. For more information, click here.
The user’s details fetched when ‘One Click Signup’ is enabled will be Firstname, Lastname & Email Address.
Step 5: Front-end view
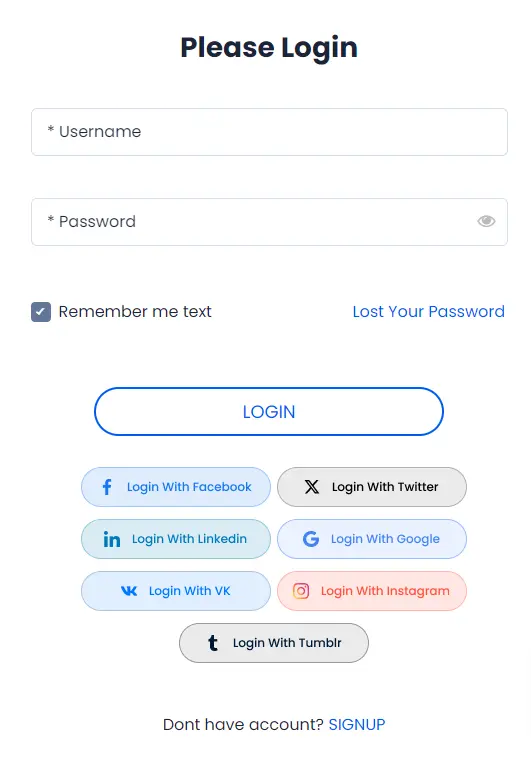
As soon as you complete all these steps then just save the changes and then check the login form at front-end side, you can check the provide screenshot to get an idea.
Add Button at the Registration Form
ARMember does provide a facility to add the shortcode of the social connect buttons at registration or any other page so if you wish to set the Social Connect button at the registration page then kindly navigate to the Admin Panel ⇾ Pages ⇾ Add/Edit Registration page and here at the Membership Shortcode block select Action Buttons and choose the button. To have more information, kindly click here.
Further more to include this inside the registration form like the login form, you can adjust that button inside the registration form with the help of Custom CSS.


