With ARMember Social Login Addon, members get a facility to connect Twitter login button directly via Twitter credentials. But firstly, to enable Twitter one click signup, you need to configure the ARMember Social Connect Addon and X (formerly Twitter).
In this document you will be able to set up X through a step-by-step guide on how to create the X App and connect it to ARMember.
Setting up X (formerly Twitter) Application
As mentioned, you can connect ARMember to the X application. Create your X App through the X Developer Portal using your X Developer Account.
Setting Up Your X Application
Let’s set up the custom X Application one-by-one:
- Log in with your X (formerly Twitter) credentials if you’re not already signed in.
- Navigate to X Developer Portal
- If you don’t have a developer account, you’ll be asked to create one during the process.
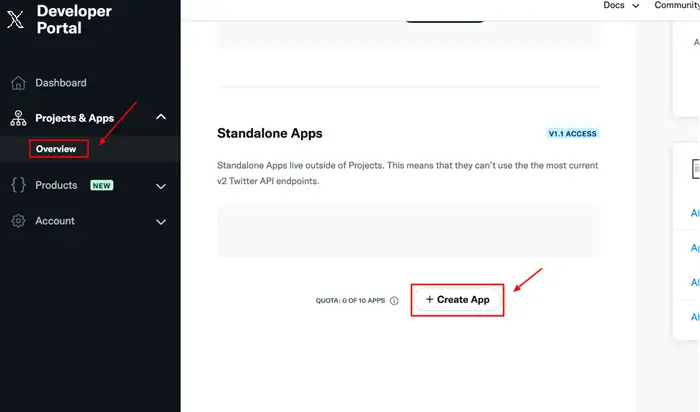
- After you are successfully logged in then navigate to the
Projects & Apps⇾ Overview page. - You can use your existing projects or create a new one by clicking
Add Project. - At the time of creating, you’ve to add the name of the project, select your use case, and add the project description.
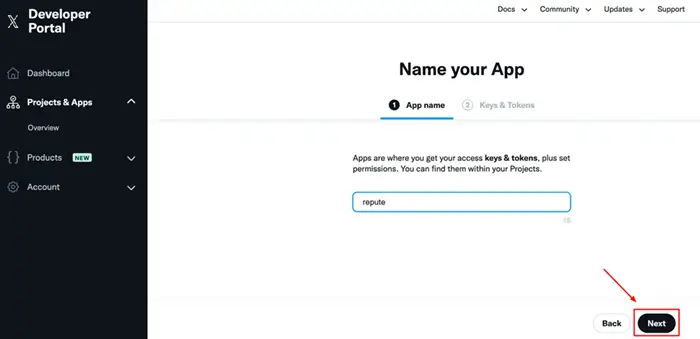
- Add the App name and click Next. This will create your X app.
- Further, create an App for your new project. If you’re adding the App to the existing project, navigate to your App, and click the
+ Add Appbutton.
X App Settings and User Credentials
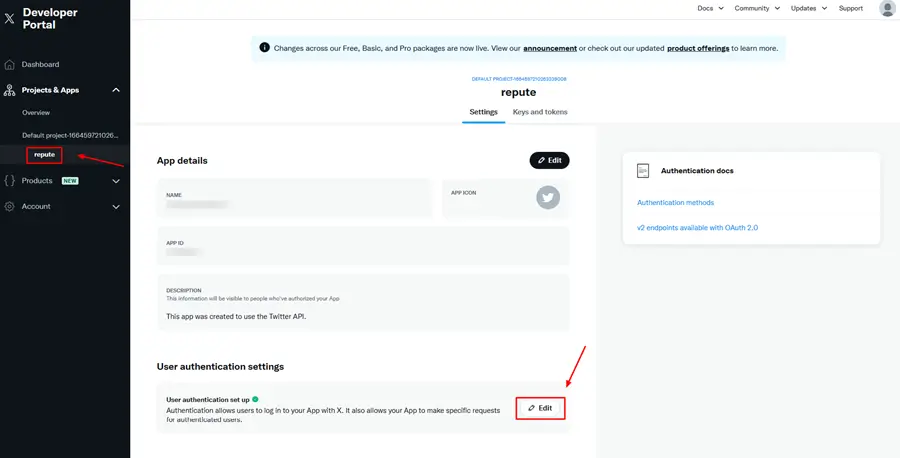
Now that your X App is created, the next step is to configure it and generate the necessary credentials:
- Go to your App Settings page.
- In the User Authentication section, click the Set-Up button.
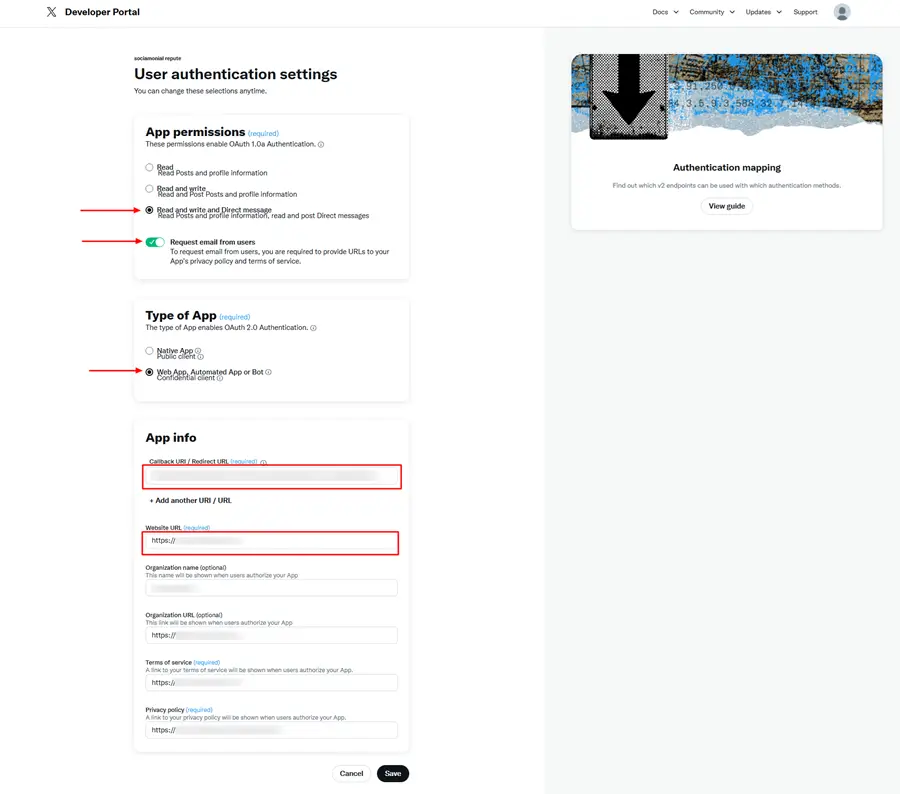
- Edit
User authentication settingssection, click on Edit, and then atApp permissionssection. Here, selectRead and write and Direct messageoption and enableRequest email from usersoption. After that, from the same page atType of Appsection, enableWeb App, Automated App or Botoption. - At the
App infosection, addCallback URI / Redirect URLas specified at theARMember⇾General Settings⇾Social Connectpage atTwitterconfiguration section. - Scroll down to the bottom of the page and click the Save button.
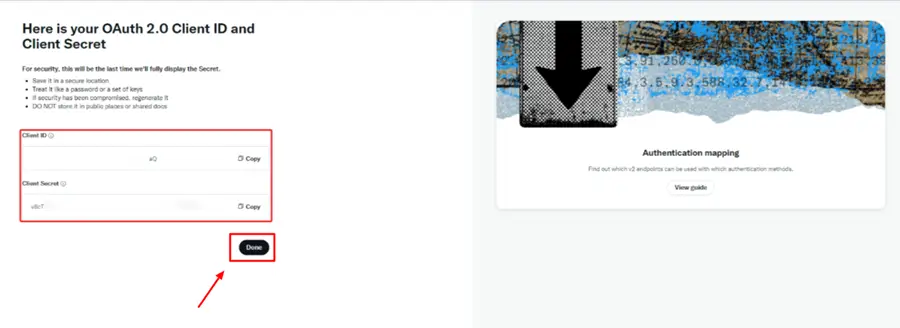
- Your app credentials will be automatically created on the following page. You will need to add these credentials to ARMember.
- Save Client ID and Client Secret in the safe place, and click Done.
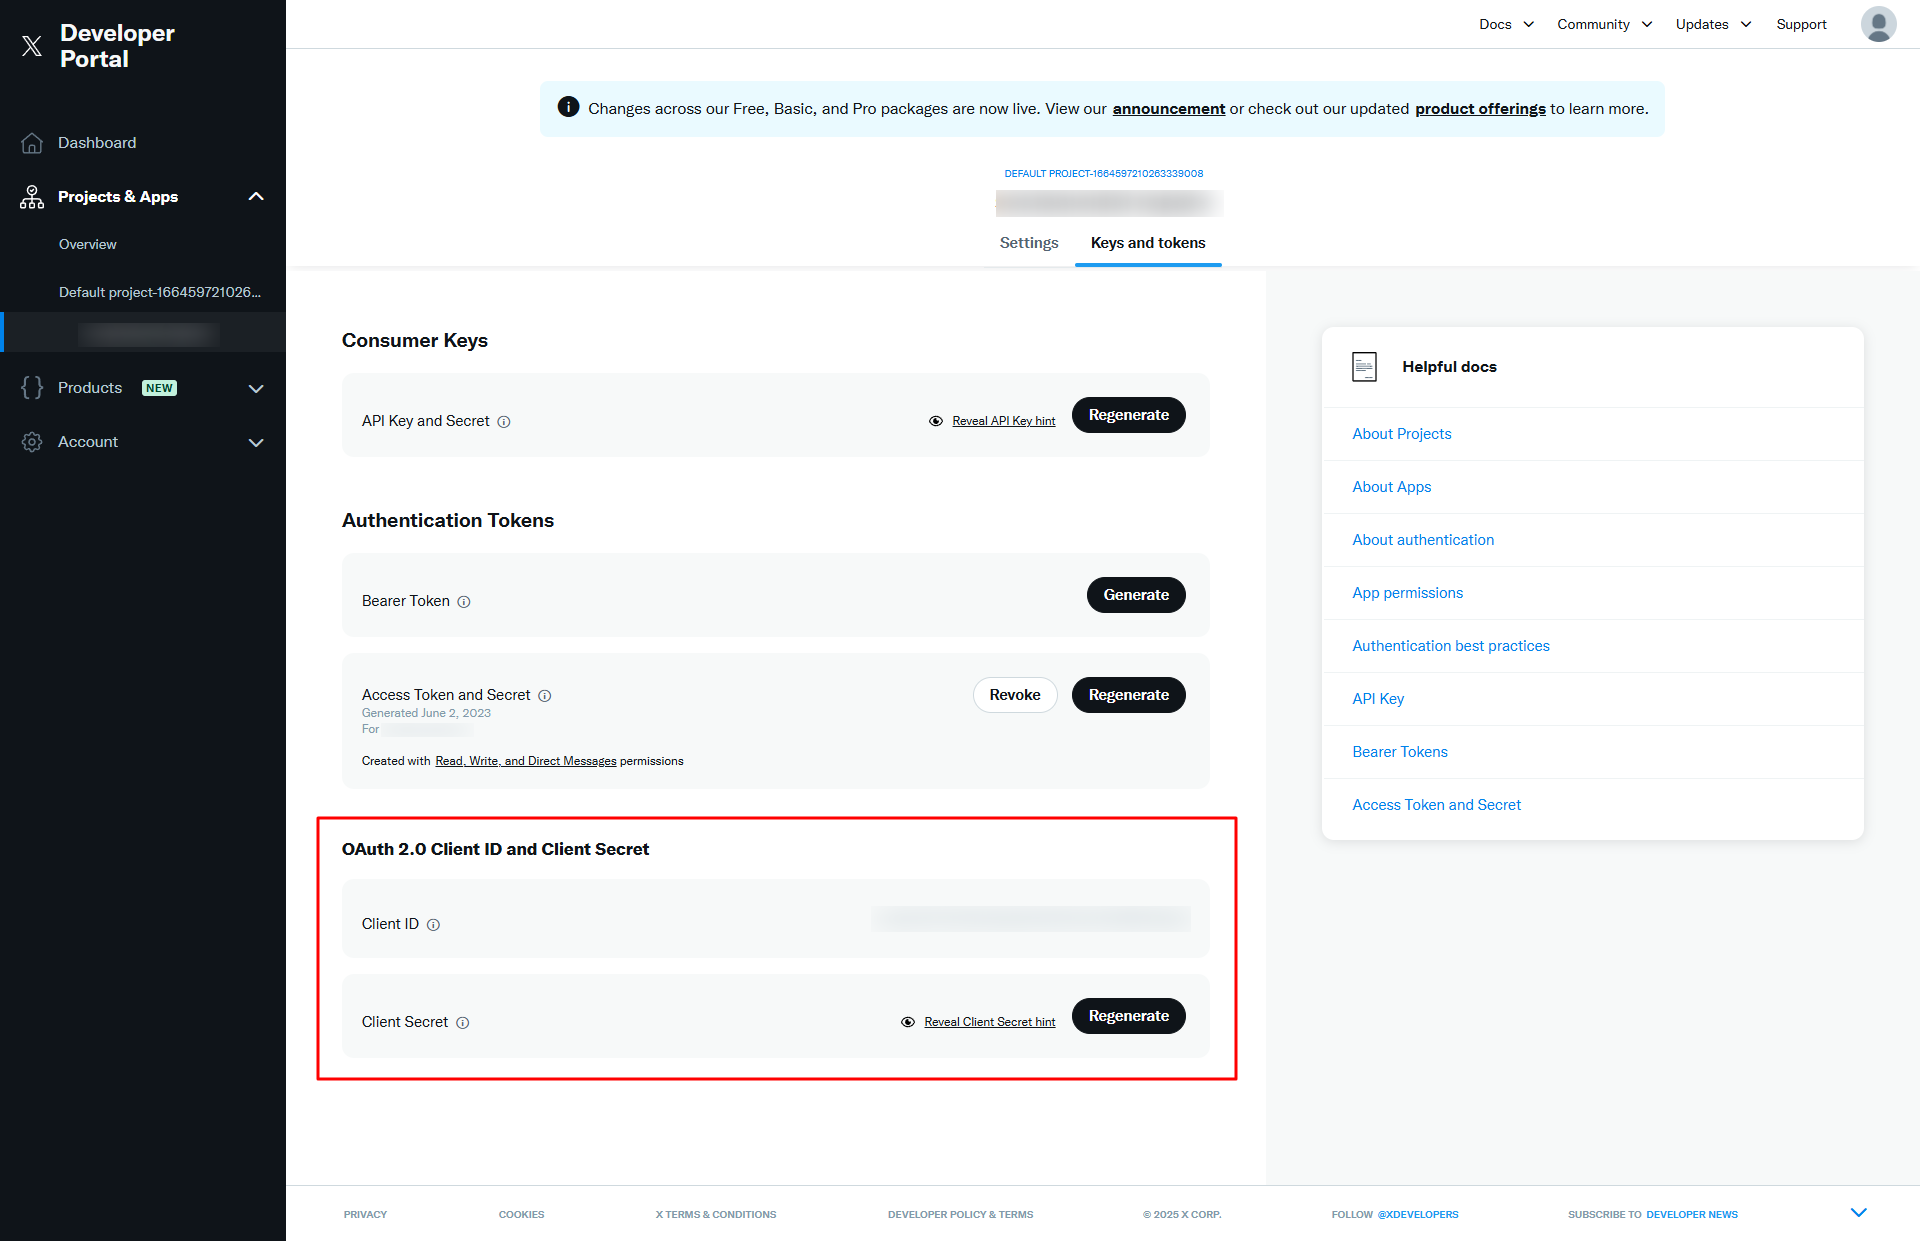
- You can also get the credentials from
Dashboad⇾Projects & App⇾Overview⇾App Settings⇾Keys & Tokens.
Connecting the X (formerly Twitter) Application at ARMember
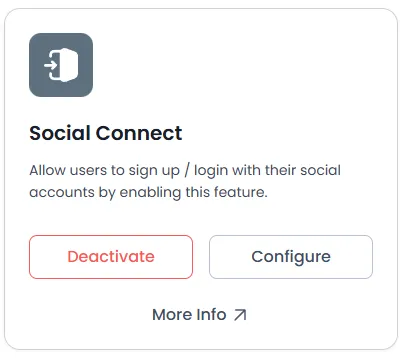
- Navigate to the
ARMember⇾Addonspage. - Here activate the addon Social Connect.
- Move further to the Social Connect Tab, it will be displayed at
ARMember⇾General Settings⇾Social Connect. - Here locate the Twitter section and add the credentials which you have obtained from above.
- Click Save button once you have added the credentials at the Social Connect page.

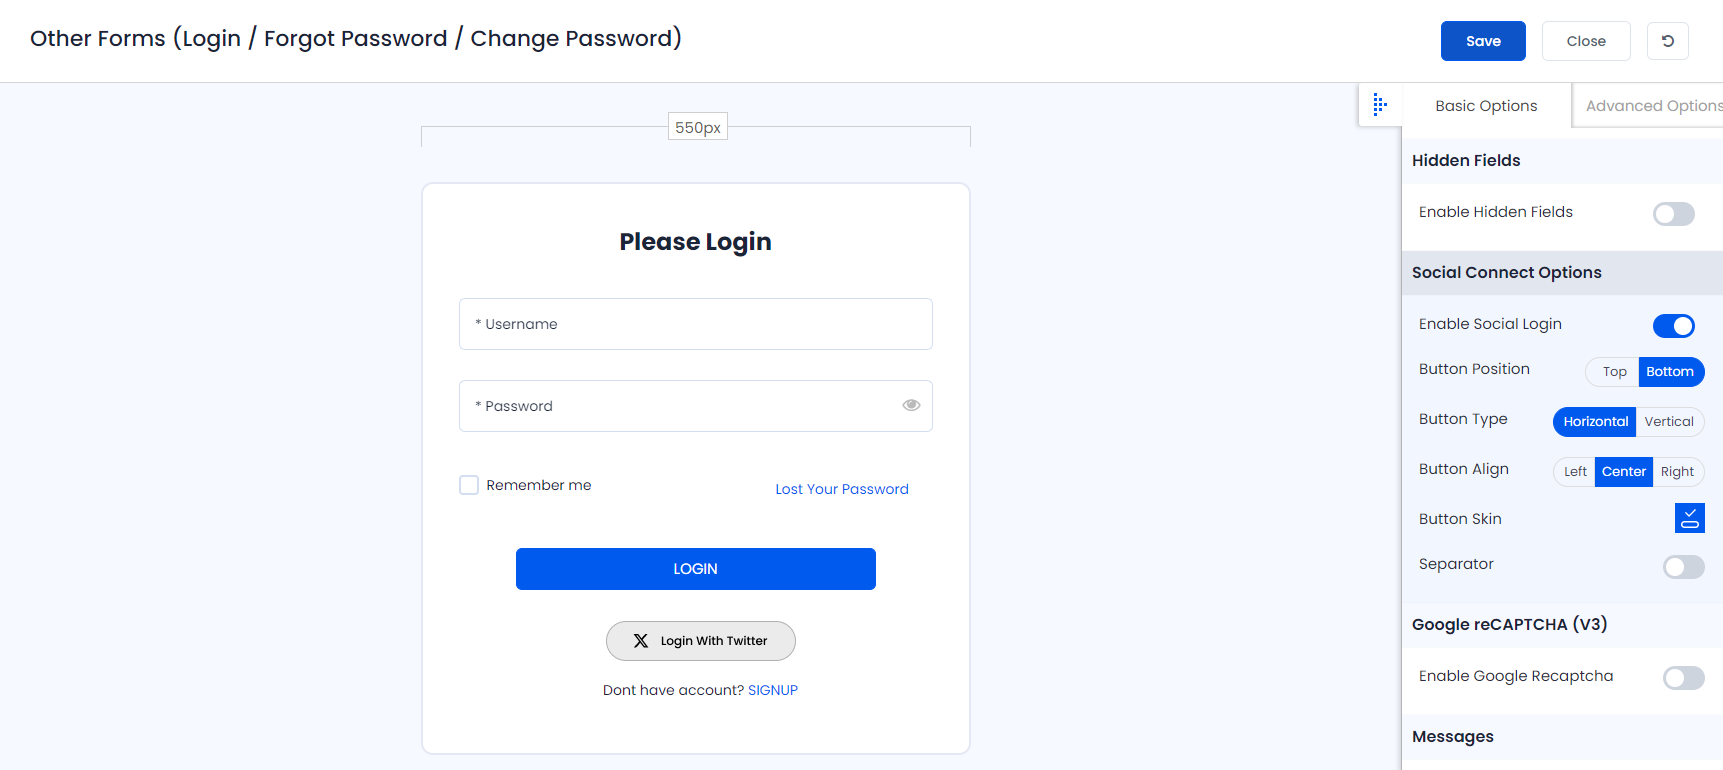
To add Login with Twitter button at Forms and Pages:
- Edit your login form set.
- You will find a section Social Connect Options in right panel under Basic Options.

- From here, you need to Enable Social Login switch to add social connect button with Login Form.
- You will see a Button Skin option in the above image. Click there to add more social connect buttons eventually.
- You will also be able to upload your custom image for displaying Login with Twitter.
- Save Form
However if you are willing to set the Login with Twitter button to display on any page then you can add the shortcode provided below.
[arm_social_login network="twitter"]