

How to Build a Website with a Free WordPress Membership Plugin

Published in How To
February 25, 2019
5 min read

If you are on a tight budget and looking to build a membership website on WordPress, you are in the right place!
We’ve created this step-by-step tutorial of how to start a website with the ARMember free WordPress membership plugin. It’s a free version of the popular ARMember membership and content restriction WordPress plugin.
Before we move on, you’re probably wondering: is it actually possible to build a fully-functional membership WordPress website using a free plugin? The short answer is yes.
A more complete response would be: it directly depends on what functionality you need to use. A free plugin by no means implies it’s worse; it just doesn’t provide the all-inclusive toolkit and priority support like its premium counterpart. So…
If you need to build a simple self-serve online club, an online course hub, a training area with member-only content, or breathe life into any other creative membership idea, it’s possible within a free ARMember plugin.
In a nutshell, you can create unlimited membership levels, set up free and premium membership plans, enable people to register on your website to get access to the premium content, manage clients from the WordPress dashboard, etc. A free plugin can be a perfect starting point; so when you grow, you can more safely decide whether you need premium features.
Now let’s guide you through the the main steps of setting up a website with ARMember, so you can assess whether it suits your needs right away. We’ll also highlight some differences with the Pro to help you compare them easier.
 If you want to allow users to upgrade or downgrade their membership plan, ARMember free Membership WordPress plugin provides flexible settings:

 A free plugin version allows you to create just one payment cycle (multiple ones are offered with Pro), but it doesn’t create any tangible limitations for your future membership website.
Moreover, in this screen, you can fine-tune your subscription plan by deciding when to start a billing cycle, specify a membership cancellation behavior, and more.
A free plugin version allows you to create just one payment cycle (multiple ones are offered with Pro), but it doesn’t create any tangible limitations for your future membership website.
Moreover, in this screen, you can fine-tune your subscription plan by deciding when to start a billing cycle, specify a membership cancellation behavior, and more.
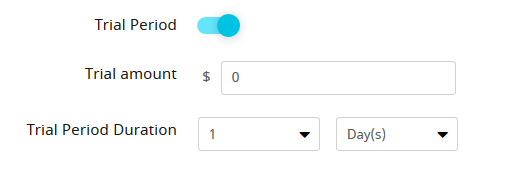
 You can even turn on a free or paid trial period for this plan!
 More payment gateways are available by default in a Pro plugin (Stripe, 2Checkout, Authorize.net). Moreover, if you only need a specific gateway, it can be implemented with a paid add-on.
 It’s just a bird’s-eye view; you can go much deeper into custom settings if you give it a try.
 Once it’s done, a shortcode will be generated – so you can easily add it to the website page (there are also Gutenberg blocks for the ARMember plugin allowing you to safely use it with the new block-based editor).
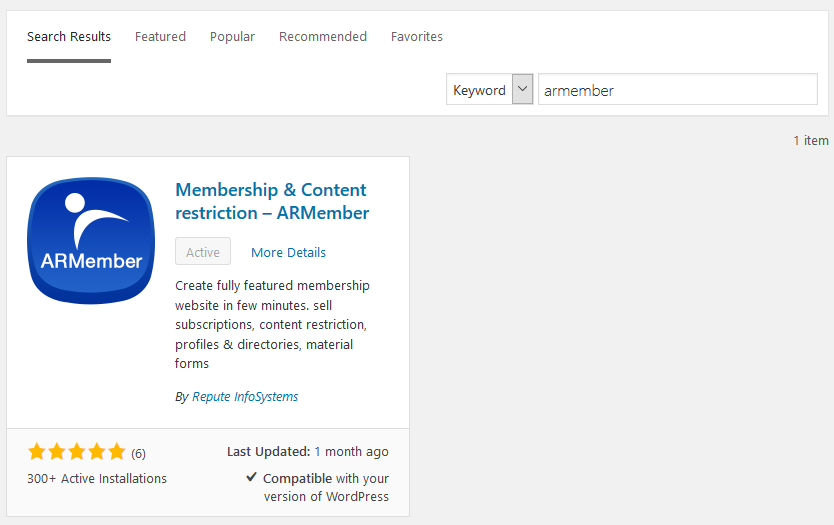
Step 1. WordPress Membership website installation and setup
Install ARMember Lite right from your WordPress dashboard via Plugins > add new.
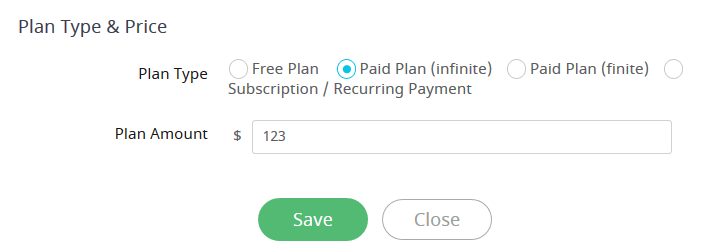
Step 2. Create Membership plans
You can create unlimited plans based on different offerings and pricing: go to ARMember Lite > Manage plans. For example, you can opt for a standard scheme with a free plan and a couple of premium ones. There are several plan types you can set up:- Free plan
- Paid plan (lifetime access)
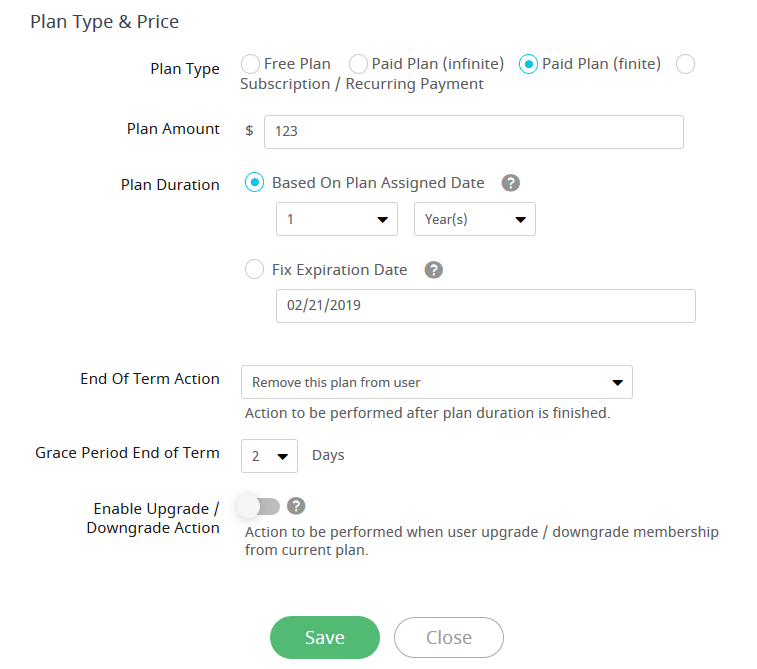
- Paid plan (custom membership duration)
If you want to allow users to upgrade or downgrade their membership plan, ARMember free Membership WordPress plugin provides flexible settings:
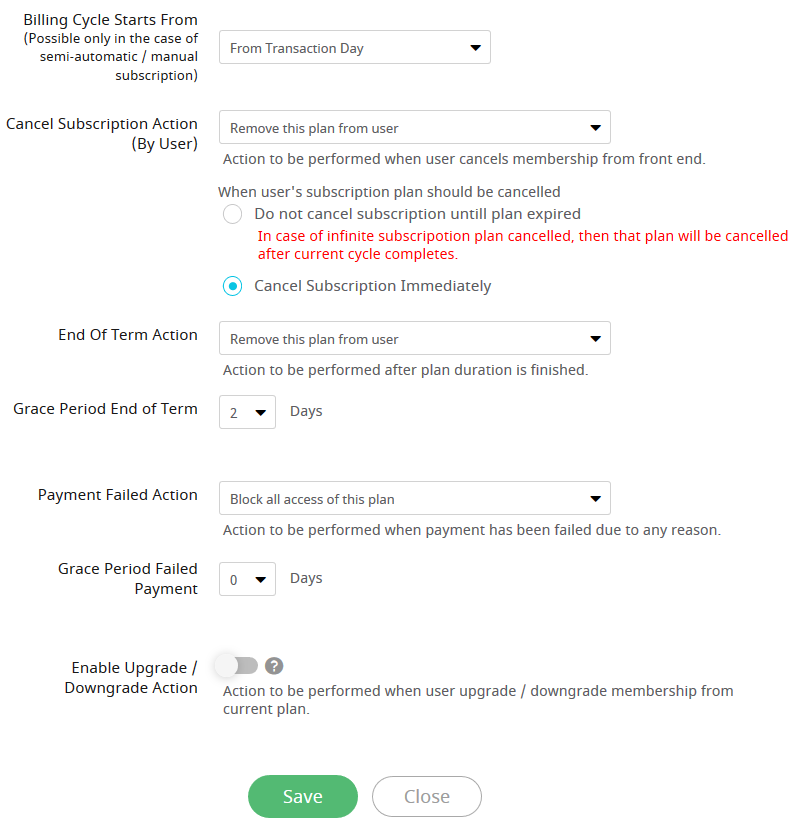
- Subscription (recurring payment)
A free plugin version allows you to create just one payment cycle (multiple ones are offered with Pro), but it doesn’t create any tangible limitations for your future membership website.
Moreover, in this screen, you can fine-tune your subscription plan by deciding when to start a billing cycle, specify a membership cancellation behavior, and more.
You can even turn on a free or paid trial period for this plan!
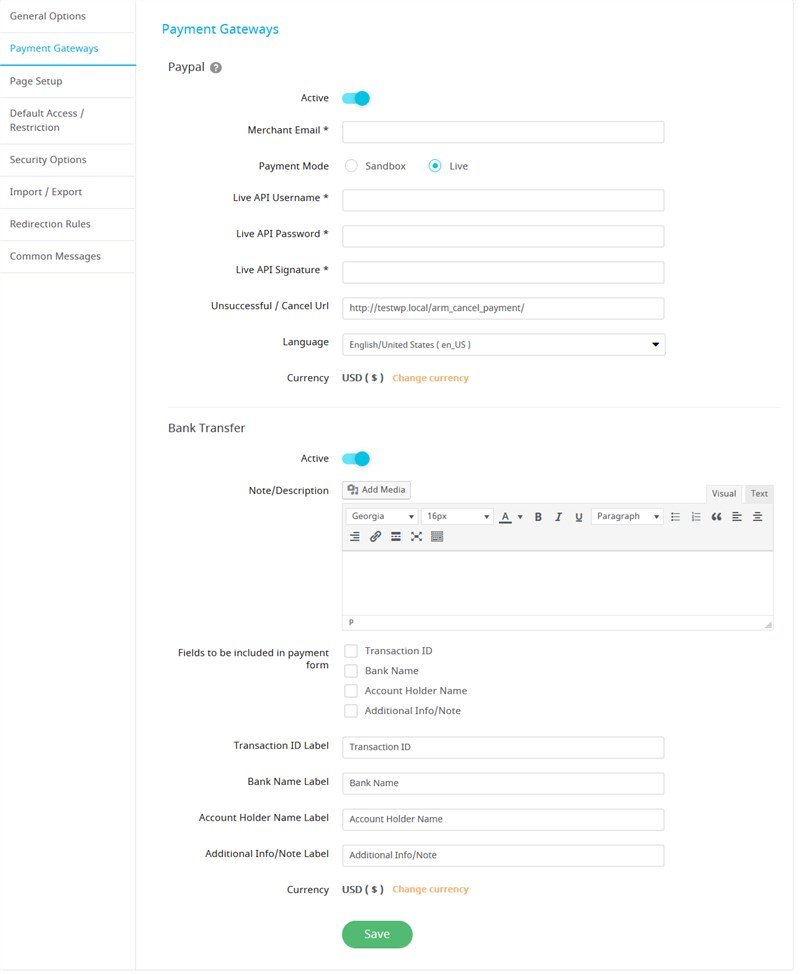
Step 3. Configure payment gateways for paid membership plans
With a free plugin, you can collect payments via PayPal (members of your online club pay online through your website) or bank transfer. To turn on any and connect them with your real accounts, go to General Settings > Payment Gateways. Any currency can be used.
More payment gateways are available by default in a Pro plugin (Stripe, 2Checkout, Authorize.net). Moreover, if you only need a specific gateway, it can be implemented with a paid add-on.
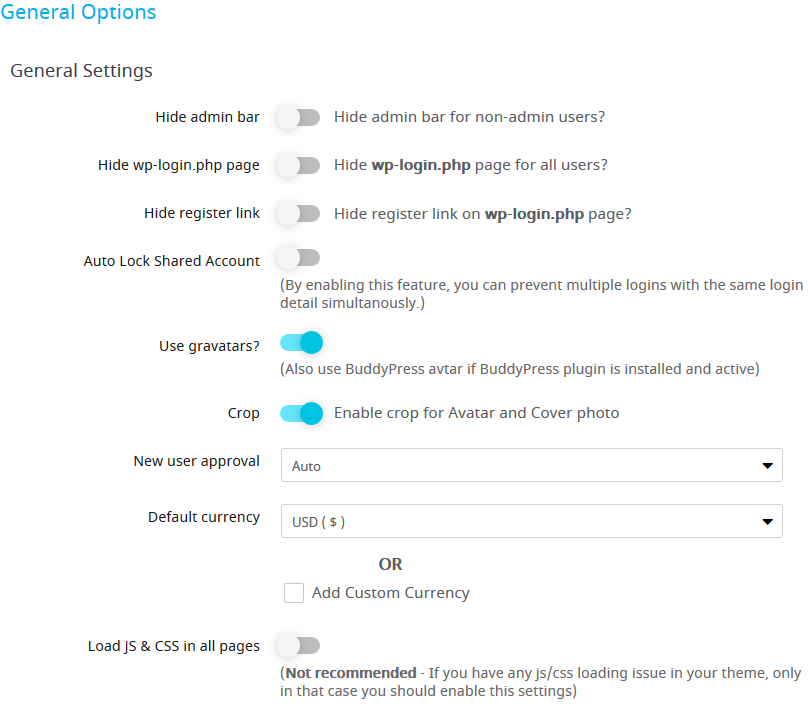
Step 4. Configure general settings
In the General settings menu, you can find more essential options that you need to set up to run your WordPress membership website the way you want:- Configure login pages settings (you may set up the system to prevent logins with the shared account details at the same time).
- Enable gravatars.
- Select a new user registration confirmation mode (auto, by user via email, by admin manually).
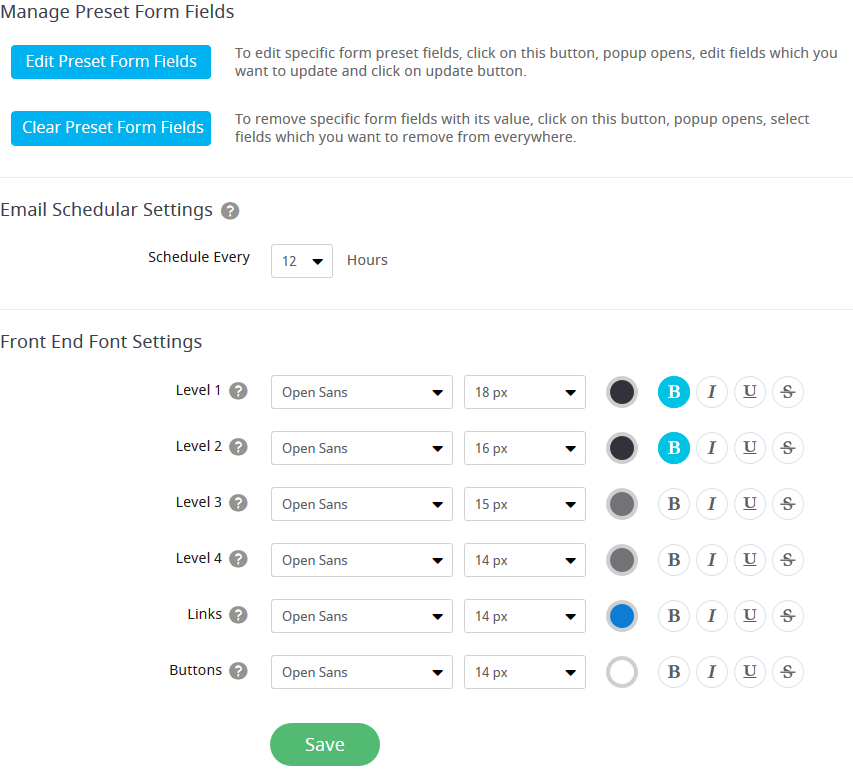
- Go through email settings to automate email notifications.
- Set up fonts, colors, fields for the registration forms.
- Add system pages via Page Setup menu.
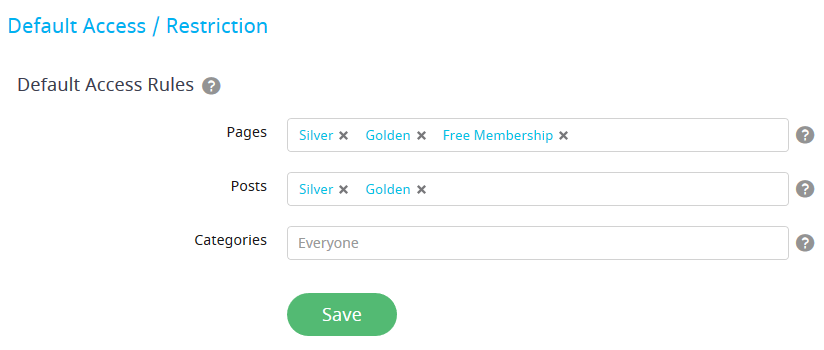
- Set up default plans access and restrictions.
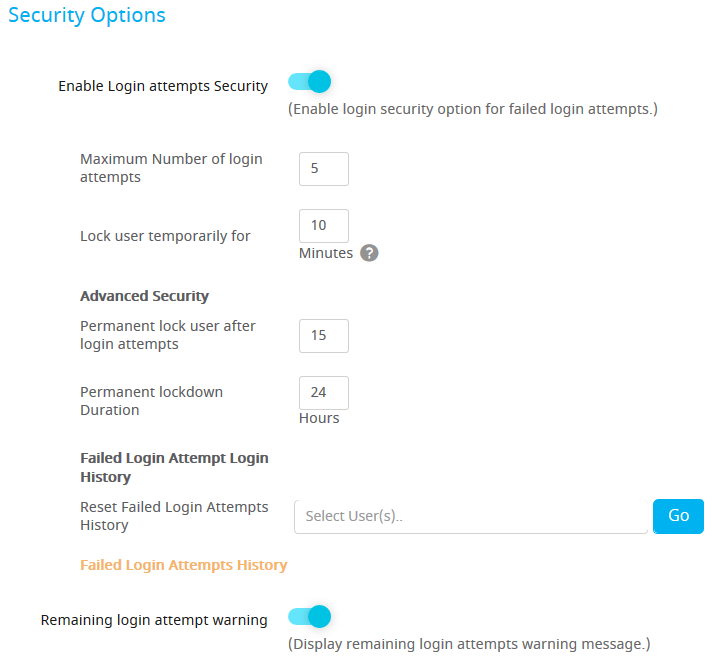
- Designate advanced security options.
It’s just a bird’s-eye view; you can go much deeper into custom settings if you give it a try.
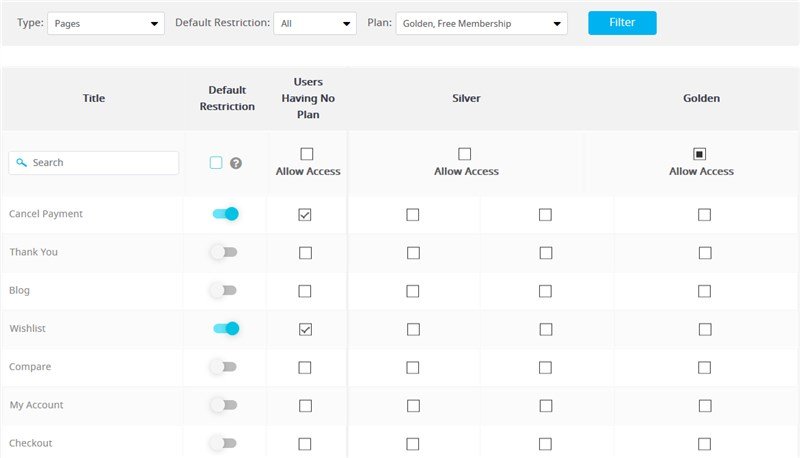
Step 5. Add custom access rules
You can either quickly go with default rules or selectively allow access to specific pages and posts for different membership plans.
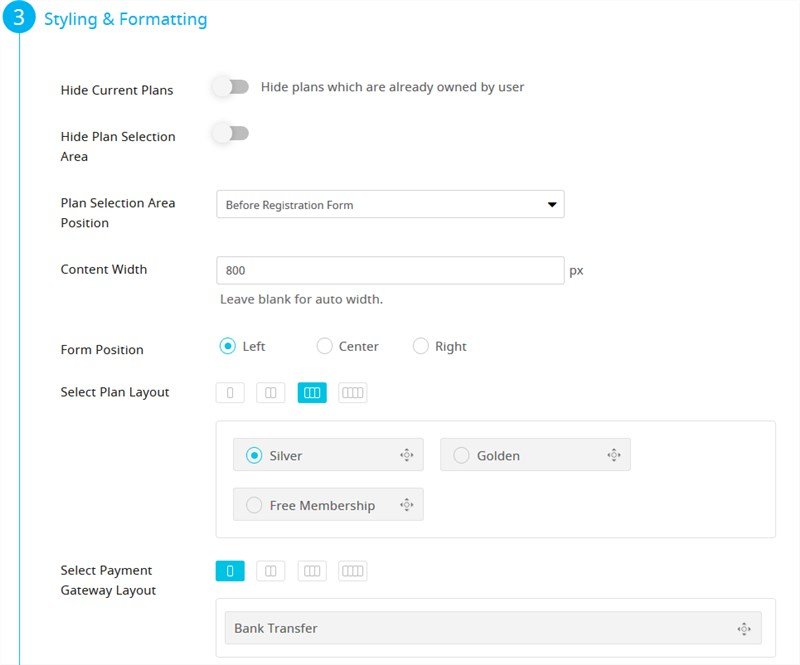
Step 6. Create a member registration form
There is a very handy step-by-step wizard that will let you create a needed behavior and look for your membership registration page in clicks. Navigate to Configure plan + Sign up page to build the page. Here you can basically choose which plans to show, turn on payment gateways, adjust styles and layouts for the form.
Once it’s done, a shortcode will be generated – so you can easily add it to the website page (there are also Gutenberg blocks for the ARMember plugin allowing you to safely use it with the new block-based editor).
Step 6. Enable extra module
To power up your WordPress membership website, you can optionally enable a free extra module, such as “Social features” to integrate social profile fields and more. If you need to utilize more tools, such as time-based ‘Content dripping”, “Opt-ins” for connecting email marketing tools, “Coupons” and some others, note that they are available only in a Pro plugin version.Final note
As you see, this is just a brief guide to features and setup of the ARMember Lite free WordPress plugin for membership websites. There is much more to it, both free and pro versions. Overall, we are pretty sure that you can create a functional online membership club on WordPress, even using only essentials of a free plugin. Or, it can be a great starting point for your future membership business!Share Article:


Brian Denim


Leave a Reply
You must be logged in to post a comment.