Social Features Integration for Building a Successful Membership Website
Published in Membership Tutorial
December 9, 2020
10 min read

Nowadays, it is no big secret that most companies and brands use social media to enhance their audience reach.
With an increasing number of social media use like Facebook, Twitter, LinkedIn, and other popular social networks, they are mostly used to get more exposure to a broader audience reach.
Having said that, when it comes to the membership website, there are vast benefits that social media can deliver for a membership website.
So, if you want to build an advanced level membership website for WordPress and want to have social connections and social feature integration, that is what we are going to explain to you here in this article.
Getting access to such features would require a great WordPress membership plugin!
Our takes are going to be on the ARMember WordPress membership plugin.
Just stay tuned!
We will discuss the things you need to know for having these amazing features of Social Connect, Social Community, and Social features for your WordPress membership website!
But first, we will make you understand the need for social media integration that can help you build a social community.
What are the Reasons for Utilizing Social Community, Social Connect, and Social Features for a Membership Website?
One of the most crucial things that a social community feature can help you with for your membership website is that it allows your members to communicate and keep engaged with the people on your membership website.
Just as the social community feature helps to get maximize the member engagement, so does the social feature, and Social Connect integration can help you to improve your membership website management.
Better yet, here is what your membership website can gain with the above mentioned social community and social feature integration:
- Easily increase the traffic with the higher members reach in a short time
- Members can easily share their post content, like a post, add comments, and more.
- Get the increased number of members and their engagement level
- Allows your members to get logged in to your membership website with their social networks.
- Members can follow or unfollow each other.
- The facility for community members to private messaging where your members can communicate only to the members who are in their friend connection
- Allowing the users to write the post articles, set featured image, add comments on a post, and make it public just to the users within the community.
- Allows users to give reviews on other user profiles by enabling the “allow review toggle” button option from the community settings option. Even you can set the reviews approved only from the admin option and modify the previously submitted reviews by the users.
- Facility to get the member’s posts to make it visible in the news feed of the other members.
- Allows community members to send emojis while communicating to help them with better communication.
- First and foremost, the first thing you need to do is to navigate to the ARMember> Add-Ons and activate the Social Connect option.
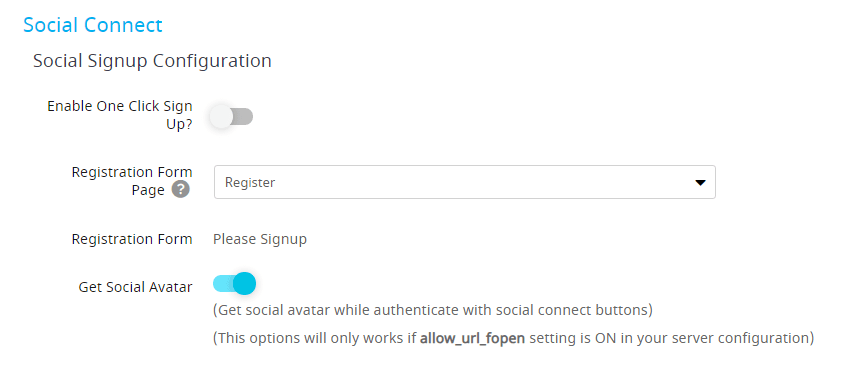
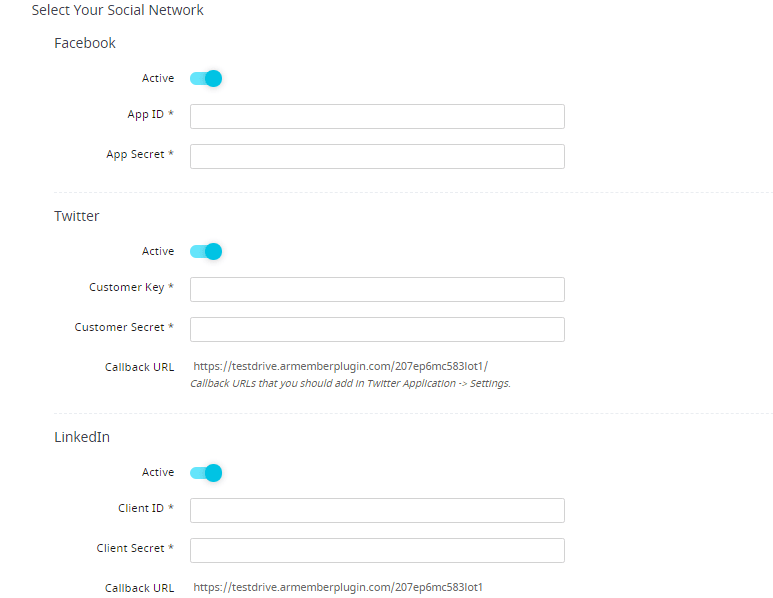
- As soon as you activate the Social Connect option, then you would require to go to ARMember > General Settings > Social Connect tab. You will see social signup configuration that will let you select your desired registration form where you want to display the social login option with your favorite social networks.
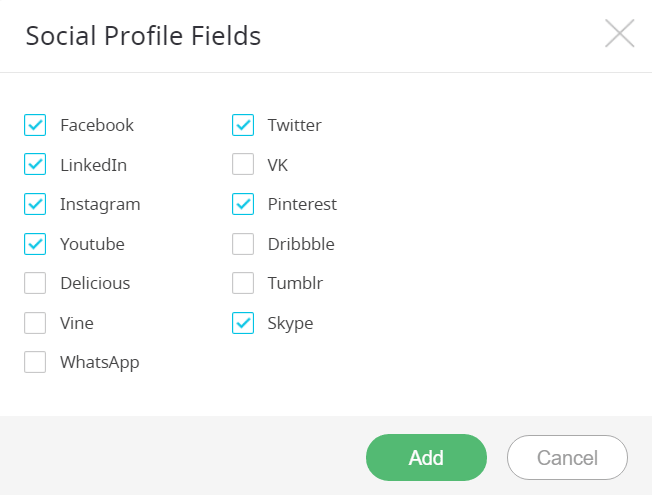
- Next, you can easily select from the popular social networks like Facebook, Twitter, LinkedIn, VK, Instagram, and Google Account by entering their App ID and App Secret key for each one of them.
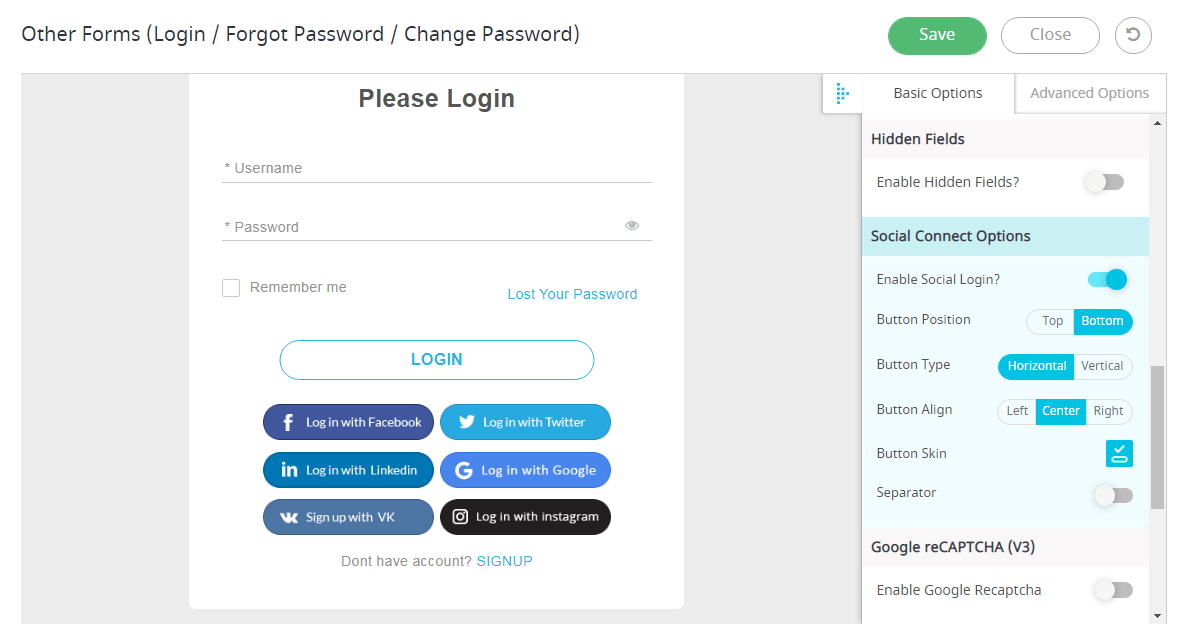
- After you put the App ID for the social networks and Save it, then you need to go to the ARMember> Manage Forms and click on the edit form by hovering the Login Form.
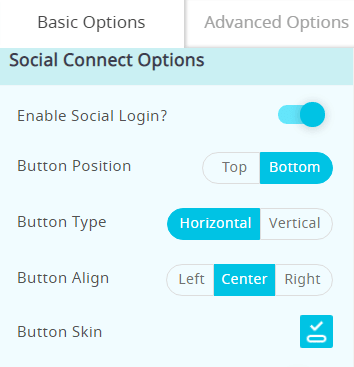
- Next, Next, you will be able to see the Login Form screen where you need to first click on the toggle button “Enable Social Login”. Clicking on it will show you different Social Connect options like changing social button position, button type, button alignment, and Button Skin.
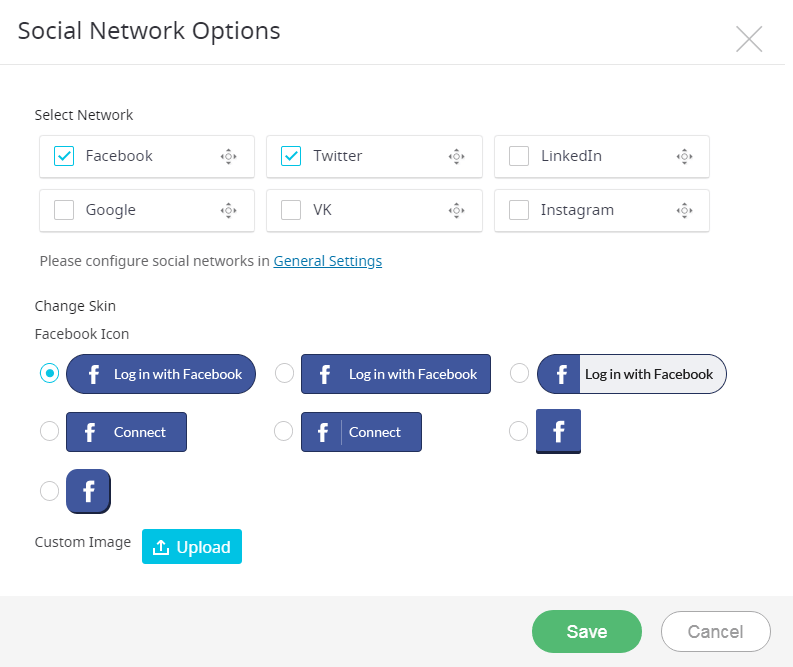
- Clicking on the Button Skin option will show you the new popup screen that will let you select your desired social network skin, icon, or you can even upload the custom image on your selected social network. Once you finish that, you need to make sure to click on the Save button on the social network option popup screen.
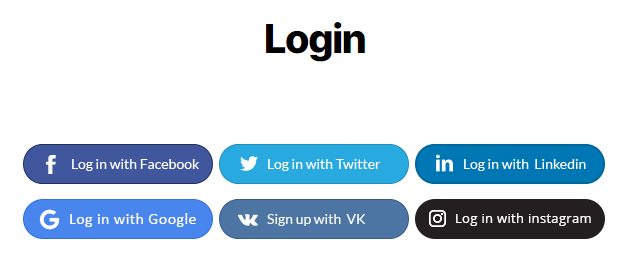
- Finally, you need to click on the Save button from your selected Login Form screen. Then, you will be able to see the registration/signup form with the social login option that allows your membership website members to directly login by clicking on the social media of their choice!





Leave a Reply
You must be logged in to post a comment.