

WordPress Tutorial: What to Do After Installing WordPress

A WordPress tutorial on what to do after installing WordPress is your first step in the content creation journey online. However, you can’t just start creating content. For that, you will have to get your WordPress site ready to rock and follow this guide on WordPress for beginners.
Now this WordPress 101 guide is the perfect WordPress tutorial for beginners. From WordPress download to securing your site to optimizing it, following these steps would get your site completely ready for visitors. Are you ready to convert your newly installed WordPress into a fully functioning site?
Step-by-Step WordPress Tutorial for Beginners
Step-1 Initial WordPress Setup after WordPress Download
There are some very basic website details that you must update.
- Update Permalink: Once you download WordPress, it gives a default URL structure like yoursite.com/?p=123. As per your requirement, you must change your URL structure to be more reader and SEO friendly. For instance yoursite.com/about-us or yoursite.com/blog-post-title
Go to Settings > Permalinks and select Post Name. Save changes.
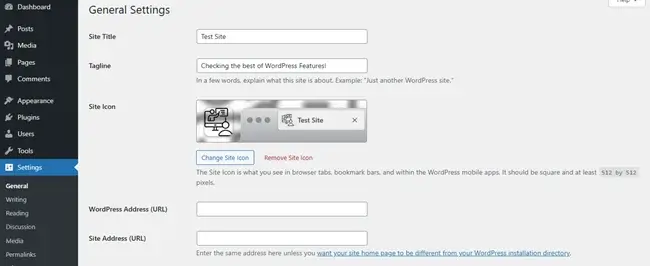
- Set Site Title, Tagline, and Time zone: In any WordPress guide, this is the most basic thing you’ll be instructed to do. Setting WordPress site title, tagline, and time zone gives a personalization and identity to your online business. Go to Settings > General and update the Site Title, Tagline, and Time zone as per your website niche.
- Delete Default Content: Now, it’s time for a fresh start. Delete all the default content like sample post, page, and comments. Clean up your site after you install WordPress locally.
In this step of WordPress tutorial, all you have to do is visit Posts and Pages from the Dashboard and delete it.
Step-2 Install a Theme on Your WordPress Site
When you look for How to Create Website on WordPress, you will be instructed to choose a theme. A WordPress website theme is the backbone of your website’s appearance. Based on your requirement to create a food blog, a travel blog, a membership website, or an appointment booking system, you need to pick a theme. Make sure it has all the features you need and a possibility to scale up as per your vision.
- Free Themes: Free WordPress install theme are a perfect collection for beginners who want to start without additional costs.
- Examples: Astra, Neve, or Twenty Twenty-Four.
- Available directly in your WordPress dashboard under Appearance > Themes > Add New.
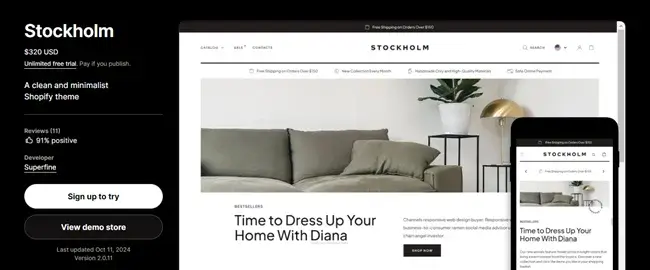
- Premium Themes: There are multiple WordPress themes available in the market. These are niche-specific, highly scalable, and provide good support. If you have the budget, opt for Premium Themes.
To upload a Premium Theme on WordPress, go to Appearance > Themes > Add New > Upload Theme. Select your purchased theme’s ZIP file, Install and Activate.
Step-3 Add Plugins to Set Up WordPress Basics
WordPress Plugins are the best part about using this powerful CMS. These are little apps for your Website to extend its functionality. WordPress plugin download helps you add powerful features to your site without any coding knowledge.This step of our extensive WordPress tutorial guides you to set up and select necessary Plugins for a smooth functioning website.
Must-Have Plugins After Downloading WordPress
- Security Plugins: To keep your site secure from hackers, spammers, and malware.
- SEO Plugins: Helps your website achieve good results and visibility on search engines.
- Performance Plugins: Helpful to reduce page load times, optimize web performance, and keep it running smoothly.
- Backup Plugins: Backup Plugins help keep your data safe in case of any site crash or attacks.
- Membership Plugin: Plugins like ARMember help monetize your content by creating multiple membership plans or members-only areas. You can set recurring payments, content access rules, coupon management, and so much more.
- Image Optimization Plugins: If your blog uses high quality Plugins, you might need to implement techniques like lazy loading, WebP conversion, or lossless image compression. This can be enabled using Image Optimization Plugins.
Installing Plugins
WordPress is a house of multiple Plugins and installing them is a crucial part of WordPress tutorial. With our steps on WordPress install Plugin, it’s pretty easy!
- Go to Plugins > Add New in your dashboard.
- Search for the plugin name.
- Click Install Now and then Activate.
Pro Tip: Use only the necessary Plugins. Multiple Plugins can result in Plugin bloat and can potentially affect your site speed. Thus, it is beneficial to use well-optimized Plugins only.
Step-4 WordPress Tutorial for Security Measures
Taking care of site security is simply WordPress Basics. A secure site ensures data protection and overall reputation of the business. Let’s look at the steps.

Set Up Two-Factor Authentication (2FA): You can’t allow anyone and everyone to login. Set an extra security layer so that your site is foolproof and safe from hackers. ARMember Plugin comes with multiple in-built security features like two factor authentication, invisible spam protection, reCAPTCHA, and brute-force login protection.
Disable Directory Browsing: Protect your site’s directory files from any unauthorized access. These files contain important data, including user information, and should be handled securely.
Change the Default Login URL: Default Login URL of WordPress is commonly known and targeted by attackers. You can change it from your settings.
Install a Security Plugin: Security Plugin is the topmost solution to get all of this handled by a dedicated tool. They monitor your site continuously and block suspicious activity.
Enable Automatic Updates: Keeping your themes and WordPress version up to date enhances security and protects your site from vulnerabilities. Thus, go to Dashboard > Updates and turn on automatic updates for Themes, Plugins, and WordPress Core.
Once you install WordPress, before thinking about how to use WordPress, check these security steps of the WordPress Tutorial. This keeps our site, data, and all the hard work safe.
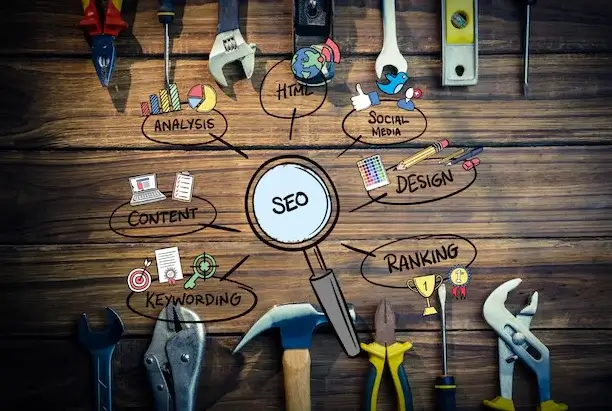
Step-5 SEO Optimization for Your WordPress
You have hopped on the Web to be visible, right? Now, SEO is the key to rank your WordPress site higher. If generating traffic and being on top of SERP is your target, then this is a crucial step in our WordPress tutorial.
Install an SEO Plugin:
An SEO Plugin simplifies task optimization and provides clear suggestions. Checkout tools like Yoast SEO and Rank Math for optimizing your WordPress site. You can even follow our SEO Audit checklist.
Create an XML Sitemap:
An XML sitemap is your site’s structure. How are the pages aligned or interlinked with each other? It’s kind of a roadmap or a flowchart that you need to submit to Google Search Console to get indexed.
Optimize Permalinks and Metadata:
Your URLs should be clean and descriptive. For example, yoursite.com/5-steps-to-seo-success is better than yoursite.com/?p=456.
Metadata:
Add optimized titles and meta descriptions for each page and post you create. An SEO Plugin makes this task as easy as writing in a Word Doc.
Optimize Images:
Compress your images so that your site loads quickly. Image optimization plays a major role in site speed optimization and overall performance of your website. TinyPNG, WebP convertor, or Smush helps you in this process.
Even if you are looking for How to create a WordPress site for beginners, SEO is an important part. Following SEO basics makes your site and business more visible to the target audience.
Step-6 Design and Customization for WordPress
This WordPress tutorial takes into account all the necessary aspects from backend to frontend. Now, it’s time to beautify your frontend.
-
Customize the Homepage
Your homepage is the first thing a visitor sees. Thus, it must be perfect.
Set a Static Homepage: Navigate to Settings > Reading and select A Static Page under “Your homepage displays.” You can either choose an existing page or create a new one.
Utilize the Block Editor or Page Builders: The WordPress block editor (Gutenberg) enables you to design sections such as hero banners, feature highlights, or testimonials. Alternatively, you can use drag-and-drop page builders like Elementor or Beaver Builder for greater flexibility.
-
Customize Your Theme
The chosen theme must be aligned to your brand colors. Go to Appearance > Customize to access options like Colors, Typography, Header, and Footer and make the necessary edits.
-
Add a Logo and Favicon
- Go to Appearance > Customize > Site Identity to upload your logo and favicon.
- Here are the recommended dimensions:
- Logo: 250px by 100px (adjust as needed).
- Favicon: 512px by 512px.
-
Create WordPress Site Menus
Menus help in easy navigation for your visitors. Go to Appearance > Menus to add pages, categories, and custom links. Think of a logical structure of a menu and organize accordingly. Set your menu in the header or footer as per requirement.
-
Widgets and Sidebars
You can use widgets for search bars, recent posts, social media feeds, and so much more. These help in putting important information right in the eye of a user.
Go to Appearance > Widgets. Modify the widgets from the sidebar right here for a customized look.
-
Test Your Design
Ensure your design preview is spot on before getting the site live. You can also enhance the device responsiveness via going to Appearance > Customize > Device Preview. Make changes that perfectly suit your needs and site.
Step-7 WordPress Tutorial for Content Creation

Based on the above listed steps, you have a basic idea of what to do after downloading WordPress. Now, it’s time to work your magic and create content. Firstly, build essential website pages like Home Page, About Page, Contact Page, FAQs and then work on blogs.
You can enable the smooth Gutenberg Block Editor or use the drag and drop website builders like Elementor and Beaver Builder. Tick the list of best practices of content creation like shorter paras, grammar check, plagiarism, etc. Add high quality images and keep publishing. You can even use a content calendar to automate your posting schedule.
Step-8 Ongoing Maintenance and Additional Tips
Once you follow the steps of WordPress Tutorial, you are not done. You have just started on the journey of how to start a WordPress website. Here are some tips for ongoing maintenance of your site.
- Regular Updates: Keep your WordPress and overall Plugins up to date to stay safe from malware.
- Site Backup: Set up a daily or weekly backup system using Backup Plugins. This helps in recovering your site whenever needed.
- Site Analysis: Use Google Analytics, Google PageSpeed Insights, or Membership Metrics for membership sites to measure your performance, monitor it, and optimize it.
- Website Errors: Check your site for Broken Links and fix them for a smooth sail across all pages of your site.
- Gather Feedback: Use contact form plugins like ARForms to gather customer feedback. Use the feedback to modify your site as per audience preferences.
- Additional Features: Add features like popups, gamification, community, booking feature, membership plans as per the growth and need of your business.
Are You All Set to Follow the WordPress Tutorial?
If you have gone through all the above given steps, congratulations! You have built, modified, optimized, customized, and secured WordPress site. This WordPress tutorial for beginners helps you in understanding what to do after installing WordPress. These tips will help you create a fully functional website. Once you get a hang of it, you can learn more advanced steps to manage a WordPress site based on your niche.
Read these also:


Leave a Reply
You must be logged in to post a comment.